TransForm Central Home
Description
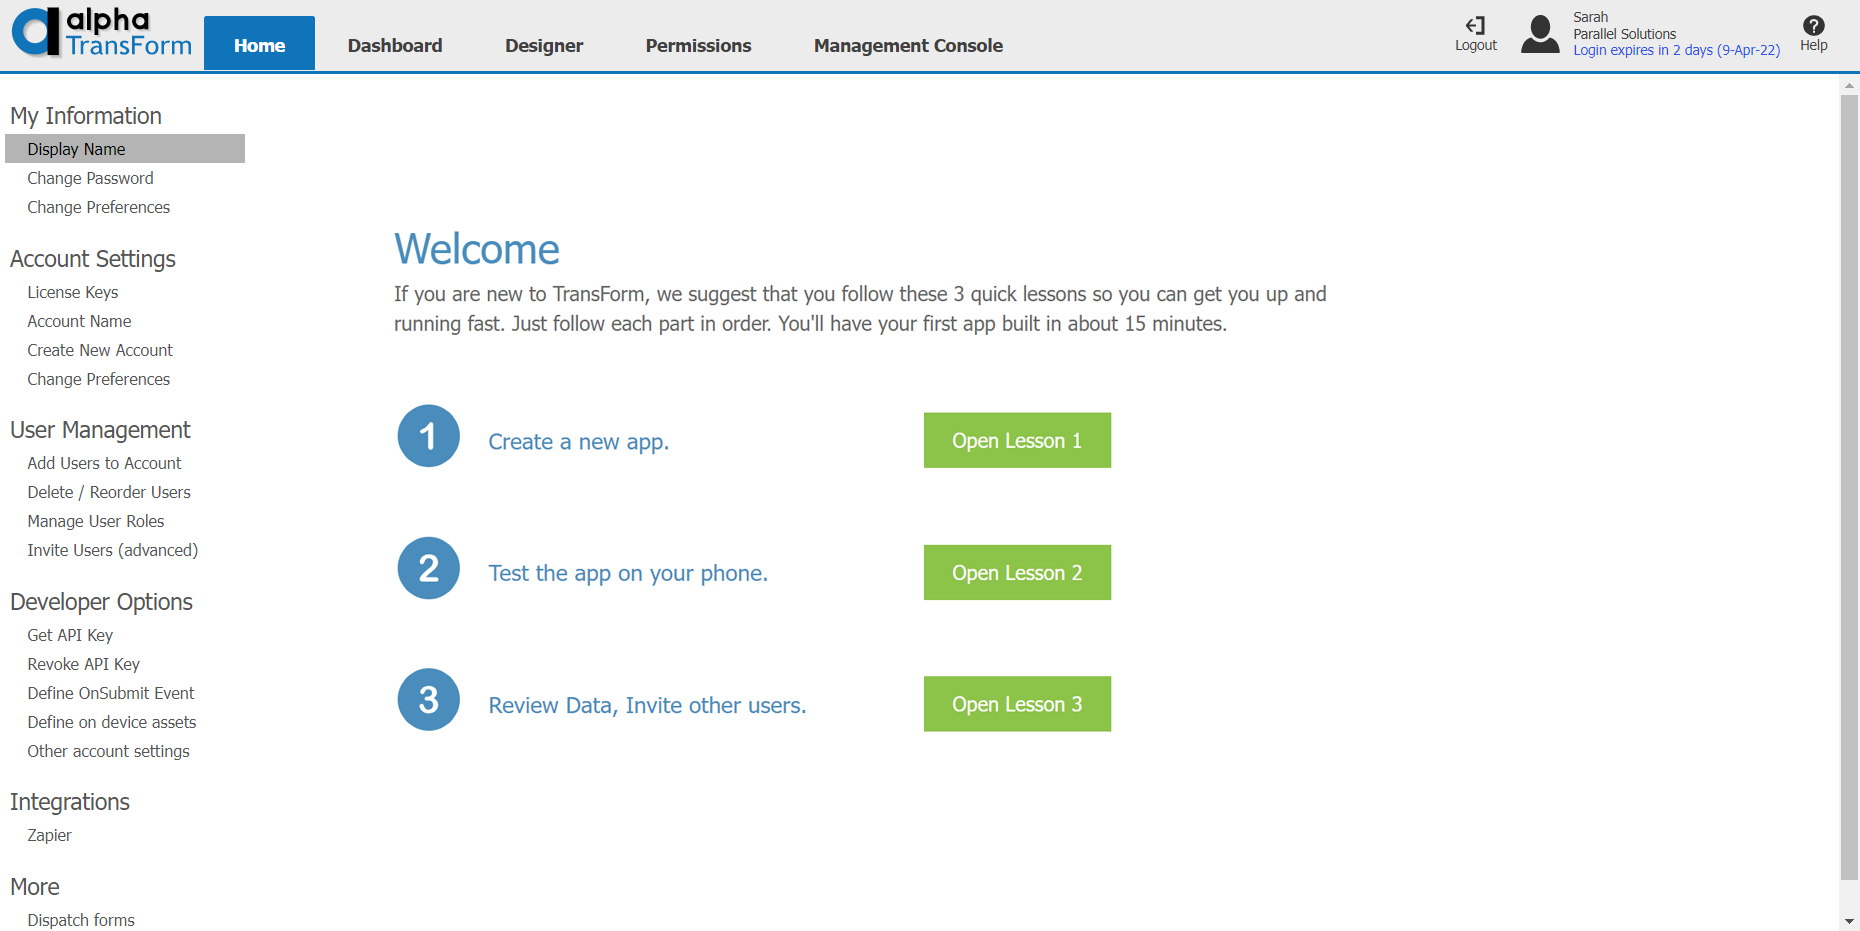
The Home Tab in TransForm Central is where you manage your TransForm account, including inviting and managing users, configuring your password and account, and generating a TransForm API Key.
My Information
Display name
Your display name is shown in the header when you are logged into TransForm Central.

To change your display name, enter the new name in the Display name text box and click OK.

Change Password
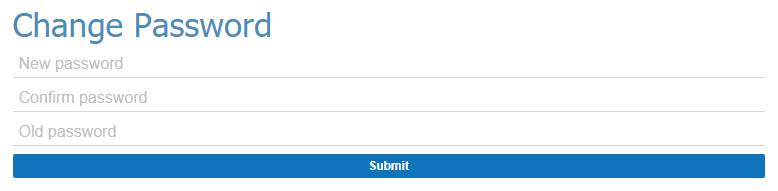
Use the Change Password option to change your TransForm password.
To change your password, enter the new password in the New password and Confirm password text boxes and click Submit.
User Preferences
Users can specify their preferred method of receiving notifications by changing their preferences in TransForm Central.
To configure your User Preferences:
Log into TransForm Central.
On the Home tab, click "Change Preferences" under the My Information section.
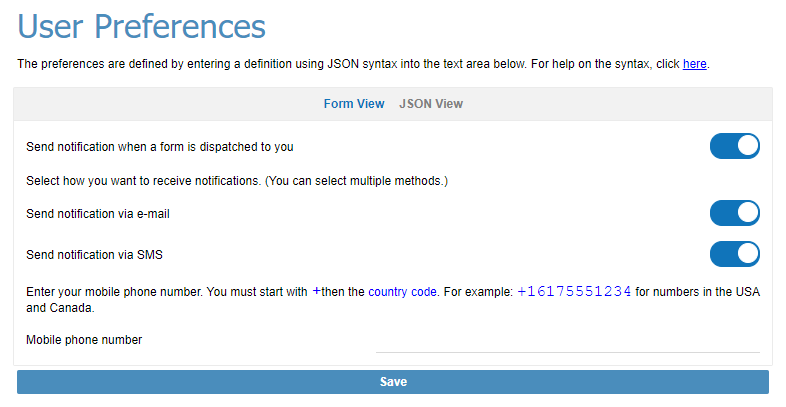
Configure your notification preferences. The options available are described below
- Setting
- Description
- Send notification when a form is dispatched to you
Enable or disable notifications.
- Send notification via e-mail
Enable or disable email notifications. If enabled, your TransForm User Name will be used as the email.
- Send notification via SMS
Enable or disable SMS (text) notifications. If enabled, you also need to specify the phone number where notifications will be sent.
- Mobile phone number
The number to send the SMS message. The number must begin with a + and contain only numbers in the following format. Replace [Country Code] and [Phone_Number] with the country code and phone number for the mobile device:
+[Country Code][Phone Number]
The example below shows how to specify the USA phone number (617) 555-1234:
+16175551234
Account Settings
License keys
License keys is where you enter your TransForm license(s) to activate The number of authorized users for a TransForm account is determined by the license key(s) entered in the License keys box. If no licenses are provided, your account will run in Trial mode until the trial period expires.
Multiple licenses can be entered for a single TransForm account. Licenses are cumulative. This means, if you enter a 5 user license key and a 10 user license key for a single TransForm account, up to 15 users can log in to the account. If you unsure how many users are authorized for you licenses, Show License Information can be used to find out how many users are authorized and when the license expires.
To activate one or more licenses for a TransForm account, specify each license on a separate line and click Save.
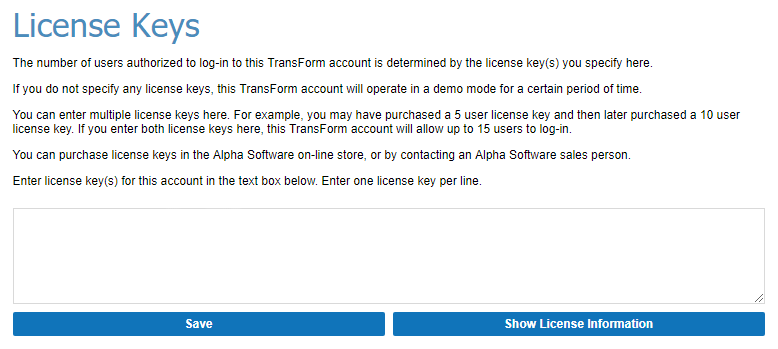
Contact the Alpha Software sales team if you have questions about existing licenses or to purchase additional TransForm license keys.
Account Name
The Account Display Name is the name of your TransForm account. When you are logged into TransForm Central, the Account Display Name is shown in parentheses at the top of the page next to your Display Name.

The Account Display Name is also shown when you log in to TranForm. If you are a member of multiple TransForm accounts, you will be prompted to select the TransForm account you wish to log into after entering your username and password in TransForm Central or the TransForm mobile application.
To change your Account Display Name, enter the new name in the TransForm account display name text box and click OK. Choose an Account Display Name that is easy for you to remember or recognize as your account (for example, the name of your company or simply "Sarah's Account"):

Create New Account
If you do not have a TransForm account or wish to create another one, Create New Account can be used to create another TransForm account associated with your user name.
A TransForm Account is not required to use Alpha TransForm. You must, however, be a member of an existing TransForm account or have your own TransForm account to use Alpha TransForm.
If you are a member of more than one TransForm Account, a list of accounts will be shown when you log in to TransForm Central or the TranForm mobile application. The Account Name is what will be shown in the list.
To create a new TransForm account, enter the "Account name" in the text box provided and click OK.

When you click OK, TransForm Central will create a new account with the specified Account Name and log you into the new account.
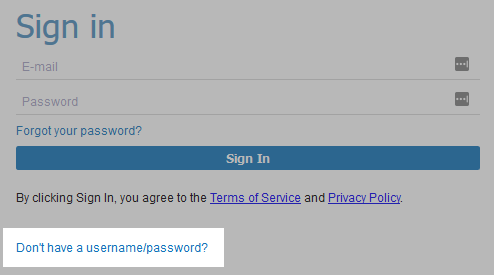
You can also use the Don't have a username/password? link on the TransForm Central login screen to create a new TransForm account.
Account Notifications
Notify your users when a form is dispatched with Notifications. Notifications can be sent via email, text message, or both. A Twilio, SparkPost, or SendGrid account is required in order to send notifications. If you do not have an existing account, you can sign-up for a Trial or purchase an account from the desired service:
- Twilio: https://www.twilio.com
- SparkPost: https://www.sparkpost.com
- SendGrid: https://sendgrid.com
Notifications for a TransForm account are configured in the Account Preferences. To setup Notifications:
Log into TransForm Central.
On the Home tab, click "Change Preferences" in the Account Settings section.
Configure Notifications for your account. Details about each option are described below.
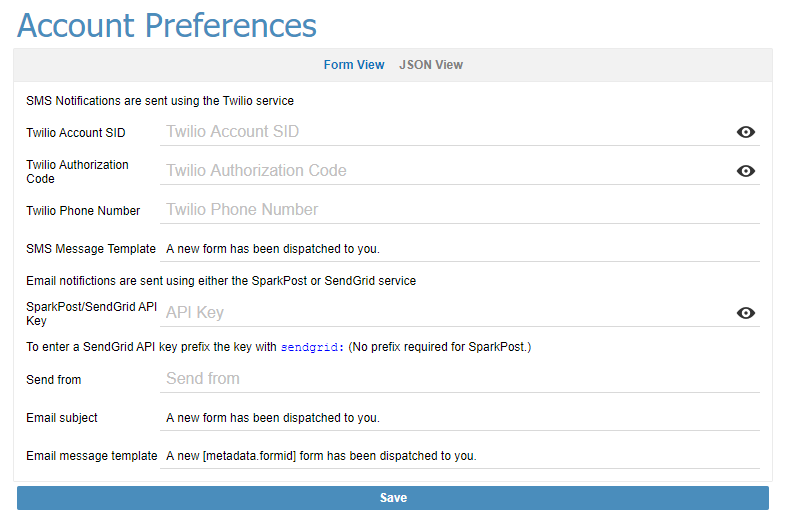
- Setting
- Description
- Twilio Account SID
The Account SID for your Twilio SMS project.
- Twilio Authorization Code
The Auth Token for your Twilio SMS project.
- Twilio Phone Number
The Phone Number for your Twilio SMS project.
- SMS Message Template
The template used to send the SMS message.
- SparkPost/SendGrid API Key
Your SparkPost or SendGrid API key. If you specify an API key from SendGrid, you must prefix the key with "sendgrid:". EG:
sendgrid:SG.Y3G9_NFwQm6IOtzqaKg.pHepuLrTdHdWxW24M02cAJQ5-nkX2nLCXmW4
- Send from
The email address to include in the "From" field.
- Email subject
The email subject.
- Email message template
The template used to send an email notification. The message can use the [metadata.formid] placeholder to include the Form ID in the message.
User Management
Add Users to Account
Users can be added to your TransForm account using Add Users. When added, if a user does not have an existing TransForm account, they will be sent an email invitation inviting them to create a TransForm User Account.
To add a user, enter their email address in the text area. Each email address must be specified on a separate line. Once you have entered the list of users to add, click the Add Users button.
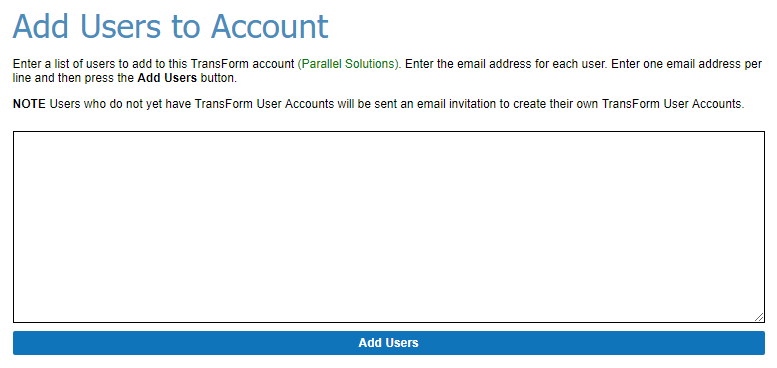
Users who do not yet have TransForm User Accounts will be sent an email invitation to create their own TransForm User Accounts.
Delete / Reorder Users
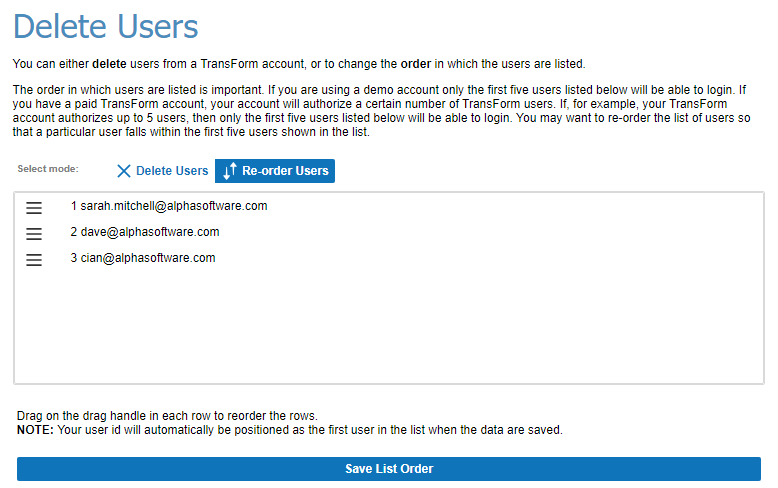
Users can be deleted from your TransForm account using Delete/Reorder Users. To delete a user, set the Select mode to Delete Users. Then, select the user to delete and click the Delete Users button below the user box. Use the Shift or Ctrl keys to select multiple users to delete from the account.
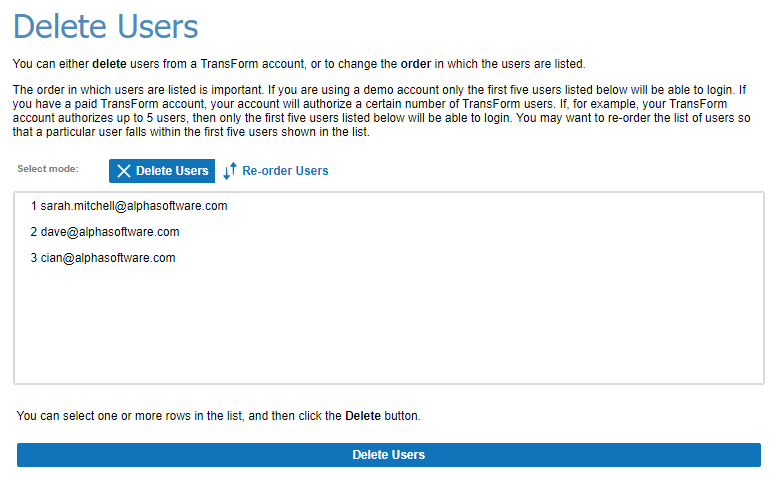
The order in which users are listed in the Delete/Reorder Users text area is important. If you are using a demo account only the first five users listed below will be able to login. If you have a paid TransForm account, your account will authorize a certain number of TransForm users. If, for example, your TransForm account authorizes up to 5 users, then only the first five users listed will be able to login. You may want to re-order the list of users so that a particular user falls within the first five users shown in the list.
To reorder users, set the Select mode to Re-order Users. Then, select the move icon next to the user you wish to move and click-and-drag the user to the new position. When you are satisfied with the order, click the Save List Order button below the list of users to save your changes.
Manage User Roles
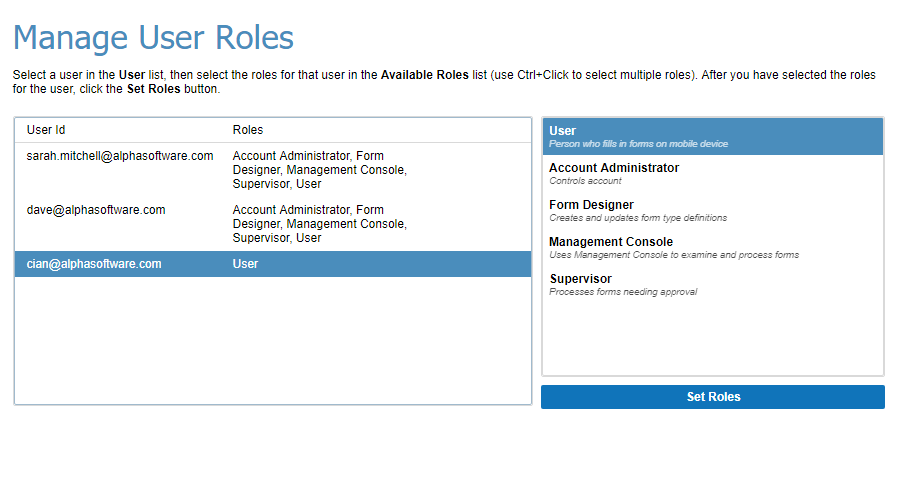
Access to your TransForm account is controlled using Roles. Users can be assigned one or more roles using Manage User Roles. Alpha TransForm includes a set of pre-defined roles, listed below. You can modify roles on the Permissions tab.
- Role
- Description
- User
Person who fills in forms on a mobile device.
- Account Administrator
Controls the TransForm account.
- Form Designer
Creates and updates form type definitions.
- Management Console
Uses Management Console to examine and process forms.
- Supervisor
Processes forms needing approval.
To modify the roles for a user, select a user in the User list, then select the roles for that user in the Available Roles list. Use Ctrl+Click to select multiple roles. After you have selected the roles for the user, click the Set Roles button to save your changes.
Invite Users (advanced)
You can invite other users to join your TransForm account using Invite Users (advanced). Invite users is different from adding users in that an invited users is not added to your account until they have accepted the invitation or if you explicitly set their password and role(s).
Invited users are assigned the "User" role if no role is specified, allowing them to fill in TransForm forms. If an invited user does not yet have a TransForm User Account, they will be able to sign-up for a TransForm User Account. If the invited user already has a TransForm User Account, they will be added as a member of your TransForm Account.

To invite users, enter their email addresses - one per line - in the text box. For example:
[email protected]
[email protected]
Setting the Display Name for Invited Users
When the user accepts the invitation, they will be added to your TransForm account. Their display name will be the email address as it as written in the invite text box.
If desired, you can specify the display name for a user when they are invited. To include the display name, use the following format:
Display name (email address)
For example:
Fred Smith ([email protected])
Molly Richter ([email protected])
Assigning Roles to Invited Users
By default, all users are assigned the "User" role when they accept an invitation to join a TransFrom account. You can optionally specify the user roles to assign a user when they accept the invitation to your TransForm account. Roles are defined as a pipe followed by a comma delimited list of user roles.
|role1,role2,role3
You can define as many roles as you want for a user. The example below assigns roles to 2 users: [email protected] will be assigned the "user" and "FormDesigner" roles while [email protected] will be assigned the "user", "AccountAdmin", and "ManagementConsole" roles. TransForm will assign users the "user" role if no role is specified.
[email protected]|user,FormDesigner
Molly Richter ([email protected])|user,AccountAdmin,ManagementConsole
[email protected]
[email protected]
When you specify a role, you must use the Role ID. Be aware that Role IDs are case-sensitive. If the specified role cannot be found or does not exactly match, Alpha TransForm will default to assigning the user to the "user" role.
The avaiable roles and their corresponding Rold IDs can be found on the Permissions tab in the "Roles" section. Alpha TransForm has the following pre-defined roles. Roles can also be assigned to a user after they have joined your account using Manage User Roles.
- Role ID
- Description
- user
User role - Person who fills in forms on a mobile device.
- AccountAdmin
Account Administrator - controls the TransForm account.
- FormDesigner
Form Designer - creates and updates form type definitions.
- ManagementConsole
Management Console - can access Management Console to examine and process forms.
- supervisor
Supervisor - processes forms needing approval.
Advanced Usage
Users are not added to your account until the accept an invitation and create their own TransForm account. If preferred, you can automatically create TransForm user accounts for users to add to your account.
Display name (email address)|comma delimited roles|noinvite|password
For example:
Molly Richter ([email protected])|user,AccountAdmin,ManagementConsole|noinvite|mrichter
Developer Options
API Keys and events can be created for your TransFrom account using the Developer Options.
Here, you can do the following:
- Get a TransForm API Key
- Revoke a TransForm API Key
- Define an onSubmit Event
- Define On Device Assets
Each of these options is detailed below.
Get API Key
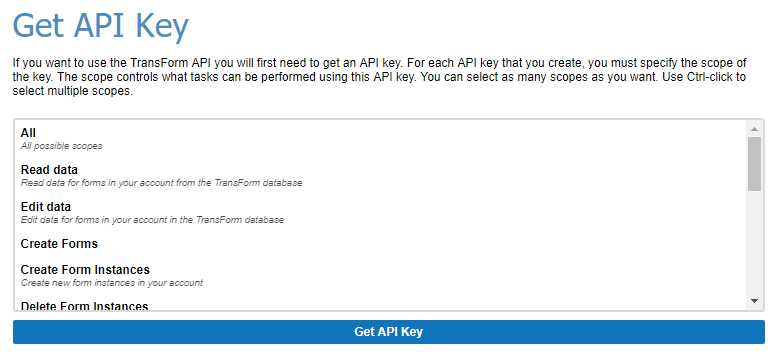
TransForm can be integrated into external applications using the TransForm API. In order to access the TransForm API, an API key is needed. When an API key is created, the scope for the key needs to be defined. The APK Key scope defines what operations are permitted when accessing the TransForm API. Multiple scopes can be defined for an API key by using the select key when choosing the scopes from the list.
The available scopes for a TransForm API key are below.
- Scope
- Description
- All
All possible scopes
- Read data
Read data for forms in your account from the TransForm database
- Edit data
Edit data for forms in your account in the TransForm database
- Create Forms
Create new form types
- Create Form Instances
Create new form from an existing form type in your account
- Delete Form Instances
Delete forms in your account
- Edit Form Instances
Edit data in an existing form in your account
- Edit roles
Edit the roles in your account
- Invite users
Invite users to your account
- Create users
Add users to your account
- Edit Account Membership
Add or remove a user from your account
- Read Account Membership
Read which users are members of your account
- Read User Roles
Read the roles for a user in your account
- Set User Roles
Set roles for a user in your account
- Edit Account Information
Edit your TransForm account information
- Create/Revoke API Key
Create or revoke an API Key
- Edit on Submit event
Create or edit the onSubmit events that fire when a form is submitted
- On-device assets
Define settings for on-device assets
- Bulk updates
Perform bulk operations against the TransForm account
- Fire onSubmit Events
Fire onSubmit events for a form instance
If you are unsure what roles you need for your API Key, visit the TransForm API documentation and check what permissions are required for the API methods you would like to use.
Once you have selected the scope(s) for the TransForm API key, click the Get API Key button to generate the key.
After an API Key has been created, it can be used until it has been revoked. To revoke an API Key, see Revoke TransForm API Key below.
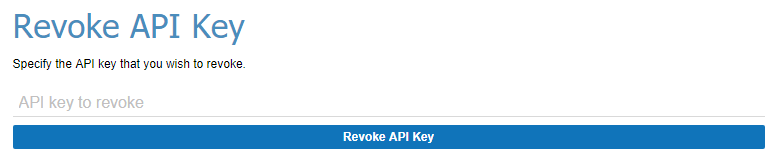
Revoke API Key
An API key can be revoked for a TransForm account using the Revoke TransForm API Key tool. Enter the API key to revoke in the text box with the text "API Key to revoke" then click the Revoke API Key button. Once revoked, the API Key can no longer be used to access TransForm.
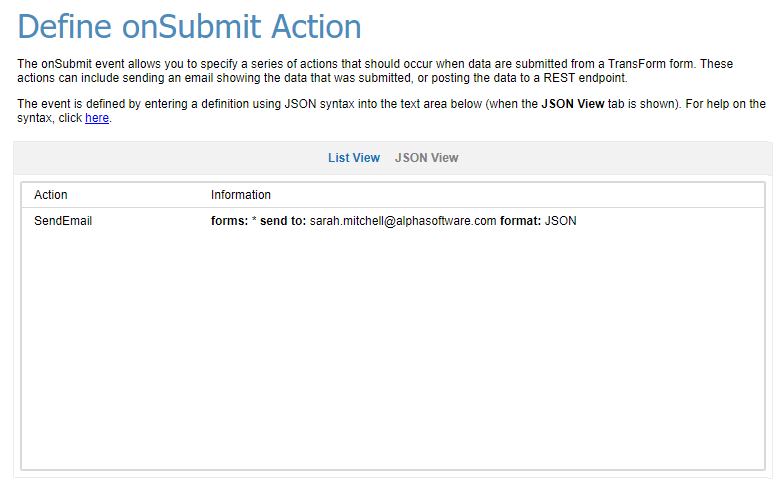
Define onSubmit Event
The onSubmit event can be used to define a series of actions that should occur when data is submitted from a TransForm form. The actions can include sending an email with the submitted form data or posting the data to a REST endpoint.
The event is defined as a JSON definition. This definition can be created using the TransForm onSubmit Genie in Alpha Anywhere or by manually specifying the event using JSON.
onSubmit Event Definition Syntax
The event is specified using JSON. The JSON string is an array of actions that should be performed after that data has been submitted. Each action has a number of properties (defined as a JSON object). Two actions are supported: SendEmail (sends an e-mail message with the form data that was submitted) and PostData (posts the form data that was submitted to a URL).
The SendEmail action supports these properties:
- sendTo - a comma delimited list of e-mail addresses.
- subject - e-mail subject.
- sendFormat - options are json, html, or excel.
- formIds - (optional) a comma delimited list of form Ids for which the action should be executed. Use "*", "" (a blank list of formIds) or omit the property to execute the action for all forms.
The PostData action supports these properties:
- url - the URL to which the data should be posted. The URL can include placeholders for form data.
Available placeholders include:
- Placeholder
- Description
- {formdata.formid}
Inserts data from a form field. Replace formid with the ID of the form field that includes the data.
- {metadata.fieldname}
Inserts data from a form metadata field. Replace fieldname with the name of the metadata field.
For example, PostData action shown below includes the form instance's ID in the URL:
{ "action": "PostData", "url": "http://mywebhook.data.com/{formdata.formid}", "variableName": "formdata", "formIds": "*", "headers": "", "actionId": "55ca0dce-75db-411a-96b9-585be3da132e" } - variableName - the variable name for the data that is posted. If not specified, the variable name defaults to data. The data (form data and meta data) are posted as a JSON string.
- formIds - (optional) a comma delimited list of form Ids for which the action should be executed. Use "*", "" (a blank list of formIds) or omit the property to execute the action for all forms.
- headers - (optional) a comma delimited list of headers in the format headername: headervalue to add to the REST call. For example: header1: value of header1,header2: value of header2,header3: value of header3
- url - the URL to which the data should be posted. The URL can include placeholders for form data.
The example below defines two actions:
[

    {
        "action":"SendEmail",
        "sendTo":"[email protected],[email protected]",
        "subject":"TransForm Data",
        "sendFormat": "html",
        "formIds" : "*"
    },

    {
        "action" : "PostData",
        "url" : "http://www.company1.com/transformwebhook",
        "variableName" : "postBody",
        "formIds" : "form1,form2,form3"
    }

]
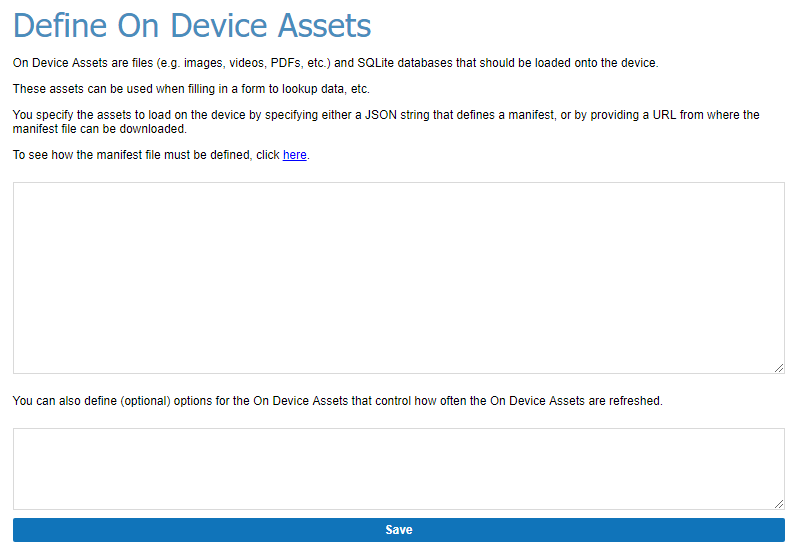
Define On Device Assets
On Device Assets are files (e.g. images, videos, PDFs, etc.) and SQLite databases that should be loaded onto the device.
These assets can be used when filling in a form to lookup data, etc.
You specify the assets to load on the device by specifying either a JSON string that defines a manifest, or by providing a URL from where the manifest file can be downloaded.
On Device Assets are defined at the TransForm account level. That means that all of the forms you define for a particular account can access the same On Device Assets.
You must define an On Device Assets Policy in order for assets to be downloaded to the device.
Manifest Syntax
The manifest is defined by a JSON string that specifies an array of objects where each object in the array defines a particular file that should be downloaded and stored on a device.
The example below defines a manifest with three assets:
[
    {
        "url": "http://alphamediacapture.s3.amazonaws.com/transform/SQLiteNorthwind.zip",
        "type": "sqlite",
        "version": 1
    },
    {
        "url": "http://alphamediacapture.s3.amazonaws.com/transform/allimages.zip",
        "type": "folder",
        "targetFolder": "images",
        "version": 1
    },
    {
        "url": "http://alphamediacapture.s3.amazonaws.com/transform/snow.JPG",
        "type": "file",
        "targetFolder": "images",
        "version": 1
    }
]
The "type" property in each object defines the type of the asset. The available options for "type" are:
- "sqlite"
A SQLite database - can either be compressed into a .zip file, or uncompressed - recommend that you zip the file to reduce download time.
- "folder"
A folder that contains one or more files. The folder must be compressed into a single .zip file.
- "file"
An individual file. The file must NOT be compressed into .zip file. If you want to compress the file, use the "folder" option.
Target Folders
For each "folder" or "file" type you can also specify an optional "targetFolder" property. This defines the folder on the device where the files will be loaded. If you do not define the "targetFolder", the files are loaded into the root folder for your TransForm account.
Multiple "folder" assets can specify the same "targetFolder" property.
Versions
Each item has an (optional) "version" property. If the "version" property is not defined, then the asset is always downloaded, regardless of whether it has been previously downloaded. If the "version" is defined, the asset is only downloaded if the "version" number in the manifest is higher than the version of the downloaded asset.
Manifest URL
Instead of defining the manifest as a JSON string, you can specify the URL of a file that contains the manifest definition. For example
https://myamazons3bucket.s3.amazonaws.com/mytransformaccount/manifest.json
You can also define (optional) options for the On Device Assets that control how often the On Device Assets are refreshed.
Other account settings
Other account settings are used to define Request Templates for use with the ajaxSendRequestFromServer() function. See Calling Web Services in TransForm Forms from the Web Filler for more information.

Integrations
Connected Applications
Connected Applications is where you can authorize access from TransForm to third-party services. Connected apps are used with OnSubmit events, such as the Send Report event, to send data from TransForm to the application. Connected Applications currently supported include Amazon S3, Google Drive, and Dropbox.
To connect an application to TransForm, click Add New Connected Application. Give the connection a Name and select the type from the Application dropdown. Enter any additional required information and then click Save or Authorize connection to finish configuring the connection.

Connected applications are currently used with the Send Report and Save Form to Storage OnSubmit events.
Zapier
Alpha TransForm integrates directly with Zapier. The Zapier section lists a set of common integrations using Alpha TransForm with Zapier. See Getting Started with Zapier to learn more about Zapier integration.
More
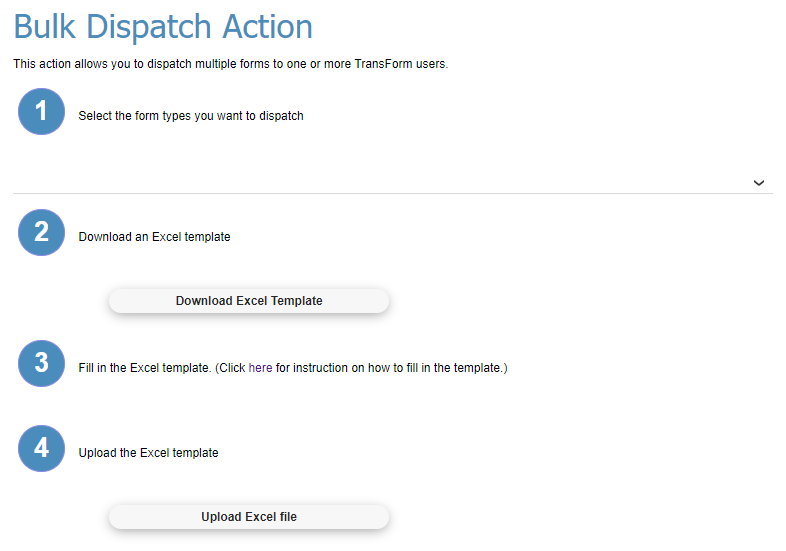
Dispatch forms
Dispatch multiple forms quickly with Bulk Dispatch. This action will generate an Excel file that you can use to define one or more forms to dispatch to your TransForm users.
To use this action:
Log into TransForm Central.
On the Home tab, click "Dispatch forms" in the More section.
Select the form types you want to dispatch in Step 1.
Click "Download Excel Template".
When the Excel file is ready, a message will appear below the "Download Excel Template" button. Click "click here to download the template" to download the Excel file.
Enter the dispatch information in the Excel file and save your changes. See Bulk Dispatch Excel Template for more information on how to fill out the Excel file.
When you're ready, click "Upload Excel file" and upload the Excel file that contains the forms you want to dispatch.
See Also