Publishing to Alpha Cloud
- Subscribing to Alpha Cloud
- Setting up your Alpha Cloud Subscription
- Preparing your Application for Publishing
- Creating an Alpha Cloud Publishing Profile
- Publishing and Deploying your Application to Alpha Cloud
- Updating your Application
- Rolling back your Application: How to Schedule a Deployment
- Using Cloud View to Monitor your Application
- Next Steps
When you feel your application is ready to share, it's time to publish your app.
Applications created with Alpha Anywhere Community Edition can be published to Alpha Cloud. Alpha Cloud is a deployment environment for web and mobile applications. Alpha Software manages the infrastructure required to run your application, allowing you to focus on developing your apps.
Subscribing to Alpha Cloud
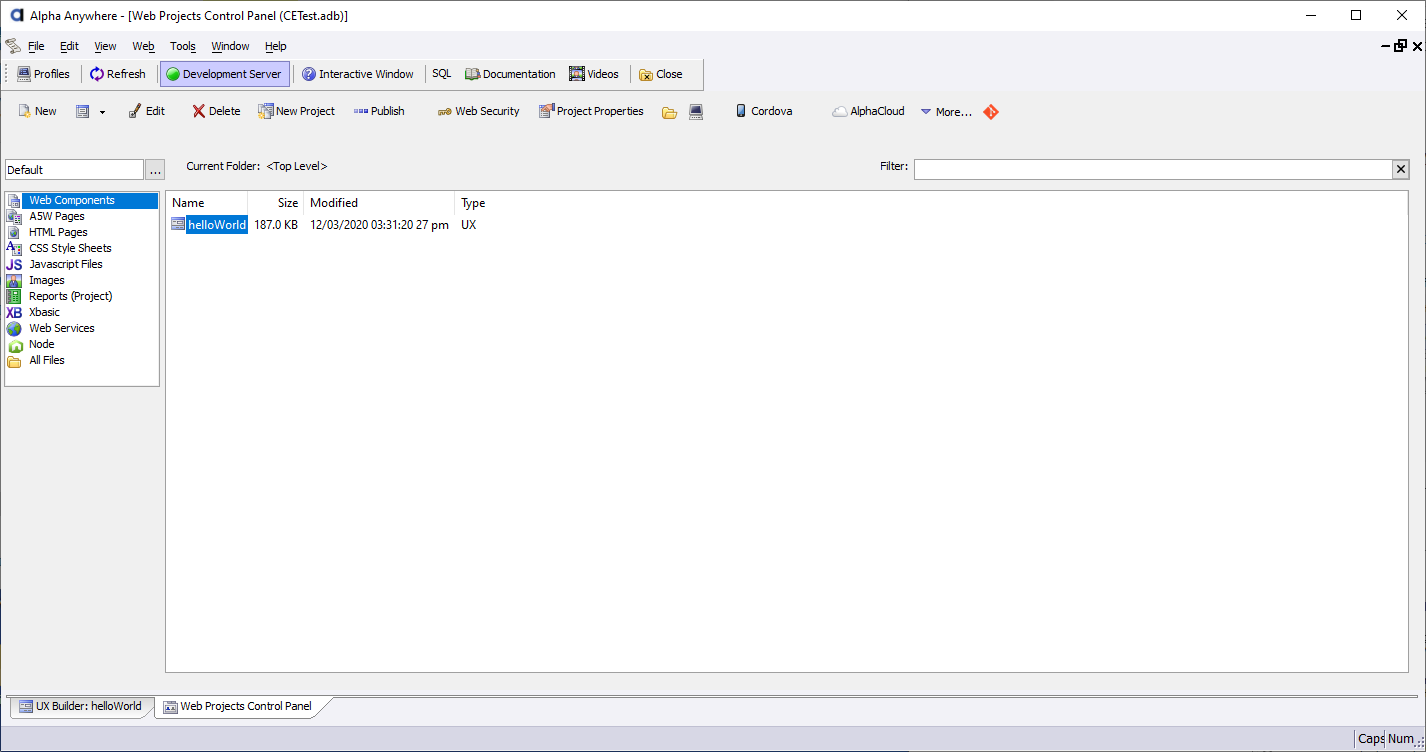
Publishing apps to Alpha Cloud requires a subscription. You can sign-up for a subscription from within Alpha Anywhere in the AlphaCloud menu on the Web Projects Control Panel. Select AlphaCloud > Purchase an Alpha Cloud Subscription, then fill out and submit the form. When registering for an Alpha Cloud account, the email address is the email associated with your Alpha Cloud account.
You can also sign-up for a subscription online at https://www.alphasoftware.com/alpha-cloud-worry-free
Setting up your Alpha Cloud Subscription
After signing up for an Alpha Cloud subscription, you will receive an email with a confirmation token. The token is time-sensitive and is used to verify your email and finalize your Alpha Cloud subscription:
Launch Alpha Anywhere Community Edition and open a workspace (it can be either an existing workspace or a new workspace.)
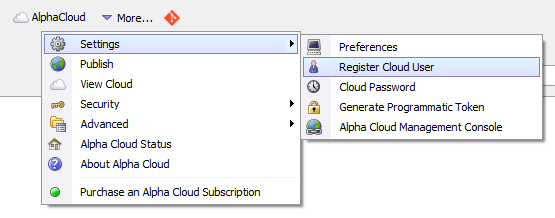
On the Web Projects Control Panel, select AlphaCould > Settings > Register Cloud User.
Click the Confirm Registration tab.

Enter the email used to purchase your Alpha Cloud subscription.
Copy the confirmation token from the Alpha Cloud registration email, and click the Paste Token button to paste the confirmation token in the registration dialog.
Enter a password for the account.
Confirm your password by entering the password again in the Reenter New Password box.
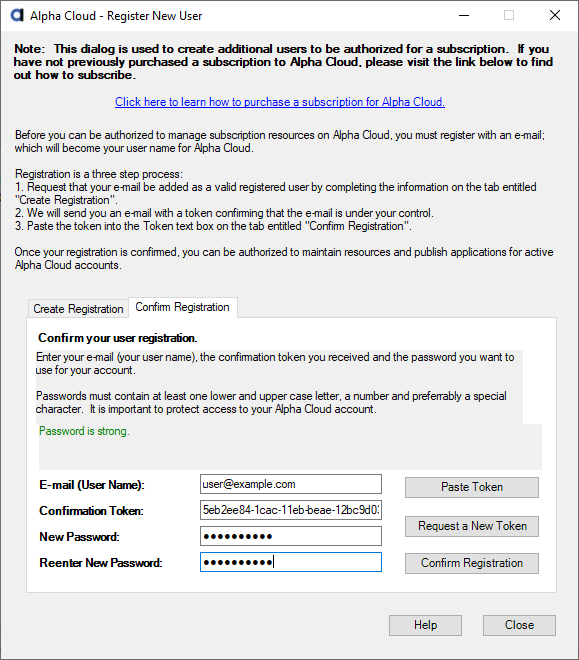
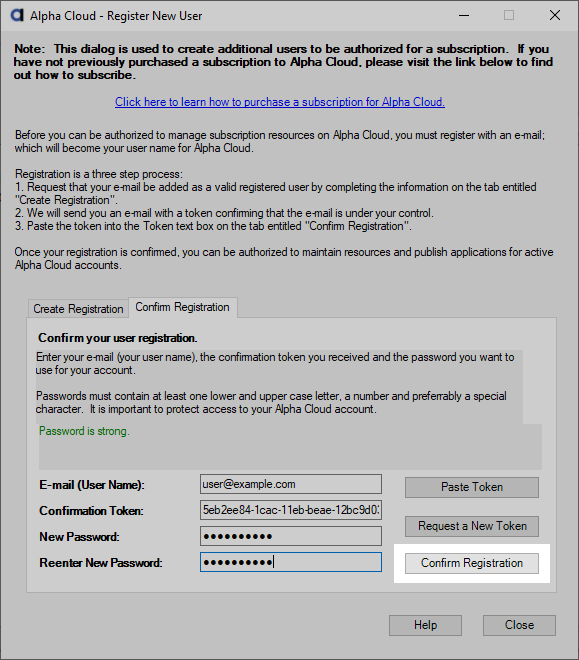
Finally, click Confirm Registration to confirm your Alpha Cloud registration.
If your confirmation token expires, you can request a new one using the Request a New Token button.
Preparing your Application for Publishing
Grid and UX Components need to be processed by the Application Server before viewing in a web browser. This is done by placing components on an A5W page. An A5W page is an Alpha Anywhere web page that contains HTML, CSS, JavaScript, and Xbasic. The Application Server pre-processes Xbasic on A5W pages to produce the HTML, CSS, and JavaScript expected by the browser.
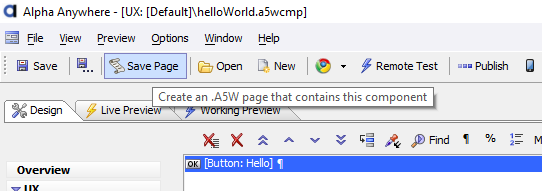
You can quickly create an A5W page for any Grid or UX using the "Save Page" button in the component builder.
If your core application component is a Tabbed UI, you do not need to do anything. The Tabbed UI component automatically creates an A5W page that you can use to view your app in a web browser.
To create an A5W page for your component,
Open the component that you want to publish.
Click the Save Page button in the component builder toolbar.
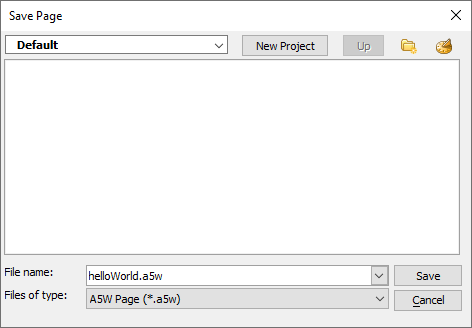
Uncheck Open page in HTML editor after saving? if it's checked. Then click the Save Page button.

Name the page and save it.
Repeat for any other components you want to display on a stand-alone web page. (Components opened using Action Javascript do not need to be embedded in an A5W page.)
Your application is ready to publish.
Creating an Alpha Cloud Publishing Profile
The first time you publish to Alpha Cloud, you will have to create an Alpha Cloud Application. An Alpha Cloud Application is a combination of all the files from a project and associated Web Site(s) where the project is deployed.
A Web Site is where users view a deployed version of your application. Applications can have multiple websites. Web Sites can be customized with your own domain name (URL) and SSL certificates. Alpha Cloud provides a default URL to view the Web Site in a browser.
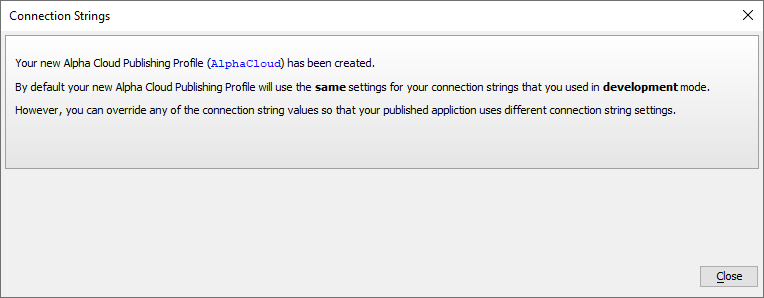
A Publishing profile defines the Alpha Cloud application where your Alpha Anywhere project will be uploaded. A project consists of the files shown on the Web Projects Control Panel. Workspaces can contain multiple projects. When you create a new workspace, a project called "Default" is automatically created.
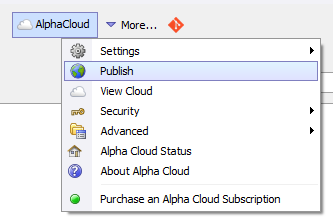
On the Web Projects Control Panel, select AlphaCloud > Publish
Select <Create new Profile> and click OK
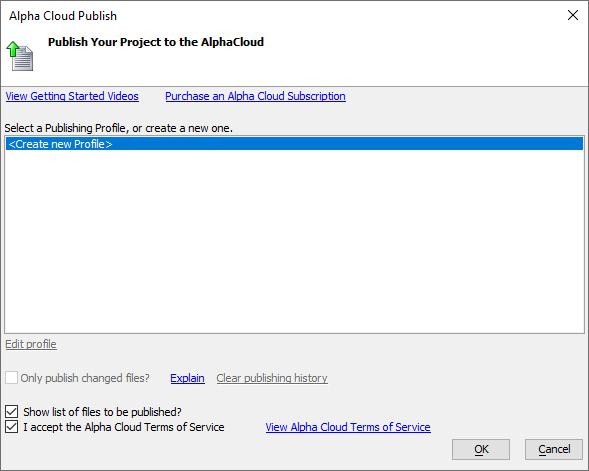
Name your new profile.

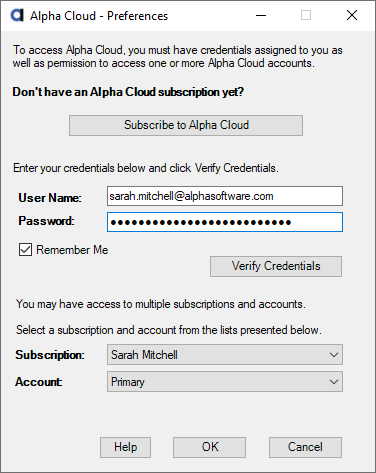
If prompted, log into your Alpha Cloud account. Select your Subscription and the primary Account.
Enter a name for your application in the Cloud Application Name box.
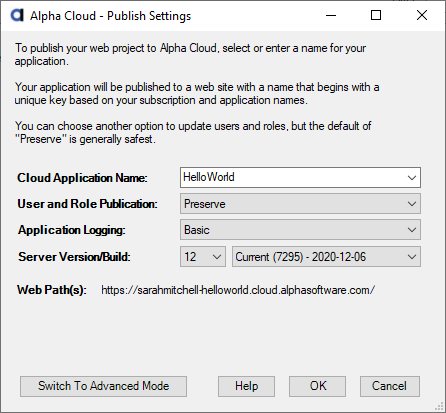
Click OK to save your configuration.
Publishing and Deploying your Application to Alpha Cloud
Publishing uploads all application files in a project to Alpha Cloud. Alpha Cloud assigns the published files an application version number, which is incremented every time you publish your application.
After an application is published, it must then be deployed to a Web Site before it can be run. Depending on how you have configured your Publishing profile, you may need to create a deployment after your application is published. Creating a deployment requires selecting the published application version, web site, and Alpha Anywhere version to run. You can optionally choose a date and time to make the deployment active. If your application includes database or storage connections, you can override these settings in the deployment configuration.
When we created your Publishing profile in the previous step, we used the basic publish settings to create the Alpha Cloud Application. As part of the basic configuration, when you publish your project, Alpha Cloud will also automatically deploy your application.
Let's see this in action, and publish your application to Alpha Cloud.
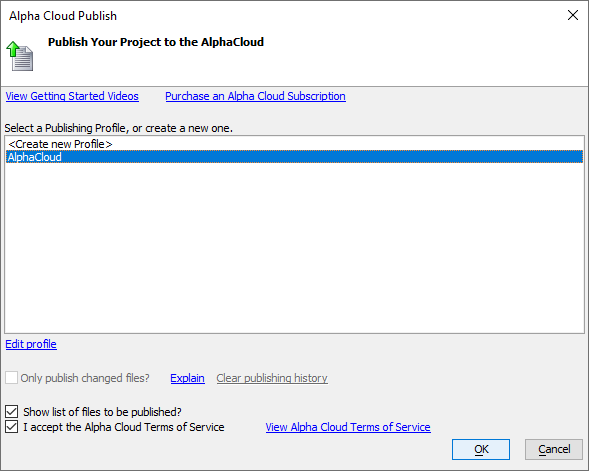
Open the Alpha Cloud Publish dialog if it is not already open: select AlphaCloud > Publish on the Web Projects Control Panel.
Select the Publishing profile you created to publish your app. Then click OK.
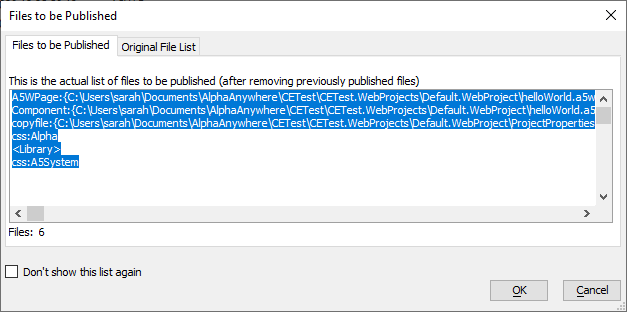
Alpha Anywhere will display a dialog that lists the files that will be published. This dialog is for informational purposes only. Click OK to continue.

If prompted, select the Default Page for your application. This page is the A5W page you created earlier. Click OK to continue.

If you do not have an A5W page, Alpha Anywhere will cancel the publish.
A progress dialog will appear. Close the progress dialog when the publish completes.
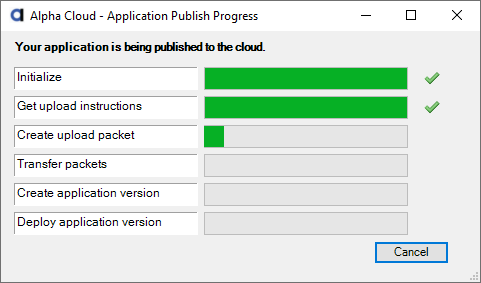
When publishing completes, Alpha Cloud then deploys the published application to a server. A dialog displaying deployment progress will appear. During this time, Alpha Cloud will deploy your published project to your application's Web Site. The application version being deployed is shown in bold text at the top of the dialog. The first time you publish, the application version will be version number 1.
As the deployment progresses, deployment status updates appear in Deployment Events tab on the dialog.
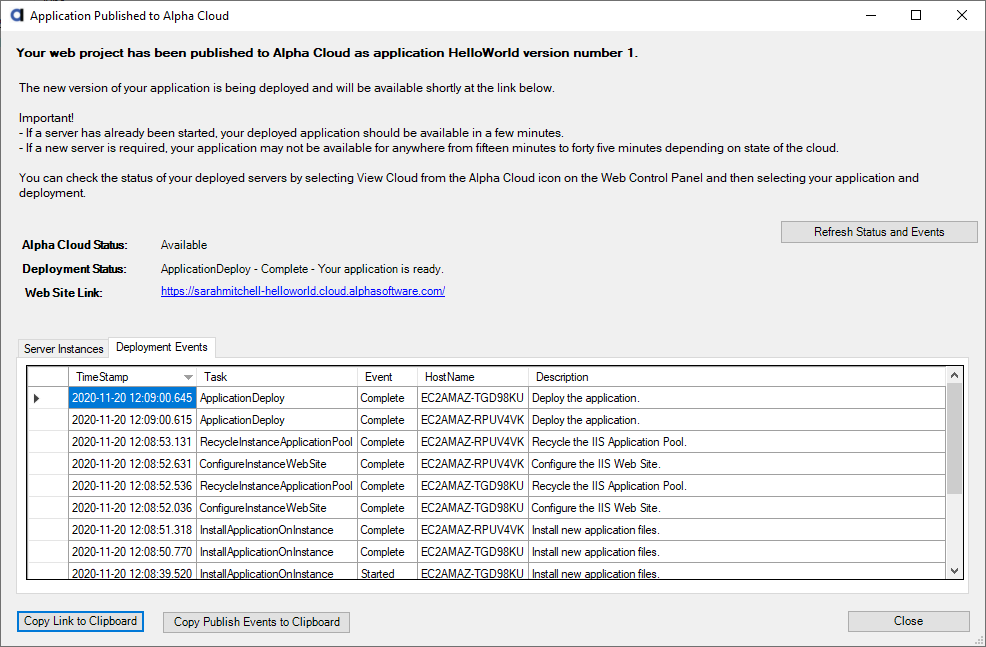
In most situations, the deployment will only take a few minutes. However, if a new server is required to deploy your application, the deployment process can take up to 45 minutes.
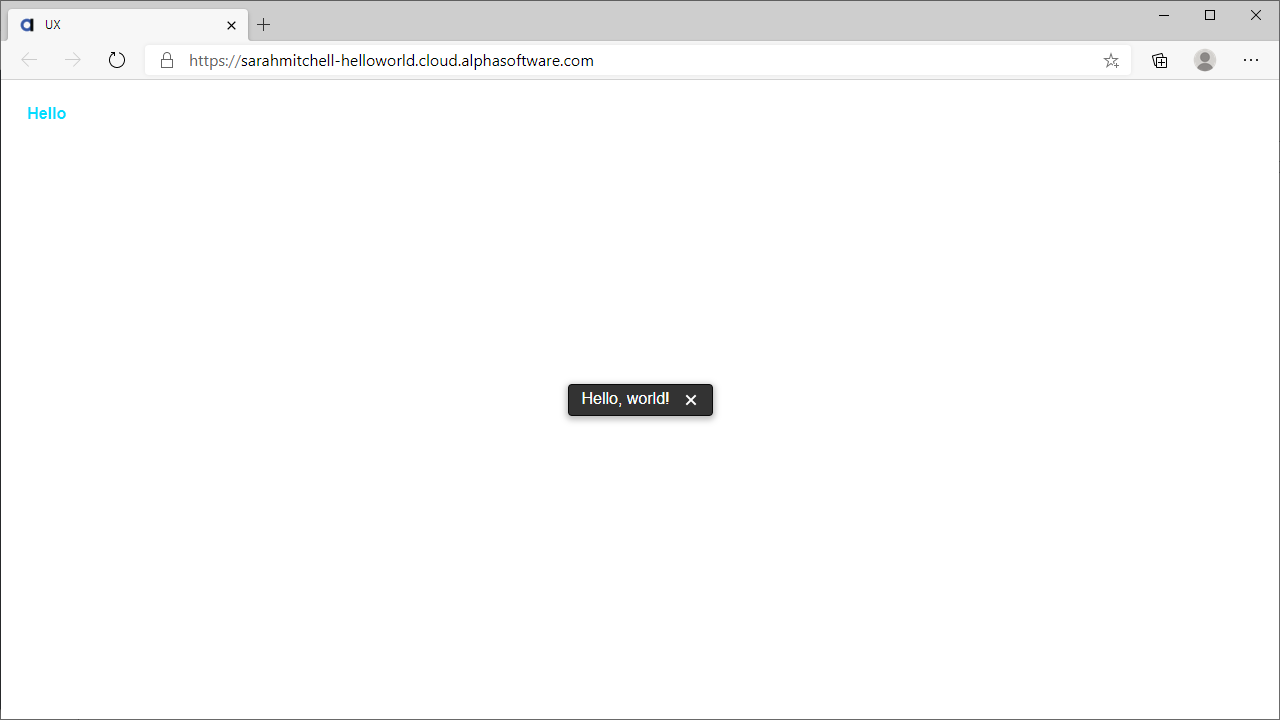
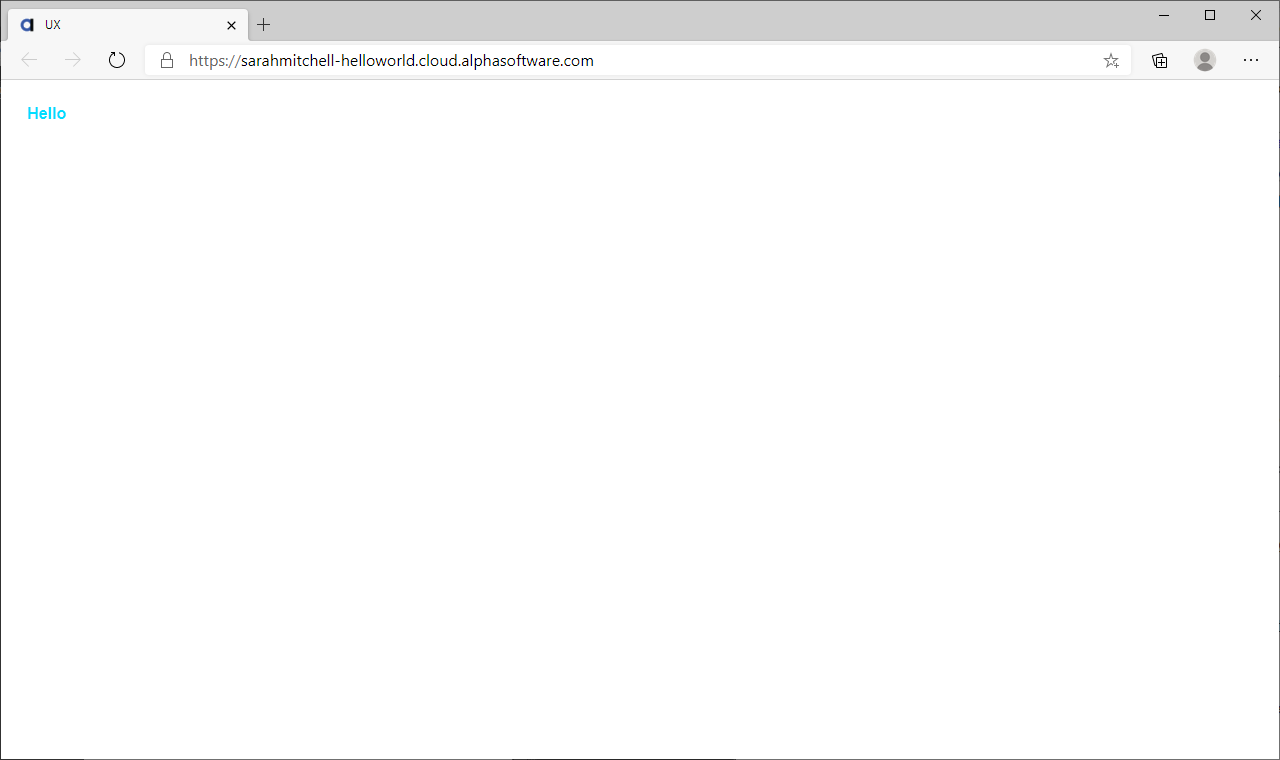
When the process completes, you can view your published application at the Web Site Link address. Click the website link to view your published application in the web browser.
Use the Copy Link to Clipboard button to copy your application's website link to share with your friends or co-workers.
Updating your Application
After your application has been published, you can update your application by publishing to Alpha Cloud using the same Publishing profile created to publish your application the first time. When you publish updates to your application, the application version number is incremented.
Open the Alpha Cloud Publish dialog: select AlphaCloud > Publish on the Web Projects Control Panel.
Select your app's Alpha Cloud Publishing profile. Then click OK.
Click OK to continue publishing when the list of files to be published is shown.
Wait for the publish to complete. Then close the progress dialog.

Remember that we chose the basic publish settings to create the Alpha Cloud Publishing profile. Because we used the basic configuration, Alpha Cloud will immediately deploy the application after publishing completes.
Wait for deployment to complete. Note that the application version being deployed (shown at the top of the dialog) is version number 2.

Click the application website link to view the updated app.

Rolling back your Application: How to Schedule a Deployment
Every time you publish your application, Alpha Cloud assigns a version number. Versioning your application makes it possible to deploy different versions of your application, including rolling back your app to a previous version.
To roll back an application, you need to schedule a deployment for an older application version:
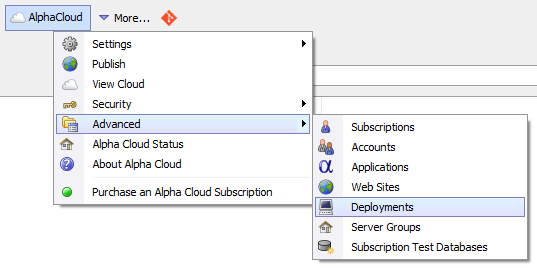
Open the Deployments dialog: select AlphaCloud > Advanced > Deployments
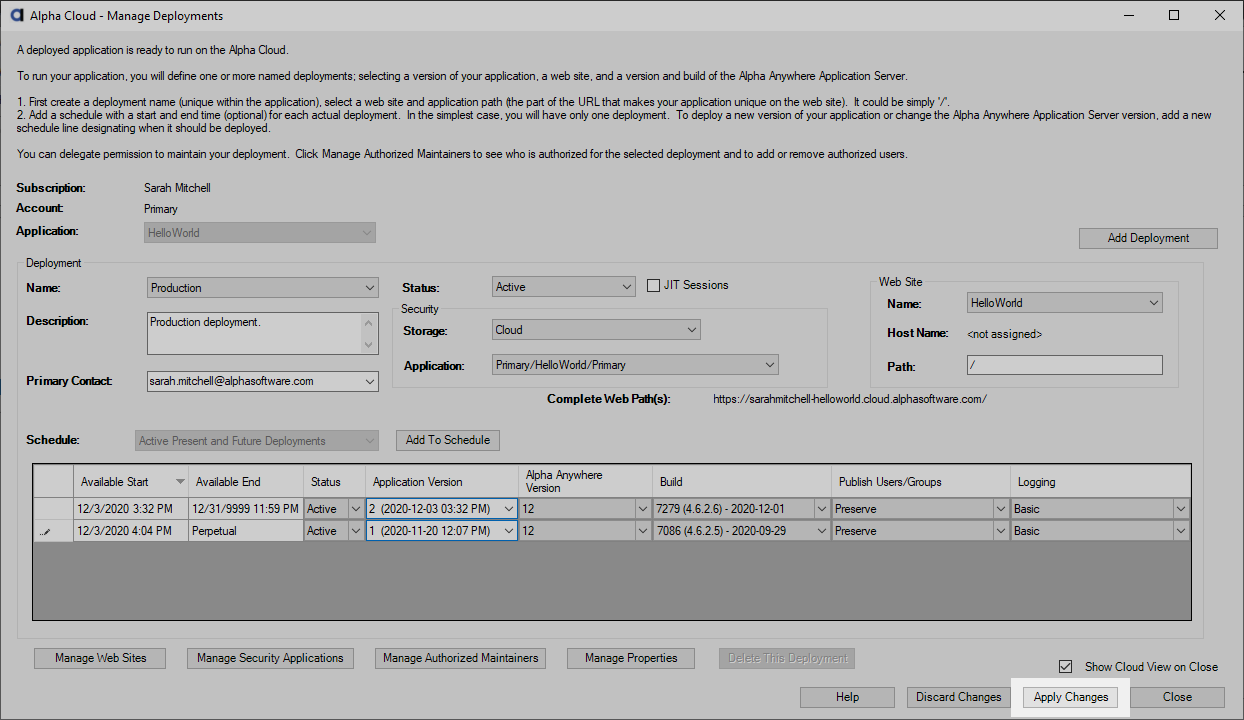
The Manage Deployments dialog is where you can schedule deployments for your Alpha Cloud applications. To use it, select your application from the Application dropdown. We currently only have one application, which is selected automatically.
Next, you need to select the Deployment Name, which describes where your application is deployed including the Web Site used to access your application. Since we used the basic publish settings to create the Alpha Cloud application, there is only one Name available -- Production.
Next, we need to schedule the deployment. To add a new deployment, click Add to Schedule

Choose the Application Version to deploy. Since we want to roll back the application, we'll open the dropdown box and select version 1.

The Available Start time determines when the application version should be deployed. The start time defaults to the current date and time. If set to the current time or a time in the past, the selected application version will be deployed immediately when the changes are applied. The Available Start time can be used to schedule your deployment for a a later date, giving you full control over when a version of your application is made available.
We want to roll back the application immediately, so we will use the default date and time supplied.
Before applying changes, check Show Cloud View on Close. This will open the Cloud View dialog where you can see the deployment progress. The Cloud View dialog also contains usage statistics and logs for your application.

Next, click Apply Changes.
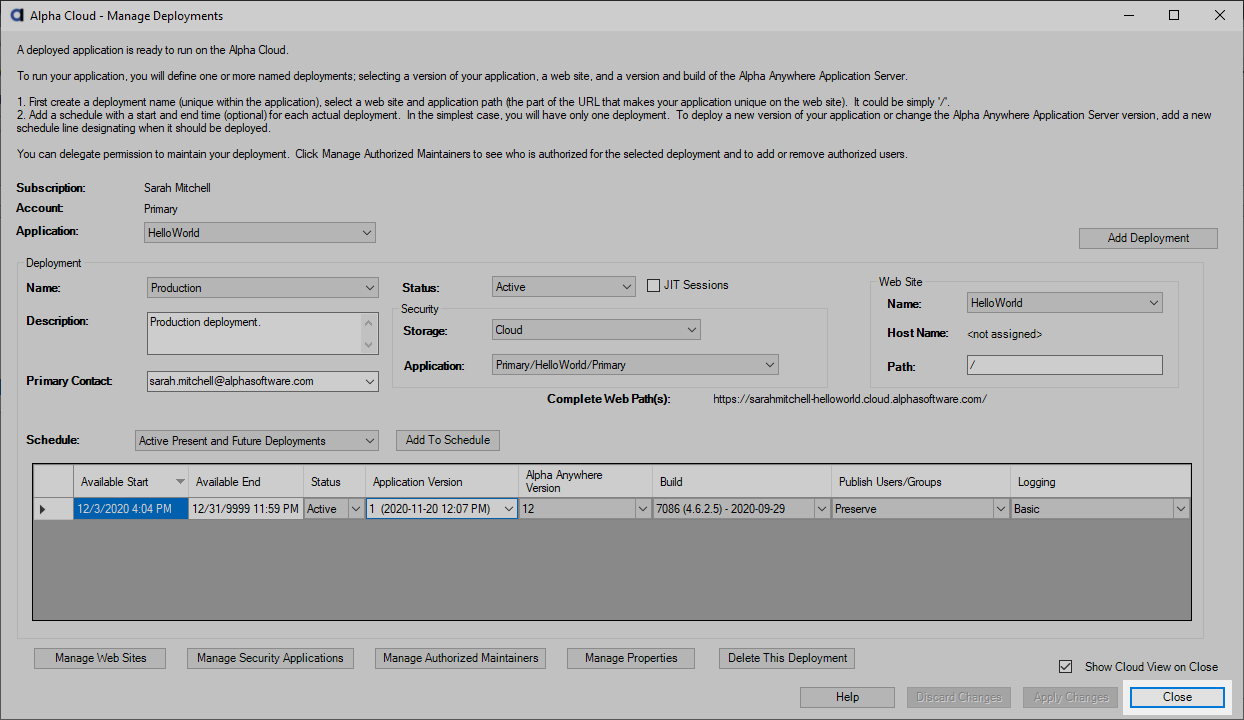
Then, click Close.
When the Cloud View dialog opens, wait for the deployment to complete.
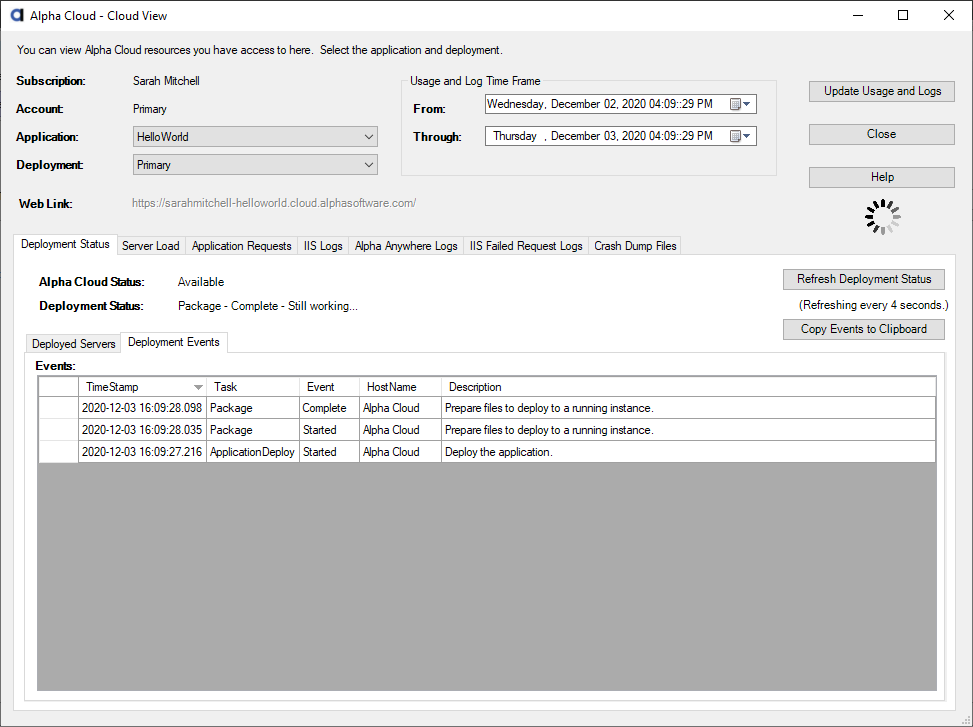
Click the website link to view your rolled back application. The link will activate when the deployment is finished.
Using Cloud View to Monitor your Application
The Cloud View dialog provides information about the status and activity for deployed applications. It is also where you will find logs for your applications.

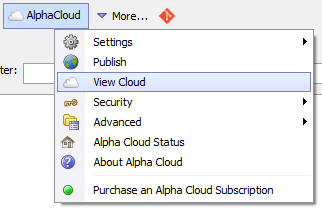
The information available in Cloud View is helpful for monitoring how your application is being used as well as tracking down issues. To open the Cloud View dialog, select AlphaCloud > View Cloud
To view information for a specific application, select the Application and Deployment. The Deployment Status tab will load information about the status of the deployed application, including the Instance where the deployment is hosted, the deployment's Start Time, the last time the server reported it was running (Last Heartbeat), the server's State, and the server's Health.
Usage and Log information is available on the other tabs (described below). Before you can view this information, you must first download the usage and logs from Alpha Cloud. The Update Usage and Logs button downloads usage and log data from Alpha Cloud that occurred during the Usage and Log Time Frame.
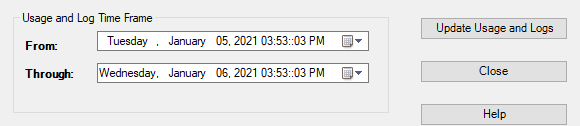
The time frame defaults to the last 24 hours. To view usage spanning a longer time frame, change the From and Through date and time and click Update Usage and Logs to download the data for the selected time frame.
The data is split into several categories:
- Category
- Description
- Server Load
Information about application load over time, including application requests, CPU usage, data sent, and data received. All information can be downloaded in either chart or CSV file format.
- Application Requests
Information on resource requests, such as web pages, images, reports, and AJAX callbacks. Resource metrics can be viewed by CPU usage, data sent, and data received. All information can be downloaded in either chart or CSV file format.
- IIS Logs
The IIS Logs record requests made to your application. One log is created each hour your application is running. The IIS Logs are useful for seeing where requests to your application originate (IP address) and what resources (web pages, images, etc) are being requested.
- Alpha Anywhere Logs
The Alpha Anywhere Logs contain Xbasic errors and trace messages generated by your application. You should check this log periodically to make sure your application does not have any issues. This log should not contain Xbasic Errors. Messages with a LogType of "XbasicError" indicate a problem in your application that needs to be addressed.
Trace messages should also be reviewed -- both those you have created as well as those generated by Alpha Anywhere. While these messages are sometimes informational, they can indicate a problem with your application. See Capturing and Logging Errors to learn more about writing messages to the Trace logs with Xbasic in server-side events.
- IIS Failed Request Logs
Failed requests are logged if logging for a deployment is set to "Diagnostic", "Debugging", or "Complete". The Logging for a deployment is set when a new deployment is added to the deployment schedule (see Manage Deployments.) If enabled, all application requests that fail with an HTTP status code of 400 or higher are logged to the IIS Failed Request Logs, including additional information about the error. This log is useful when you're trying to diagnose an issue with your application, such as missing resources (404), incorrect security configuration (403), or server-side errors (5xx).
- Crash Dump Files
Under normal operation, your application should never generate dump files. A dump file is only created when Alpha Anywhere crashes while your application is running. If the Crash Dump File page lists any dump files, download the dump file(s) and send them to [email protected].
To learn more about the Cloud View dialog, see Viewing Cloud Activity in the Alpha Cloud Developer's Guide.
Next Steps
Congratulations! You now understand the basics of publishing and deploying applications to Alpha Cloud. Your next stop is the Alpha Cloud Developers Guide. This guide contains a wealth of additional information about working with databases, storing files, managing security, accessing logs, and more.