Alpha Launch
- Understanding Alpha Launch Limitations
- How to Install Alpha Launch on a Device
- How to Run an App That Has Been Installed in Alpha Launch
- How to Install an app Within Alpha Launch
- How to Select the Active Alpha Launch Server
- How to Register a New Alpha Launch Server
- Preparing your App to Publish to Alpha Launch
- Registering an App to Publish to Alpha Launch
- Publishing Apps to Alpha Launch
- Generating a Server QR Code
- Verifying the Publish
- Troubleshooting
- Alpha Launch Methods
- Resources
Description
Alpha Launch allows you to install mobile Alpha Anywhere apps to Apple and Android devices without using Ionic Appflow, Cordova CLI, or an AppStore.
Discussion
Alpha Launch is a free AppStore app available for Android or Apple devices. Alpha Anywhere applications can be downloaded and installed within Alpha Launch. Applications deployed to Alpha Launch do not need to go through the Apple or Android app stores. Apps deployed to Alpha Launch also do not require a additional tools to create applications with Ionic Appflow or Cordova CLI. Alpha Anywhere mobile apps are installed into Alpha Launch, not directly to the device. This makes it extremely easy and quick to install new apps on a device.
Publishing Apps to a Device using Alpha Launch
Publishing mobile apps to an app store can be a time consuming and frustrating experience. With Alpha Launch you can quickly and easily publish mobile apps to iOS and Android devices, completely bypassing the app stores, Ionic Appflow, and Cordova CLI.
In this video we show how you can publish an app to a device using Alpha Launch.
The use cases for Alpha Launch include:
- You are developing a mobile app for a client and you want the client to be able to install and test the app on their own device
- Organizations that need to create many 'employee-facing' applications and need a quick way to deploy these applications to their user community
- You want a quick and easy way to update previously installed apps on a device without having to wait for app store approval.
Once an app has been installed into Alpha Launch, the app runs similarly to the way it would operate if installed directly on the device. For example, if there is no internet connection, you can launch any app installed in Alpha Launch.
Alpha Launch is not suitable as a means of deploying a public facing app that will be installed by many users who will go to the app store to find and install your App. When an app is installed directly onto a device the app icon will appear on the device's home screen. However, when you publish to Alpha Launch, the app will not have an icon on the home screen. To launch the app you will first have to open Alpha Launch and select the app from the list of apps installed in Alpha Launch.
Understanding Alpha Launch Limitations
- Alpha Launch is branded as an Alpha Software App. If you want a version of the Alpha Launch app that is branded with your company's logo and colors, contact the Alpha Software sales department.
- The apps that run in Alpha Launch are Cordova apps, but they can only use the plugins that Alpha Launch was configured to use. If you want a version of Alpha Launch that uses a different set of Cordova plugins, please contact your Alpha Software sales person.
- Only UX Components can be published to Alpha Launch.
To see the list of plugins that Alpha Launch enables, tap the Settings button in the footer of the Alpha Launch home screen.
If Support Settings are not shown, enable Show Support Settings by tapping the switch to display the Support Settings.
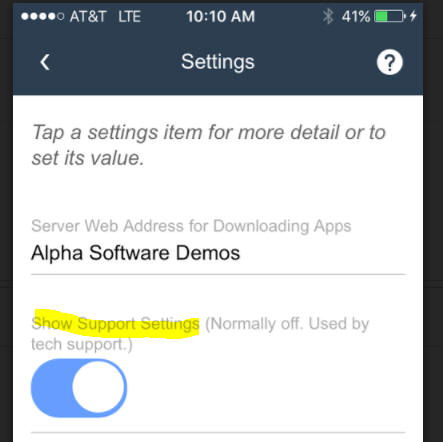
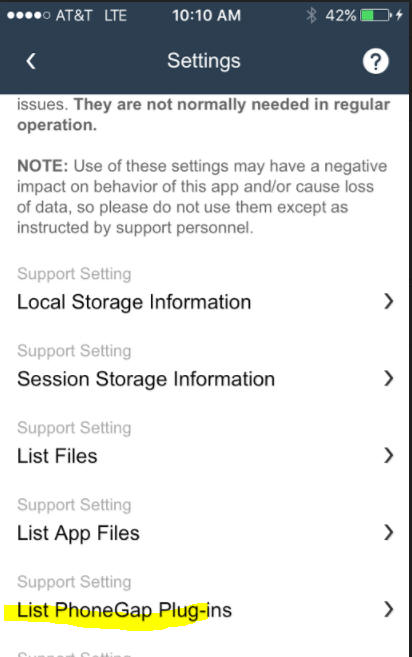
Scroll through the Support Settings until you find List PhoneGap Plug-ins. Tap on List PhoneGap Plug-ins to see a list of all available Cordova plug-ins. This will show the plugins that can be used in your mobile app:
How to Install Alpha Launch on a Device
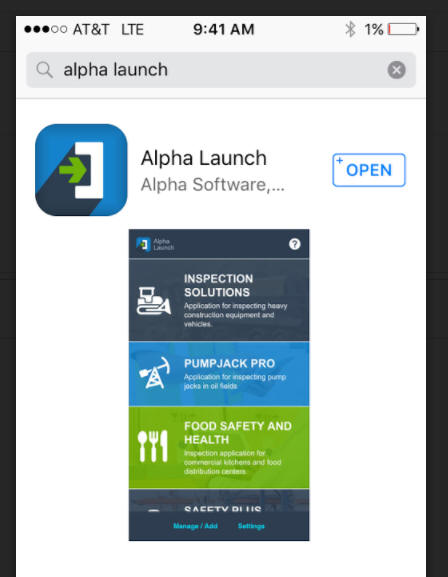
To install Alpha Launch on a device, simply go to the app store and search for 'Alpha Launch'.
How to Run an App That Has Been Installed in Alpha Launch
To run an app that was previously installed in Alpha Launch, simply launch the Alpha Launch app on your device by clicking the Launch icon.

Then scroll the list of installed apps until you find the app that you want and tap on the app name.
How to Install an app Within Alpha Launch
To install a new app within Alpha Launch, tap the Manage/Add button in the footer of the Alpha Launch app.

If there are any existing installed apps a screen showing these apps will be shown.
Note that for each installed App, the name of the server from which the app was installed is shown. When an app is run, all Ajax callbacks are made to the same server from which it was originally installed.
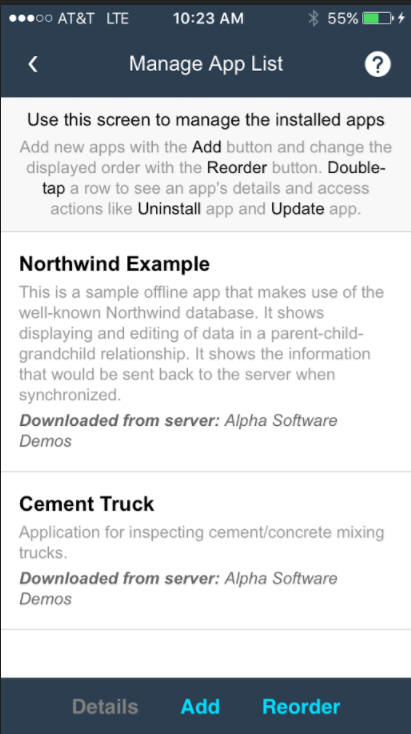
You can use this screen to reorder the installed apps. You can also use a 'press-hold' gesture on any of the apps in the List to bring up a screen that will allow you to uninstall an app or to update the app.
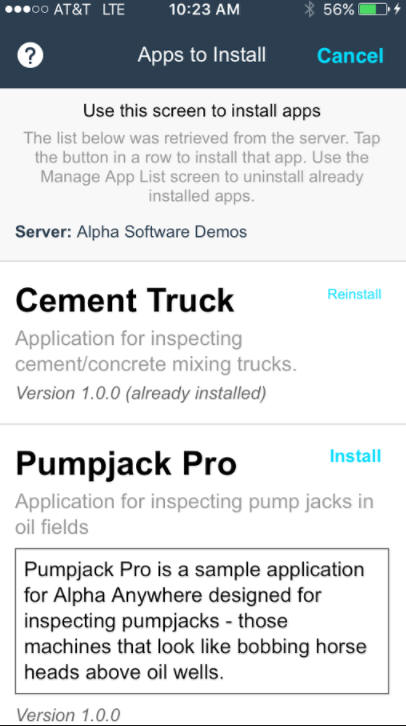
Tap the Add button to bring up a list of the available apps on the server that Alpha Launch is currently configured to use.
For each app that is listed, there is either an Install or Reinstall button. The Install button will appear if the app is not currently installed and the Reinstall button will appear if the app has previously been installed. Reinstalling a previously installed app is effectively updating the app to a newer version of the App.
How to Select the Active Alpha Launch Server
When you click the Add button on the Manage App List screen, the apps that are available on the active Alpha Launch server are shown. You can change the active Alpha Launch server by tapping the Settings button at the Alpha Launch home screen.
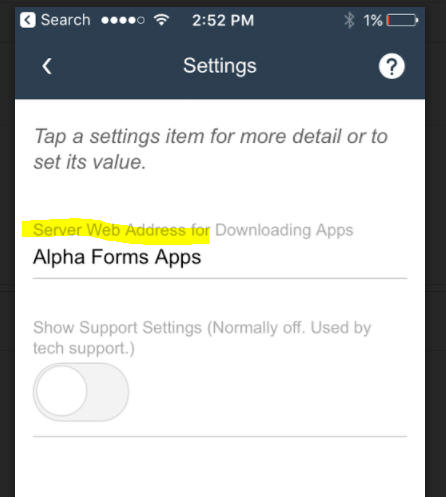
Then, tap on 'Server Web Address for Downloading Apps...'.
This will bring up the list of registered servers.
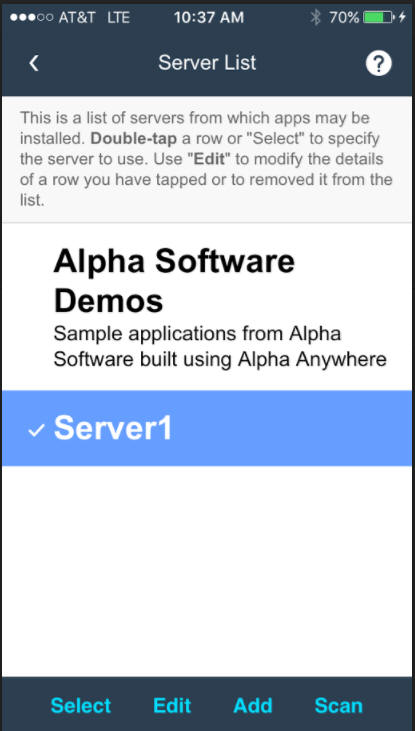
Tap on the server you want to select, then tap the Select button.
How to Register a New Alpha Launch Server
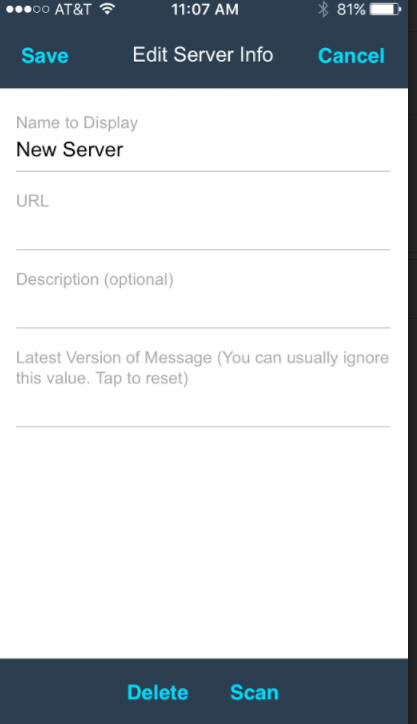
To register a new Alpha Launch server, follow the instructions (above) for selecting the Active Alpha Launch server. On the Server List screen (shown above), tap the Add button.
This will bring up the Edit Server Info screen where you can either type in the server address or scan a special QR code that encodes all of the necessary information.
Preparing your App to Publish to Alpha Launch
Apps deployed to Alpha Launch need to give the user a way to get back to the Alpha Launch home screen. This is often done by adding a button to the component that runs the Exit to AlphaLaunch home screen action.
You can alternatively code the Javascript for the button yourself.
To use Action Javascript, select the 'AlphaLaunch Actions' action for the list of available Action Javascript actions.
To code the Javascript directly, use this code:
if (A5.shell) {
    A5.shell.exitComponent();
}
The code tests if you are running in Alpha Launch, then if you are then it calls the A5.shell.exitComponent() method.
Registering an App to Publish to Alpha Launch
Before you publish apps to Alpha Launch you must first 'register' the apps you want to publish. Registering an app involves defining how the app will appear when it is shown in the Alpha Launch home screen and how it will be described when a user displays the list of available apps that can be installed into Alpha Launch.
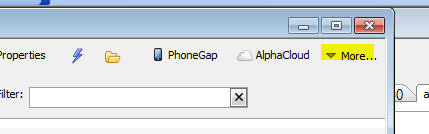
To register the apps from a particular Web Project for publication to Alpha Launch, tap the More... button on the right of the Web Control Panel.
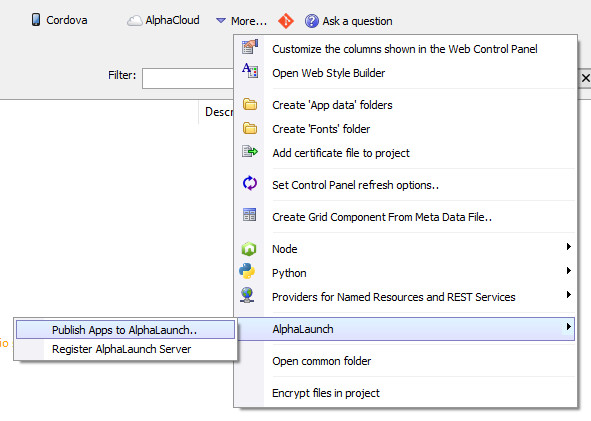
Then select the AlphaLaunch > Publish Apps to AlphaLaunch... menu item.
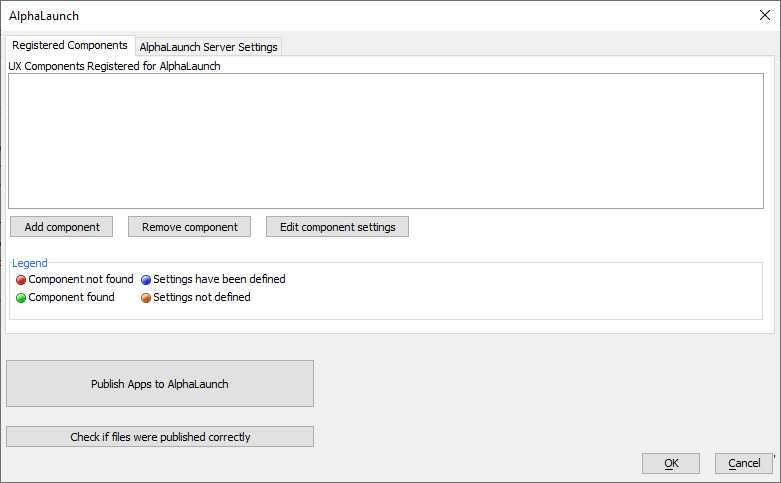
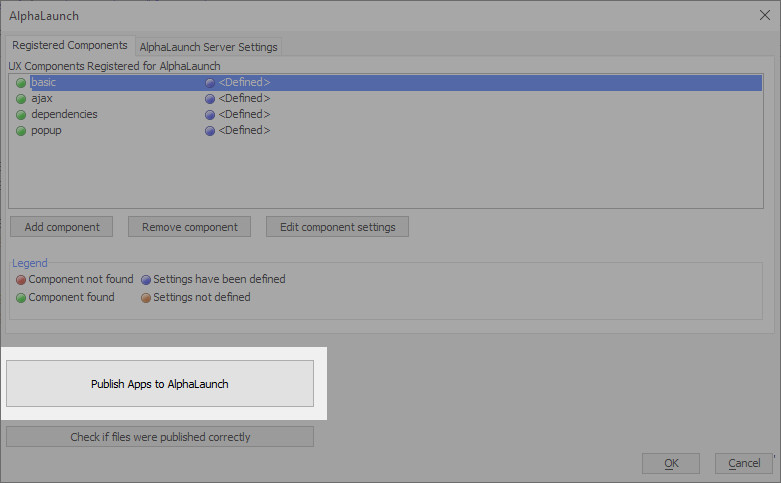
This will bring up the Alpha Launch dialog where you can register the apps from the Web Project that you want to publish to Alpha Launch.
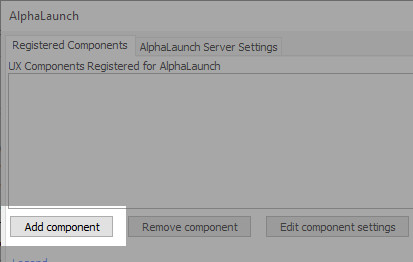
To register a new UX component, click the Add component button and then select the UX component you want to publish.
The Alpha Launch dialog will then show the component that you selected and the orange icon will indicate that the settings for this component have not yet been defined.
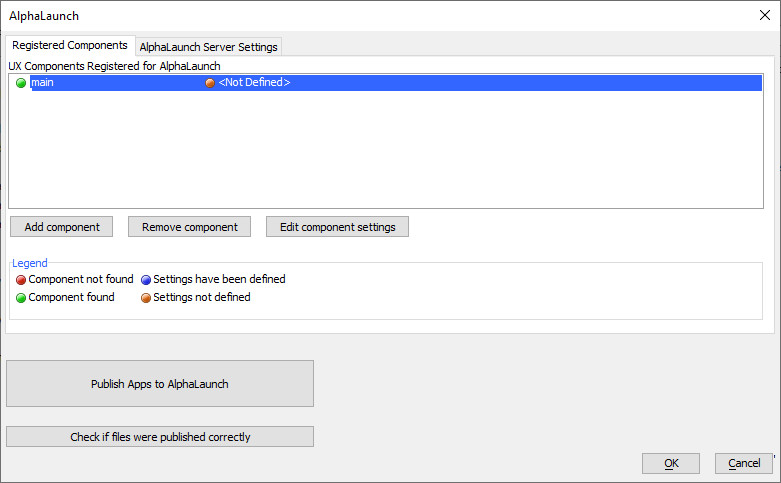
Either double click on the component name, or click the Edit component settings button to open the Alpha Launch Settings dialog box.
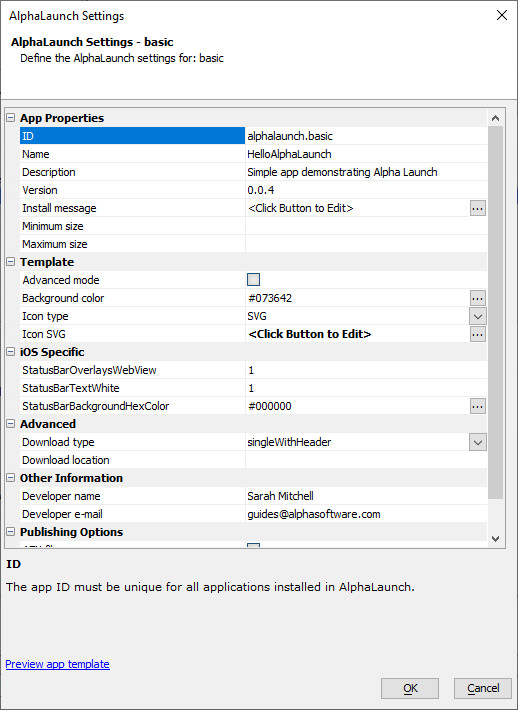
The important properties on this dialog include:
- Property
- Description
- ID
The ID must be unique across all app that are installed in Alpha Launch. It is common to use a reverse URL format for the ID (e.g. com.mydomain.myappname), but this is not required. The ID will be used in future versions of Alpha Launch to allow one Alpha Launch App to communicate with another Alpha Launch App.
- Name
The name of the App. This is the name that is shown on the Alpha Launch home screen and in the list of available apps that can be installed into Alpha Launch when a user adds a new app to Alpha Launch.
- Description
The app description. This is the description that is shown on the Alpha Launch home screen and in the list of available apps that can be installed into Alpha Launch when a user adds a new app to Alpha Launch.
- Version
The app version.
- Minimum size
Defines the minimum screen resolution of the device that the app can be installed on. You can leave this blank if you do not wish to set a minimum size.
- Maximum size
Defines the maximum screen resolution of the device that the app can be installed on. You can leave this blank if you do not wish to set a maximum size.
- Template
The template defines how an installed app will appear on the Alpha Launch home screen. By checking the Advanced mode property, you have complete control over the template. The template can include special placeholders (e.g. {name} and {desc} ) to show the app name and description. If you want to use a default template style, do not check the Advanced mode property. You will then be able to select the app icon and background color of the row for this app in the list of installed apps.
- Icon type
You can either use an SVG or bitmap as the icon for the App. The icon is shown in the list of installed apps at the Alpha Launch home screen.
- Download Type
Defines the type of download. Options are manifest or singleWithHeader. manifest publishes all app files individually. singleWithHeader publishes the app as a single file. singleWithHeader is recommended for publishing. With this option, all of the files that need to be installed on the device are combined into a single file which is then downloaded and unpacked on the device. It is considerably quicker to download a single large file than hundreds of smaller files. singleWithHeader is only available under Alpha Anywhere 4.5.4.1 or newer and only works with Alpha Launch 2.1.1 (released June 18, 2018.)
- Download location
If you leave this property blank, the app files are download from a folder in the webroot of your Alpha Anywhere server. However, you can download the app files from another server if you wish. For example, you might want to have Alpha Launch download the app files from Amazon S3. In this case you would enter the URL of the bucket on S3 where you have placed the app files. For example: http://mys3account.s3.amazonaws.com/app1. For more information on why you might want to specify another server (such as S3) as the download location see App Install Errors below.
- AEX Files
If checked, Xbasic functions defined on the Control Panel (not the Web Projects Control Panel) will be compiled into an AEX file and published when the Alpha Launch application is published.
- Additional assets to include in Fileset
Additional files to include from the Web Project, including other components, CSS or JavaScript resources, images, etc.
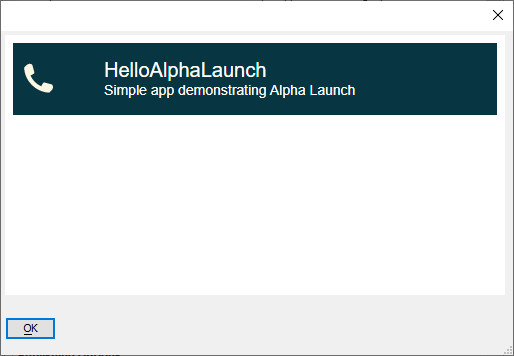
You can preview how the app will appear in the Alpha Launch home screen by clicking on the Preview app template hyperlink at the bottom of the screen. For example, here is a preview of a template that is using a purple background color and an SVG icon.
Once you have registered all of the apps in a Web Project that you want to publish to Alpha Launch you are nearly ready to publish to Alpha Launch.
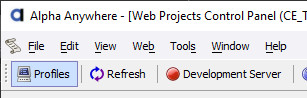
Before you can publish, you must first define a Publishing Profile that indicates where the apps will be published (i.e. the Alpha Anywhere server and folder on that server where the apps will be published). To define a publishing profile, click the Profiles button on the toolbar when the Web Project Control Panel has focus.
You can publish apps to and install from the Development Server. To do this, specify the IP address for you computer and the port number in the Server Address. For example, "http://192.168.70.120:8080/alphalaunch". This should only be done for testing purposes as your local IP address is not static.
Once you have defined the publishing profile, click the Publish Apps to Alpha Launch Server button on the Alpha Launch dialog.
Publishing Apps to Alpha Launch
Once you have registered all of the UX components that you want to publish to Alpha Launch, click the Publish Apps to Alpha Launch button.
This will then open this dialog where you can configure the publish operation.
Key Concepts
It is important to understand the key concepts of how Alpha Launch works. There are two servers:
The download server is where the apps that you install into Alpha Launch are downloaded from.
The Alpha Anywhere server is where an app that is running in Alpha Launch will make its Ajax callbacks.
The Alpha Anywhere server and the download server can be the same or they can be different. For example, it is common to use an Amazon S3 bucket as the download server. The Alpha Anywhere server can be your own classic or IIS Alpha Anywhere server, or it could be Alpha Cloud.
If you use an Amazon S3 bucket as your download server, you can either use your own private bucket, or you can use a special shared bucket provided by Alpha Software. The shared S3 bucket is a quick and easy way to get started, but ultimately you will likely want to use a private S3 bucket.
When you publish an app to Alpha Launch you specify a publishing profile. This profile determines how your apps are published to the Alpha Anywhere server.
Once an app has been installed into Alpha Launch it will appear on the Alpha Launch home screen.
For example the screen shot below shows Alpha Launch running on a mobile phone. There are two apps installed. If you tap on one of the items in the List, the app is launched from the file system on the device. Just like when you load an app that you previously installed on a device from an App store by tapping its icon on the device home screen, you do not need to have an internet connection to load an app into Alpha Launch. That is because the app has been physically installed into the file system on the device, and the app is loaded from the file system. Of course, if the app you load makes Ajax callbacks, you will need to have an internet connection.
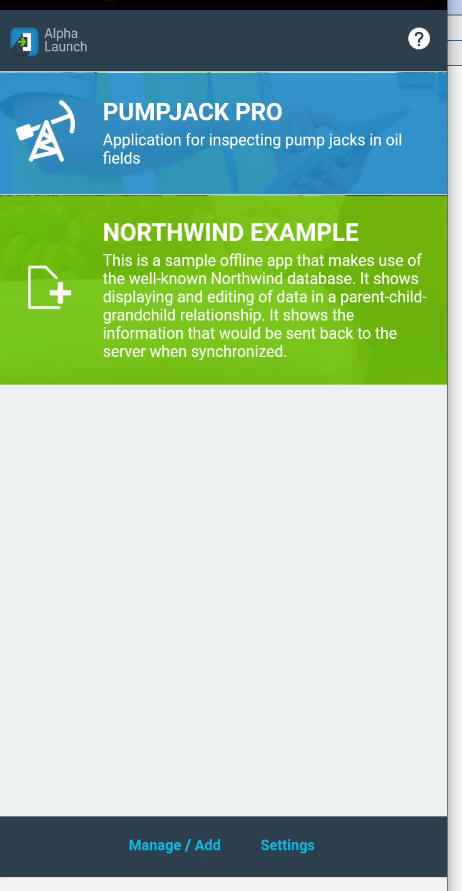 Alpha Launch Home Screen
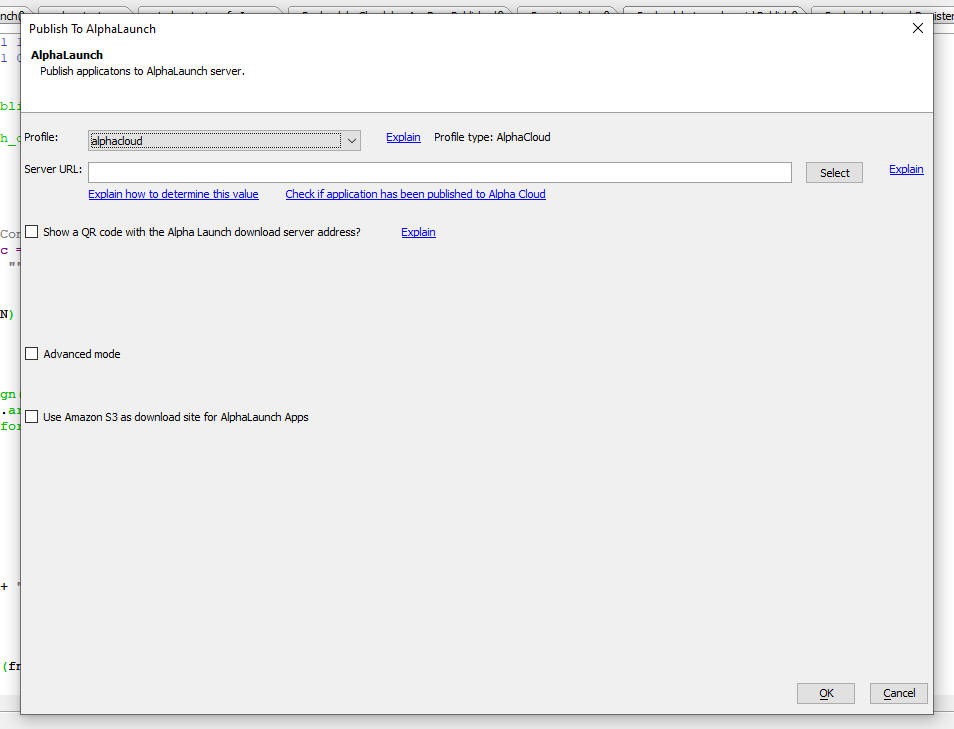
Understanding the options on the Publish to Alpha Launch dialog
The Publish to Alpha Launch dialog is where you configure how the apps that you registered get published to Alpha Launch. You can set the following values in the dialog:
Profile
This is the publishing profile that you want to use to publish your applications to the Alpha Anywhere server.
If you choose an Alpha Cloud publishing profile, you will need to ensure that you have previously published your application to Alpha Cloud. You can confirm that you have published your app to Alpha Cloud by clicking the Check if application has been published to Alpha Cloud hyperlink.
 Profile setting
Server URL
This is the URL of the Alpha Anywhere server where your app will be published. The value for this property depends on what Profile you use to publish your apps. This is the server that will handle Ajax callbacks made by your app. If you do not use an Amazon S3 bucket as your download server, it is also the server from which Alpha Launch will download the app when you install it into Alpha Launch.
If you are using an Alpha Cloud publishing profile and you are unsure of the Server URL, you can set the Server URL to <Auto> and Alpha Anywhere will automatically figure out what the correct value is for the Server URL based on the Publishing profile you selected. There is, however, a disadvantage to using the <Auto> option as it means that Alpha Anywhere will have to go through additional time consuming steps when you publish to Alpha Launch.
 Server URL setting
In order to install apps into Alpha Launch you first have to register the URL of the download server in the Alpha Launch app. Typing a long URL on a mobile keyboard is tedious and it is much easier to register a server by simply scanning a QR code. To display the QR code for the download server, check the checkbox for the Show QR code prompt. Enter a server name and description and then click the Show QR code hyperlink. This will display a QR code that you can scan in Alpha Launch.
 Show a QR Code checkbox
If you are using an Alpha Cloud publishing profile and you have set the Server URL to <Auto> you will not be able to display the QR code before the publish to Alpha Launch operation is complete. The QR code will be shown automatically when the publish is complete.
 Server name and description settings
If you want to use an Amazon S3 bucket as your download server, check the Use Amazon S3 checkbox.
 Use Amazon S3 checkbox
When you check this box, the following options appear.
- Preserve existing Available App file
By default, when you publish to Alpha Launch the AvailableAppInfo.txt file (this is the file that lists the apps that can be installed from the selected download server) is recreated. If you check this option, the apps that you publish are added to the existing AvailableAppInfo.txt file (if one exists).
- Use private S3 bucket
Check this option if you do not want to use the shared S3 bucket.
- Download site id
If you are using the shared Alpha Anywhere S3 bucket as your download server, this id represents the sub-folder in the shared S3 bucket where your apps are download from. Once this id has been assigned, it is not changed (unless you press the Get new id button).
 Settings for using Amazon S3 to host AlphaLaunch apps
If you click the Get new id button, you will then have to register a new download server in Alpha Launch.
If you are not using a private S3 bucket, you will be asked to provide the following:
- S3 URL
The URL to your S3 bucket where your Alpha Launch files will be published. e.g. http://alphalaunchservers.s3.amazonaws.com/. Do not include the name of the S3 Folder in the URL.
- S3 Folder
The folder within the S3 bucket where your app files will be published.
- S3 Connection String
The connection string to your S3 bucket. You can either use an explicit or named connection string. If using a named connection string, you must use the ::storage:: prefix.
 Configuring a Private S3 Bucket
Advanced mode
When you publish files to Alpha Launch, a Deployment Package (also known as a fileset) must be created. This fileset is stored in the files directory in the __alphaLaunch.alphaLaunch folder in the Web Project folder. The fileset is automatically created when you publish to Alpha Launch, but you might want to create the fileset manually before you initiate the publish so that you can examine the files in the fileset.
 Advanced mode
You can use Advanced mode when you want to republish to Alpha Launch after having made a change to the app settings (e.g. the app template, description, version number, etc.), but not the app itself. This will speed up the process of publishing the apps because it will avoid having to recreate the static file set for each App.
- Create Deployment Packages
Generates deployment files for the selected components locally but does not publish them. You can find the generated deployment package files in the __alphaLaunch.alphaLaunch folder in the web projects directory.
- Re-create all deployment packages when publishing?
If checked, the entire application will be redeployed when the application is published to Alpha Launch. If you have made modifications to the application settings but not the application, Alpha Anywhere will only publish the app settings if you leave this option unchecked when using Advanced mode.
Generating a Server QR Code
After publish completes, you'll be prompted to generate a Server QR Code. The Server QR Code is used to register your server in Alpha Launch. Enter a name for your server and a short description. Then click OK.
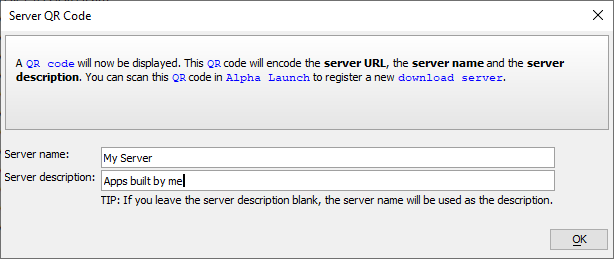
See How to Register a New Alpha Launch Server for more information about registering servers.
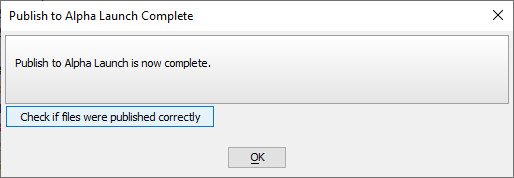
Verifying the Publish
When the publish completes, you'll be shown a dialog that you can use to verify if the publish was successful. Click the Check if files were published correctly button to verify the publish.
If the publish succeeded, the Publish was OK dialog will be shown that contains the availableAppInfo.txt data that was published.
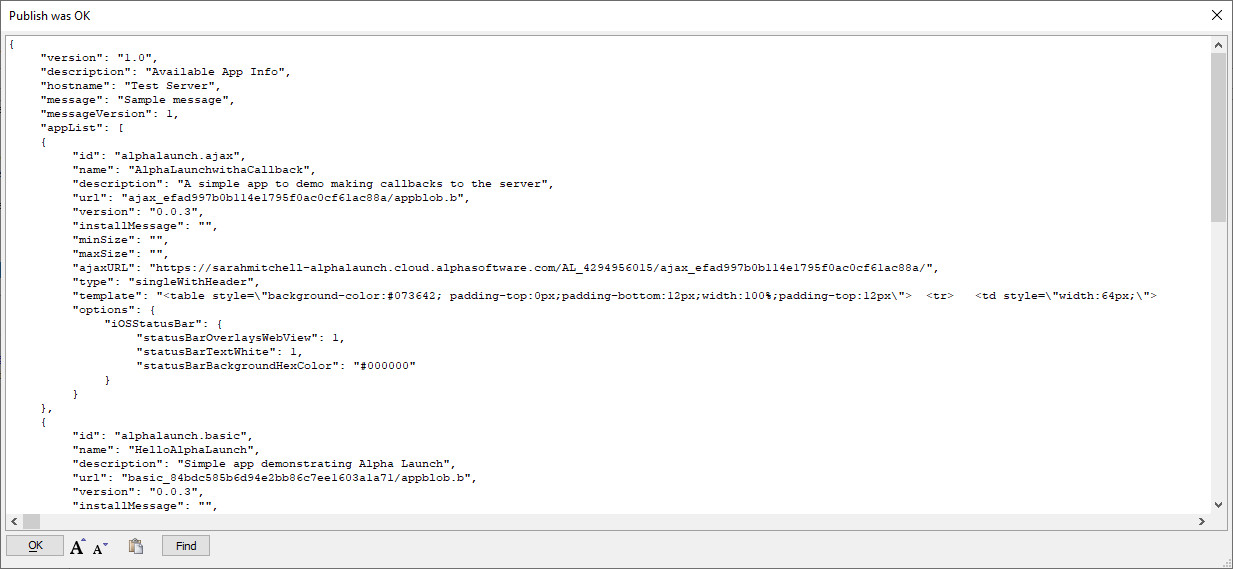
Once you have published your apps, you can register the server in Alpha Launch. Alpha Launch will contact the server to get a list of the available apps. You can then install your apps in Alpha Launch.
For instructions on how to register a server with Alpha Launch, see How to Register a New Alpha Launch Server.
Troubleshooting
The most common problem with Alpha Launch is that after you have published apps to your Alpha Launch server and you then go to Alpha Launch to install the apps you just published, the apps are not listed on the apps to Install screen. This cause of this problem is either the Application Server has not been started, or the Server Address (i.e. URL) that was entered in the Publish to Alpha Launch dialog was incorrect.
You can test if you entered a valid server address by going to a browser and entering the following URL into the browser
<server URL>/availableAppInfo.txt
For example, if your server URL was entered as:
http://192.168.70.157/AlphaLaunchDemo
You would enter this address into the browser address bar:
http://192.168.70.157/AlphaLaunchDemo/availableAppInfo.txt
If you do not receive a response, then it is likely that the server URL that you specified is incorrect.
App Install Errors
On some devices, an error can occur when installing an app from the Alpha Anywhere Classic Application Server (as opposed to the Alpha Anywhere Server for IIS or Alpha Cloud) if the app has a large number of files. The Classic Application Server limits the number of files that can be simultaneously served. On some devices, such as Android devices, the device tries to download all files simultaneously, exceeding the capacity of the Classic Application Server.
To resolve this issue, change the Download type to 'singleWithHeader'.
This error does not occur if you are using the Alpha Anywhere Application Server for IIS or Alpha Cloud.
The Download type option 'singleWithHeader' is only available for Alpha Launch V2.0.0.
For older versions of Alpha Launch, you can work around this problem by copying the folder that contains your app files to a bucket on Amazon S3. When configuring the Alpha Launch profile, set the Download location for the app to the URL of the S3 bucket to specify the application's files should be downloaded from Amazon S3 and not the Application Server.
Missing Files or Resources
If your application relies on external resources, such as other component files or static images in the workspace, they must be manually included using the Additional assets to include in Fileset option to ensure they are installed along with your main UX component. If dependencies are not included, they may manifest as a "file not found" error when Alpha Launch attempts to load them.
To resolve this issue, add the file using Additional assets to include in Fileset, increment your application version, and republish your Alpha Launch application.
Alpha Launch Methods
A5.shell.exitComponent()
Exit the app that is running an return to the Alpha Launch home screen.
if (A5.shell) {
    A5.shell.exitComponent();
}
A5.shell.getAppDir()
Returns the file URL of the local directory with the App's files.
if (A5.shell) {
    var appDir = A5.shell.getAppDir();
    alert(appDir);
}
A5.shell.getAppFileStorageDir()
Returns the file URL of the local directory where the application data files are stored (this is separate from other apps).
if (A5.shell) {
    var localDir = A5.shell.getAppFileStorageDir();
    alert(localDir);
}
Resources
Additional resources
- Name
- Description
- Alpha Launch Checklist
A checklist for deploying mobile applications to Alpha Launch.
- Publishing Alpha Launch Apps to Localhost for Testing
Alpha Launch applications can be published to and installed from the local area network running the development server. This is a useful technique for testing Alpha Launch applications.