How to Use the Report Editor
- Understanding the Report Editor
- Print Preview Toolbar
- Printing a Report
- Converting the Report to PDF
- Creating a New Report
- Adjust the Grid
- Removing the Report Header
- Inserting the Invoice Number Group
- Resizing the Group Header
- Placing Labels on the Group Header
- Placing Frames on the Group Header
- Placing Labels on the Frames
- Placing Invoice Header Fields on the Report
- Placing Billing and Shipping Fields on the Report
- Adding the Invoice Details
- Formatting Numeric Values
- Creating a Group Footer with Calculated Fields
Description
Reports are a versatile type of layout for printing data. Reports can order and select the record, group related records, and perform calculations. Report layouts can divide pages into columns, display graphics, and include page headers and footers.
Discussion
This article makes use of the AlphaSports sample desktop application. While the report being created is for a desktop app using sets, the concepts discussed here apply to any freeform reports.
Understanding the Report Editor
Open the AlphaSports sample database.
Display the Reports tab of the Control Panel.
Select "Customer List" and click Design.
The Report Editor will open and display the structure of the report, which is moderate complex, given that it has a continuation header and a group.
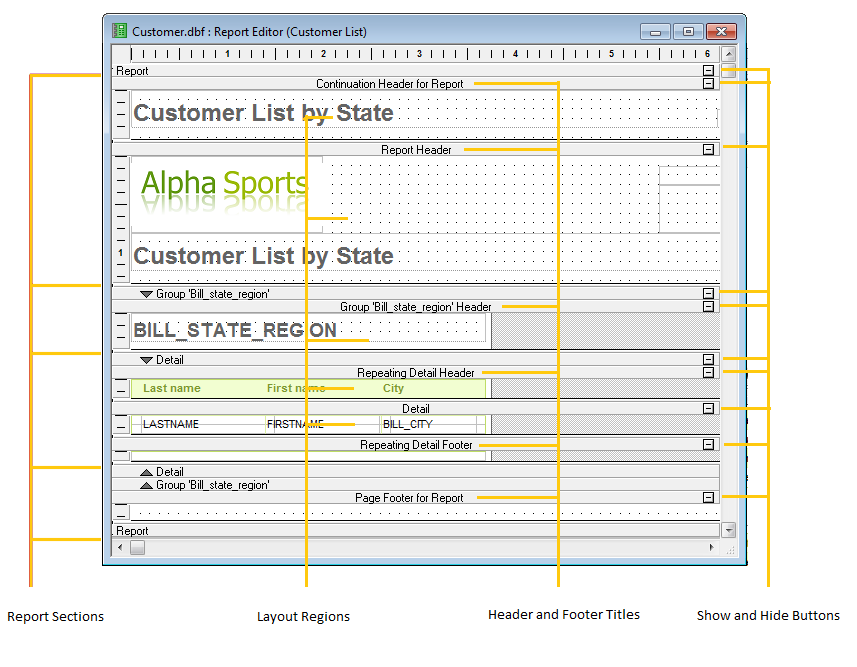
The Report Editor shows the division between sections and layout regions with section title bars. On each title bar there is a Show/Hide button which lets you toggle the appearance of the section.
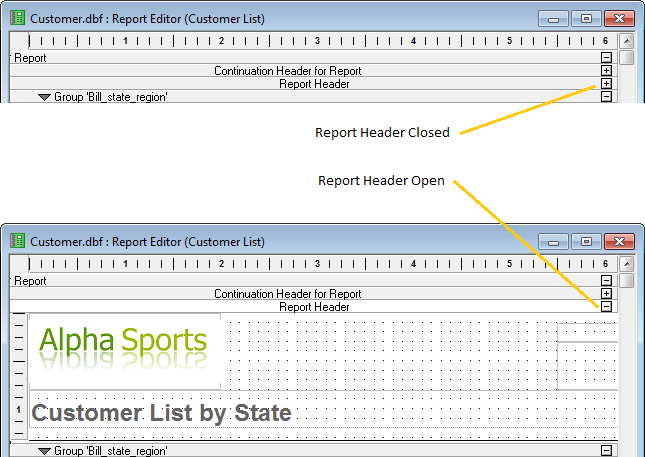
The Show/Hide buttons only control the Report display in the Report Editor. They do not affect the Report appearance when you print or preview it. You can also show and hide Report components by selecting Sections, Titles, or Regions from the View menu.
Print Preview Toolbar
On the Report Editor toolbar, click the Print Preview button to preview your Report. You can navigate in the Preview window, using the Print Preview toolbar.
Printing a Report
Select File > Print..., or click  on the toolbar to display the Print dialog box.
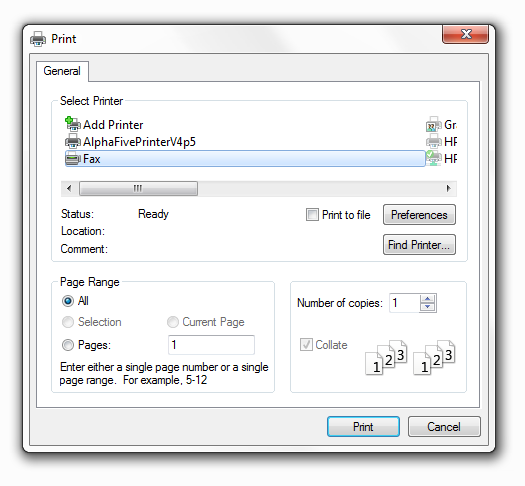
Use the Print dialog box to specify a printer, range of pages, and number of copies to print.
Converting the Report to PDF
You can convert your report to an Adobe Acrobat Portable Document Format (PDF) file to distribute to others. Anyone who has the Acrobat Reader, which is free and widely distributed, can read the PDF file.To print a report to a PDF file:
With the Customer List report in the Report Editor, click the Print Preview button. The report appears in the Print Preview window.
Click
 on the toolbar. Select "Adobe Acrobat PDF File" for the file format and click OK. Alpha Anywhere converts the report to PDF format, and displays the report in the Adobe Acrobat Reader. Alpha Anywhere assigns the new PDF file the same name as the report, with a PDF extension.
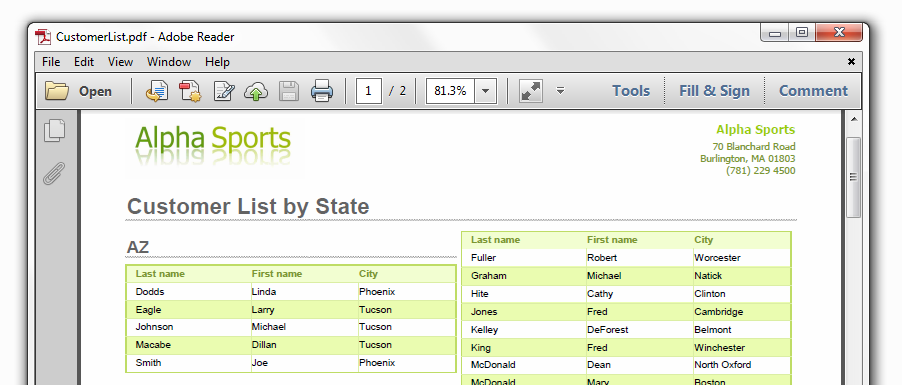
To convert a report to PDF and email it:
Click
 on the toolbar. Select "Adobe Acrobat PDF File" for the file format and click Send. Alpha Anywhere saves your report in PDF format, opens your email program (or the built in email dialog), and attaches the PDF file to a new email message.
Address the email and click Send.
Sending a report via email using this method is only supported in desktop applications.
Creating a New Report
This procedure describes the creation of an Invoice report similar to the report found in the AlphaSports sample database.
Open the AlphaSports sample database.
Display the Reports tab of the Control Panel.
Click New. The New Report dialog appears.
Select "Invoice.set" as the data source.
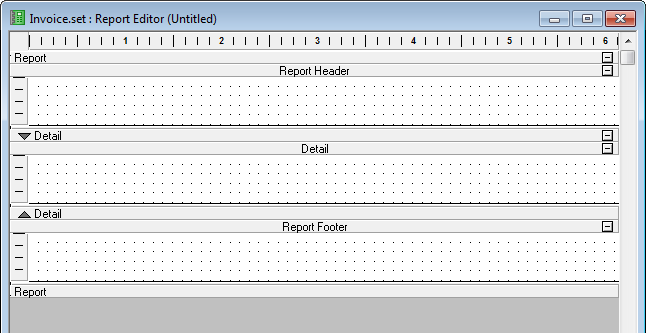
Select "Start from a blank free-form Report", and click OK. A new, blank report appears in the Report Editor with three empty report sections.
Adjust the Grid
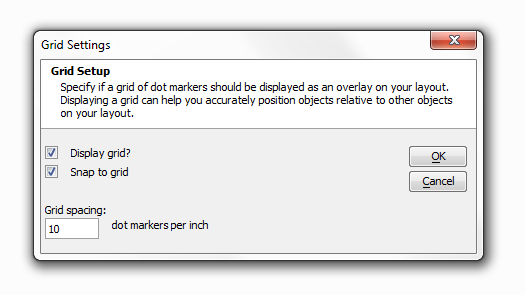
Because of the tight spacing of this report, it is useful for the grid to have a smaller spacing. Select Report > Grid... to display the Grid dialog. Click the down arrow to change the spacing to .0833 inch.
Removing the Report Header
Because this report is actually a series of invoices, which will be separately sent to different customers, there is no need for a report header or title.
Click the topmost horizontal bar labelled "Report" in the Report Editor.
Right click on the bar to show the right click menu.
Clear the Report Header check.
Clear the Report Footer check.
Inserting the Invoice Number Group
Select Report > Insert Group Break to display the New Group Properties dialog.
On the Group tab select "Invoice_Number" from the Break on change in list.
On the Region tab select "Keep group together on page".
Click OK to continue.
Resizing the Group Header
Right click on the white space of the layout area of the group header.
Select Properties... .
Display the Region tab.
Set the Height to 4.3 inches.
Click OK to continue.
Placing Labels on the Group Header
If the toolbox is not visible, click
 on the toolbar.
Select the
 Rich Text tool and draw a rectangle across the top of the group layout area.
1. Type the following text into the new RTF label.
Alpha Sports
83 Cambridge Street
Burlington, MA 01803
(781) 229 4500
2. If the Text Toolbar is not visible, click
 .
.3. Select the text in the RTF label and click
 and
and  .
.4. The rectangle should have a height of .75 inches, width of 7.5 inches, a left position of 0, and a top position of 0. You can check this by looking at the Dimensions tab of the label's Properties dialog.
Select the
 Text tool and draw a rectangle across the middle of the group layout area. The text is "Invoice".
Right click on the text label and open its Properties dialog.
On the Alignment tab select Horizontal Left and Vertical Bottom.
On the Border tab select "Single Line" in the Border Style list and clear the Left, Right, and Top check boxes.
On the Font tab select "Arial" in the Face list, "18" in the Size list, and select the Bold checkbox.
On the Dimensions tab set the height to .44 inches, width to 7.5 inches, left position to 0, and top position to 1.25 .
Create another text label. The text of the label will be "Description". The alignment will be left and bottom. It will have a single line border only on the bottom. The font will be Arial, 10 point, and bold. the position will be height 0.2, width 4.15, left 0.1, and top 4.
Placing Frames on the Group Header
Select the
 Frame tool and draw a rectangle across the middle of the group layout area.
Display the frame's Properties dialog box.
Select Allow growth when printing on the Setup tab.
Select "Single Line" in the Border Style list on the Border tab.
On the Dimensions tab:
1. Set Left to .0625
2. Set Top to 1.9375
3. Set Width to 2
4. Set Height to 1.6875
Click OK to continue.
De-select the new frame.
Switch to the Selection Tool
 on the Toolbox.
Select the new frame, right click and select Copy.
Right click on the group layout area and select Paste.
Display the frame's Properties dialog box.
On the Dimensions tab:
Set Left to 2.125
Set Width to 2.625
Copy and paste this frame to create another frame.
On the Dimensions tab set the width to 2.5875 inches, and left position to 4.8125.
Select the 3 frames in sequence from left to right.
Select Arrange > Align Positions > Top.
Select Arrange > Align Sizes > Height.
Deselect the three frames.
Placing Labels on the Frames
Select the Text tool and draw a rectangle across the middle of the group layout area. The text is "Invoice".
Copy and paste this text label. Change the text of the label to "Billing". The position will be left 2.1875.
Copy and paste this text label. Change the text of the label to "Shipping". The position will be left 4.875.
Select the 3 text blocks in sequence from left to right.
Select Arrange > Align Positions > Top.
1. Right click on the text label and open its Properties dialog.
2. On the Alignment tab select Horizontal Left and Vertical Top.
3. On the Border tab select "Solid" in the Fill Style list.
4. Select "White" in the Fill Foreground Color list.
5. On the Font tab select "Arial" in the Face list, "10" in the Size list, and select the Bold checkbox.
6. On the Dimensions tab set the height to .1875 inches, width to .625 inches, left position to .125, and top position to 1.8125.
Placing Invoice Header Fields on the Report
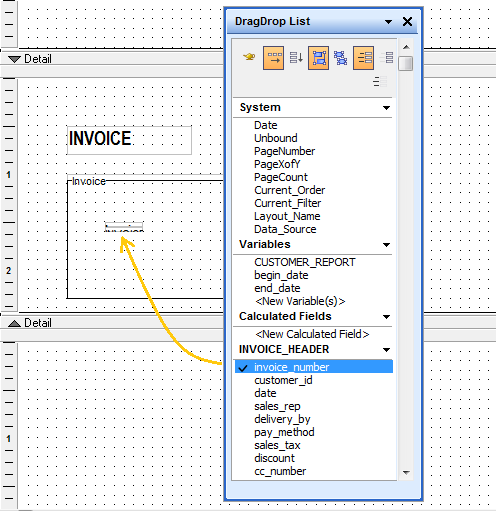
You use the Drag-and-Drop List to insert field objects in the report layout areas. When you select a field to insert in the report and drag it to the report section, an object frame appears as you drag the field onto the report.
The Drag-and-Drop List window contains a genie button  that is on by default. When the genie button is on, a Summary Field Genie appears that lets you perform a summary calculation for a single field which you are adding to the layout.
If you do not want the Summary Field Genie to appear, click the genie button in the Drag-and-Drop List window, to turn it off.
When adding multiple fields, the Summary Genie does not appear. Also, when adding multiple fields, you can specify their alignment as vertical or horizontal by clicking the appropriate layout button in the Drag-and-Drop List window.
 Place labels above fields
 Place labels to the left of fields
After you have placed fields on the report, you can change the style, appearance, and other attributes of the fields.
Push the Vertical alignment button in the Drag-and-Drop List window
down so that the Horizontal alignment button pops up.Select [fieldTitles] Fields with Titles. When you place fields on a layout, the titles may be grouped with the fields. In some cases this is convenient.
Select [noGroup] Don't Group Controls to prevent titles and fields from being grouped together.
Drag the Invoice_Header Invoice_Number field into the Invoice frame.
When the Summary Genie appears, click OK.
Repeat this process and place these fields under Invoice_Number : Date, Sales_Rep, Delivery_By, Pay_Method, and Customer_Id.
Select the top-most label, which should be "Invoice Number", and use the cursor keys to position it.
Use the cursor keys to position "Invoice Date" under "Invoice Number". The goal is to establish a spacing between the fields that will all 6 fields to comfortably fit within the frame.
The labels will probably not be aligned. SHIFT select all 6 labels from top to bottom, then click Arrange > Align Positions > Right. Note, it is important to select the labels in the order that you want them to appear from top to bottom.
While the labels are still selected, click Arrange > Align Spaces > Vertical.
SHIFT select all 6 fields from top to bottom, then click Arrange > Align Positions > Left.
Select each label and then select the corresponding field. Click Arrange > Align Positions > Top.
Double click each label and modify its text and width so it matches the picture below.
Reduce the sizes of the largest label and largest field, so that it fits inside the frame.
Use the Select Arrange > Align Sizes > Width function to make the other labels and fields match.
Placing Billing and Shipping Fields on the Report
Select the
Rich Text tool and draw a rectangle inside the billing frame. The Text Toolbar will appear.Drag the Firstname field from the Drag-and-Drop List window into the new field. Add a space character, then drag the Lastname field onto the same line. Press SHIFT + ENTER to start a new line.
Drag the Company and Bill_Address_1 fields from the Drag-and-Drop List window. Follow each field with a line break.
Click Insert... on the Text Toolbar to display the RTF Insert Command dialog.
Click If... to display the Insert If.. Expression dialog.
Enter the following expression into the Logical Expression control and click OK.
alltrim(Customer->Bill_Address_2) <> ""
Insert a CR-LF before the "Endif" so the field looks like this.
FIRSTNAME LASTNAME↲
COMPANY↲
BILL_ADDRESS_1↲
If alltrim(Bill_Addr...↲
Endif
Drag the Bill_Address_2 field to the empty line before the "Endif". This expression specifies that the Bill_Address_2 field will appear only if not empty.
Add the Bill_City, Bill_State, Bill_State_Region, Bill_Postal_Code, and Bill_Country fields into the RTF control, so it looks like the following.
Duplicate the Rich Text object for the Billing frame and paste it into the Shipping frame.
The Shipping address can be either the Billing address or a separate Shipping address. Therefore, the Shipping address Rich Text control needs to use the Billing address if the Shipping and Billing address are the same. In the new Rich Text object, select all of the text after "COMPANY" and select Insert... > If...
Click the [xy] button for the Logical Expression field and enter the following into the expression builder and click OK:
Customer->Ship_Same = .T.
Click OK to generate the IF condition. The Billing address details should be placed inside the If...Endif conditions (shown below)
FIRSTNAME LASTNAME↲
COMPANY↲
IF Ship_Same = .T.↲
BILL_ADDRESS_1↲
If alltrim(Bill_Addr...↲
BILL_ADDRESS_2↲
Endif↲
BILL_CITY, BILL_STATE_REGION↲
BILL_POSTAL_CODE↲
BILL_COUNTRY↲
Endif
Add a newline after "BILL_COUNTRY" and insert an Else condition using Insert... > "Else"
Drag the SHIP_ADDRESS_1 from the DragDrop List and place it after the "Else".
Click If... to display the Insert If.. Expression dialog. Enter the following for the Logical statement:
alltrim(Customer->Ship_Address_2) <> ""
Drag the SHIP_ADDRESS_2 from the DragDrop List and place it in the new If condition.
Add the SHIP_CITY, SHIP_STATE, SHIP_STATE_REGION, SHIP_POSTAL_CODE, and SHIP_COUNTRY fields into the RTF control, matching the layout used for the Billing address (shown below).
FIRSTNAME LASTNAME↲
COMPANY↲
IF Ship_Same = .T.↲
BILL_ADDRESS_1↲
If alltrim(Bill_Addr...↲
BILL_ADDRESS_2↲
Endif↲
BILL_CITY, BILL_STATE_REGION↲
BILL_POSTAL_CODE↲
BILL_COUNTRY↲
Else↲
SHIP_ADDRESS_1↲
If alltrim(Ship_Addr...↲
SHIP_ADDRESS_2↲
Endif↲
SHIP_CITY, SHIP_STATE_REGION↲
SHIP_POSTAL_CODE↲
SHIP_COUNTRY↲
Endif
Adding the Invoice Details
Each item in the Invoice needs to be included in the report. The Detail section is where individual records are added to a report.
Drag and drop the following fields from Invoice_Items into the Detail section: product_id, price, quantity, and extension.
Delete the label for the product_id.
On the Dimensions tab in the Properties dialog for product_id, set the following:
Set Left to 0.1
Set Top to 0.
Set Width to 4.15
Set Height to 0.187
Move the labels for price, quantity, and extension into the "Group 'Invoice_number' Header".
Turn on the [copyprop] copy format toolbar. Select the Description text control and click the [copyprop] Copy appearance button to copy the controls appearance.
Select the price, quantity, and extension labels and click the [pasteprop] Paste Appearance button. This will style the labels to look like the Description text control.
With the price, quantity, and extension labels selected, click the [right] Align Right button in the Text toolbar.
Open the properties for the price label and set its Dimensions to the following:
Set Left to 4.25
Set Top to 4
Set Width to 1
Set Height to 0.2
Open the properties for the quantity label and set it Dimensions as follows:
Set Left to 5.25
Set Top to 4
Open the properties for the extension label and set it Dimensions as follows:
Set Left to 6.25
Set Top to 4
Select the price, quantity, and extension lables in the order specified. Use the Arrange menu > Align Sizes > Both function to make the three labels the same size.
Select the PRICE field in the Detail section. Open the properties for the PRICE field and set its Dimensions to the following:
Set Left to 4.25
Set Top to 0
Set Width to 1
Select the QUANTITY field in the Detail section. Open the properties for the QUANTITY field and set its Dimensions to the following:
Set Left to 5.25
Select the EXTENSION field in the Detail section. Open the properties for the EXTENSION field and set its Dimensions to the following:
Set Left to 6.25
Select the PRICE, QUANTITY, and EXTENSION field in the Detail section in the specified order (select the PRICE field first.) Use the Arrange menu > Align Sizes > Width function to make the fields the same width.
With the three fields still selected, use the Arrange menu > Align Positions > Top to align the controls with the top fo the PRICE field.
Right click on the Detail band to open the context menu for the Detail section and select Properties....
On the Region tab, set the Height to 0.2.
Formatting Numeric Values
The PRICE and EXTENSION fields both contain numeric values that should be formatted to display as currency. This is done by setting the format.
Select the PRICE field. Open the Properties and set the Format to the following:
Set Width to 16.
Set Decimal Places to 2.
Set the Format Style to "$123,456.78".
Select the EXTENSION field. Open the Properties and set the Format to the following:
Set Width to 16.
Set Decimal Places to 2.
Set the Format Style to "$123,456.78".
Creating a Group Footer with Calculated Fields
Next, a footer containing the sub-total, sales tax, discount, and total information for the invoice needs to be added. This will require creating four calculated field expressions to compute the totals, discounts, and sales tax.
Right click in the Group 'Invoice_number' Footer area and select Properties... from the context menu. Set the Height to 1.0 on the Region tab.
Add the DISCOUNT and SALES_TAX fields from the list of fields under INVOICE_HEADER.
Right click on the DISCOUNT field and select Properties from the context menu. On the Format tab, set the display format to "123,456.78%".
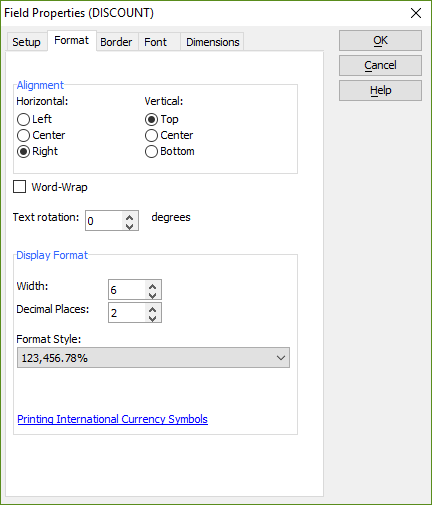
Repeat the previou step for the SALES_TAX field to set the format to "123,456.78%".
Next, you will create four calcluated fields to display the sub-total, discount amount, sales tax, and grand total. Click and drag <New Calculated Field> into the Group 'Invoice_number' Footer from the Cacluated fields in the DragDrop List.
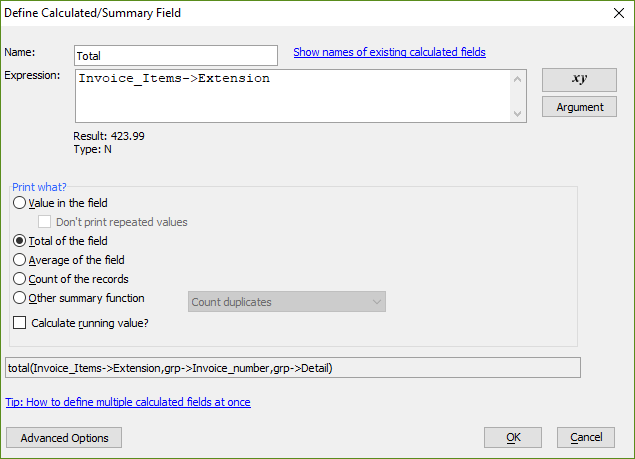
Name the calculated field "Total".
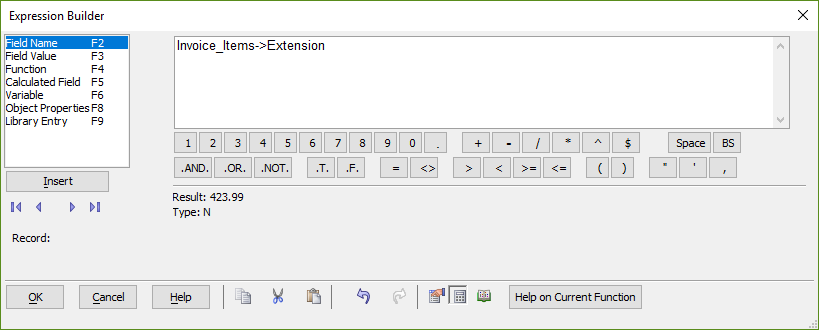
Click the xy button to open the expression builder. Insert the "Extension" field into the expression builder. Select Field Name and click the Insert button.
Select the Invoice_Items table from the Table Name column. Select "Extension" from the list of fields and click Insert.
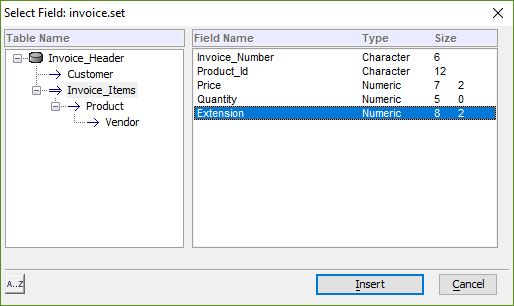
Click OK to save the expression and return to the Define Calculated/Summary Field dialog.
In the "Print What?" section of the dialog, select Total of the field. This directs Alpha Anywhere to sum the total of all Invoice_Items records in the Detail section, creating a subtotal for the invoice. Click OK to create the calculated field.
See Also