Web Application Security Guide
Description
The Web Security Framework easily adds a sophisticated security system to any web application running on the Alpha Anywhere Application Server.
Overview
The Web Security Framework is integrated into the Alpha Anywhere Application Server. When the security framework is turned on, the server automatically checks every requested page or file for proper security clearance from information saved in memory. The server checks the page or file permission and will return the requested file if it is permitted within the security framework for the project containing the file. If the page or file is not allowed, the server automatically checks the security configuration to determine the proper response.
This process is repeated for every page and file request, including images, CSS style sheets, and JavaScript files. If a field on a component is not available to the user, the Application Server will remove it from the component on the page returned to the user. If a menu entry is not available to the user, its link will be disabled.
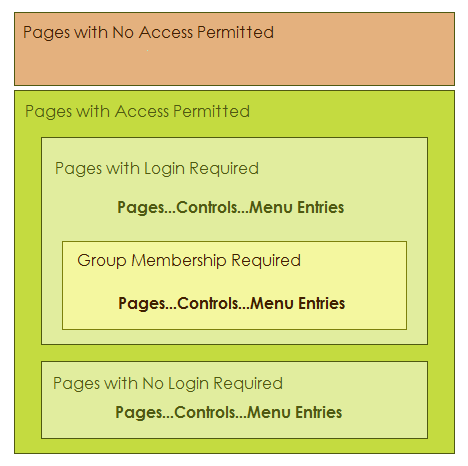
The following picture shows how the security framework categorizes pages, controls on grid and dialog components, and menu entries. Any page can be in one of three categories:
no access permitted
access without login
access after login and appropriate group membership.
Access to menu entries and controls (on any page that requires login) can further require appropriate group membership.
There are a number of easy to use dialogs available to configure the security for a project. When a project is initially created there are no security files. The top menu on the Web Projects Control Panel has a Web Security Button. Open the Security Settings dialog, where various security options can be assigned. You must have at least one page defined in the project to build the security settings. The other menu options are disabled until these security settings have been defined. The Security Settings dialog has many options to configure the web security or turn it off completely. Some of these options include requiring a password, configuring user ID and password validations, determining how to respond to an incorrect login, allowing the user to change their password, user id and password recovery, and many other options.
After you have defined all desired security parameters, you may build a login component. After you build the login, you may add it to a page. As with other components, parameter overrides on the page may modify the component's messages and style sheet(s). All of the code to validate the user and respond to the login actions is included within the component. The developer does not have to add any code to any page to implement security. Since the login page may not have existed prior to setting the initial security parameters, reopen the Security Settings dialog and add the login page name to the redirect options desired. You can open the Users and Groups dialog to define the users and groups. The fields shown when entering or editing users are determined by the security parameters selected. Not all possible fields may be shown. The security system includes an option to activate a special field named 'ulink'. The value entered in the 'ulink' field can identify a related user record in an external table. There are options on the dialog to import user information from existing tables or export security data to an external table. The users, groups, and permissions tables are defined and controlled by the security system.
The next dialog in the security system is the Page Security dialog The Page Security option on the Web Security Menu dialog to open the Page Security dialog. This genie assigns permissions for all pages within the project. Pages may be always allowed or require a login. If any page requires a login, you must assign one of more groups to it. Some pages may not have any assess defined. The server will automatically deny or allow these pages, based on the project's security configuration. After configuring the page assignments, you may publish the page security file from the menu or from the Web Projects Control Panel. After you have defined and published the Security Settings, Login component, Users and Groups, and Page Security, the security system is ready to go. The server that contains the published files will automatically check all page and file requests for proper security clearance. If you make a change to any of the configuration options and republish the security files, the next page request will automatically use the new settings.
Implementing Security
You should following this sequence when implementing the security framework.
Enable the Security Framework at the Application Server Control Panel
Create a page or some pages that users can access.
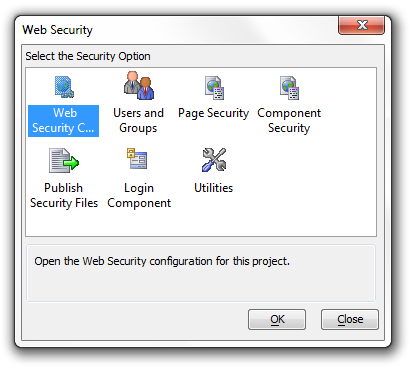
Display the Web Projects Control Panel and click the Web Security button at the top right to display the Web Security Menu dialog. The button should have a little key image next to it.

Select Web Security Configuration and click OK to display the Security Settings dialog. Select the security options that you want to use.
Create a Login Component and a Login page.
Select Web Security Configuration and click OK to display the Security Settings dialog. Add the name of the login page to the correct redirect settings
Return to the Web Security dialog, then select Users and Groups to open the Web Users and Groups dialog. Create users, create groups, assign user IDs, passwords, and group membership to your users.
If you wish to be able to add users through a web page, create the dialog component and control. How to add users to a web component is covered in more detail under Users.
Return to the Web Security dialog, then select Page Security to open the Page and Folder Permissions Dialog. Define which pages are not accessible, which will be available to all, and which require a login.
Return to the Web Security dialog and then select Publish Security Files to open the Publish dialog and publish you work.
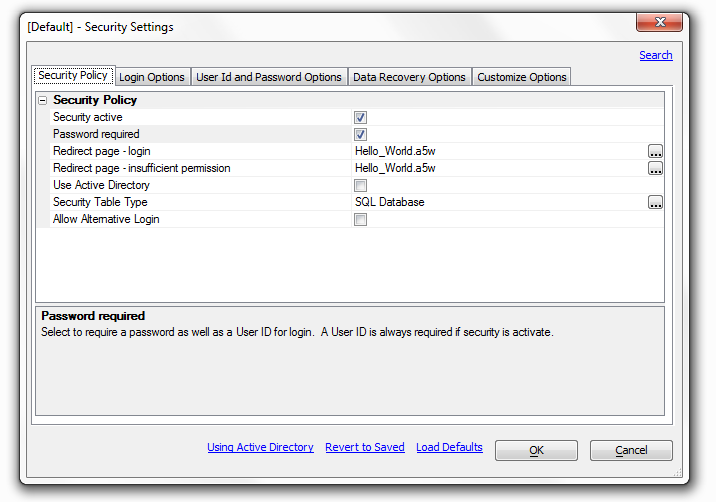
Security active
If security is not activated, all objects and actions will be available to all users without restriction. If security is active, the security system is based on membership in a group.
Password Required
Select to require a password as well as a User ID for login. A User ID is always required if security is active. If you check this box you can set password options under the 'User Id and Password Options' tab.
Redirect page
login. This is the name of the page to go to if login is required to access a selected page. This would normally be the login page, or a menu or index page. If you do not have a page designated you can type one in here
Redirect page - insufficient permission.
If a logged in user does not have permission to access a selected page they will be redirected to this page. If this page is not specified, they will be redirected to the page specified for login.
Use Active Directory
Select this option if you want to use Active Directory for security data on your production server. See "Using Active Directory" link at the bottom of the dialog for more information.
Checking the User Active Directory will change the 'Security Table Type' setting to 'Security Table Type for Development and Testing'. Checking this box will also remove the 'Data Recovery Options' tab from the top of the Security Settings dialog box. It will truncate the setting options that are available under 'User Id and Password Options' tab and the 'Customize Options' tab.This feature is not available in Alpha Anywhere Community Edition.
Security Table Type for Development and Testing
Select the database type for storing the web security data that will be used during development and testing of the application. The database can be a SQL database, a SQL database from another project, or DBF tables. You will be prompted when you save and close the web security dialog to configure the connection string for the selected table type.
This feature defaults to local DBF tables in Alpha Anywhere Community Edition.
Selecting Data Type for Storing Security Data
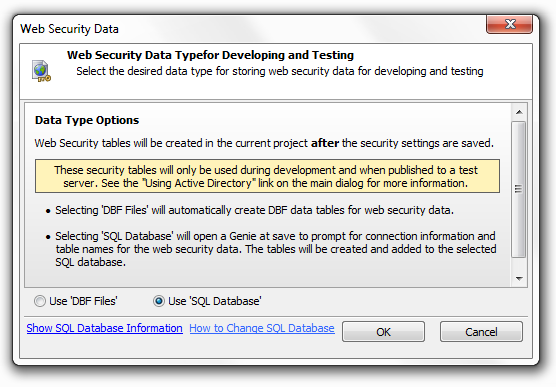
Security Table Type
As long as the 'Use Active Directory' Setting is not checked this option will remain open. Select the data for storing the web security data. If the type is changed from 'DBF Files' to 'SQL Database', a genie will open when the security settings are saved to set the connection to the SQL database and define the tables construct. If the type is changed from 'SQL database' to 'DBF Files', a prompt will display on save to confirm the conversion.
This feature is not available in Alpha Anywhere Community Edition. Community Edition only allows apps to be published to Alpha Cloud. Local DBF tables are used for testing security in Community Edition applications in the development environment.
Use DataLink File
A special encrypted single DataLink file is used to store all of the connection data needed to connect to the defined back-end SQL security tables. This file is named 'DataLink.SecuritySettings' and will always be included in every publish with other security settings files. Active Link tables for security are not used with this option and will be removed from the web project when the 'Use DataLink File' option is selected. If the DataLink option is not selected or removed, the original Active Link tables will be recreated as required.
When a DataLink file has been published, the original security Active Link files named 'websecurity_*.*' will not be used and can can be deleted from the published web project. A published application will always use the DataLink.SecuritySettings file if it exists.
This feature is not available in Alpha Anywhere Community Edition.
Allow Alternative Login
The 'Use Active Directory' Setting must be unchecked to see this option. Allow alternative login allows the use of an alternative login method to authenticate and login the user; such as Google. If you click the check box next to this option two more settings appear below it.
Automatically Add Authenticated User to Security
An authenticated user can automatically be added to the system if they do not already have a security record. In the case where the user's identifier from the external authentication system does not meet the userId configuration requirements in the security system, a unique user id will be generated using the user identifier. If the user information is accepted, they will be logged into the system when the information is saved.
Automatically Link to Existing User Security Account
If checked, when a new user is added, the authenticated user account will be linked to an existing security account if it has the same user identifier as supplied by the external authentication service (e.g. an email address.) This option is only available if Automatically Add Authenticated User to Security is enabled.
After login Event
The 'afterLogin' event fires after a user has successfully been logged in using an external authentication method. This event includes variables available after login.
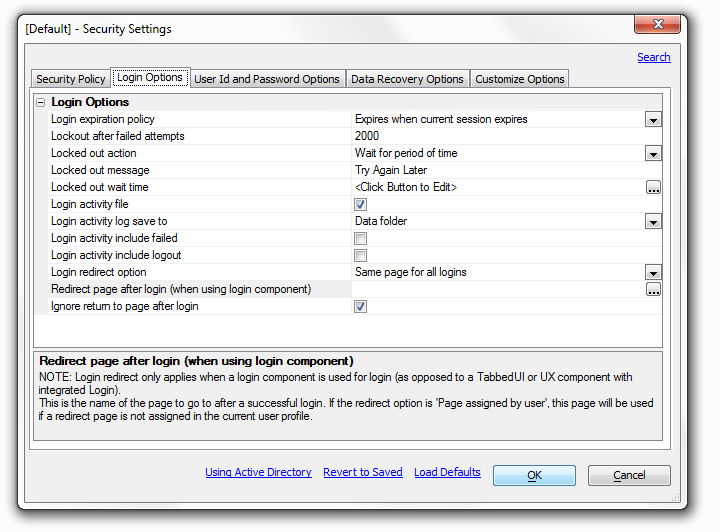
Login expiration policy
Policy to set the maximum login time period. All options other than 'Expires when current session expires' require the use of a cookie. If the user does not have cookies enabled, they will be logged out when the session expires.
Lockout after failed attempts
The number of times a user can try to login unsuccessfully before they are locked out of the application. Set to 0 to allow unlimited attempts.
Locked out action
The action that should be taken if a user is locked out of the system.
'Wait for period of time' will require the user to wait a specified time until they are allowed to login with the same User ID.
'Redirect to another page' Will send them to another page.
'Lockout user until reset by administrator' will lock out the User ID until lock is manually released.
Locked out message
Message to show the user during login to indicate they are locked out of the system.
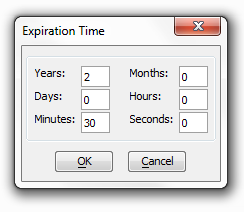
Locked out wait Time
Click on the box with three dots to the right and the Expiration Time dialog box will load. This allows you to set the locked out wait time.
Login activity file
When enabled this will save all login activity to a text file in the specified folder. If you click the checkbox, three option will appear below the login activity file in the list.
'Login activity log to save to'
Folder where activity log file will be saved. Select 'User defined function' to enter your own code to process log activity data. The 'Data folder option' does... and the 'Project Target Folder' does...
'Login activity include failed'
When enabled, all failed attempts to log in will be recorded in the login activity log. If not checked, only successful logins are recorded in the log file.
'Login activity include logout'
When enabled, any user logged out by the 'a5ws_logoutuser()' function will be recorded in the login activity log. No log entry will be created if no one is logged on when the log out function is called.
Login redirect option
Note: Login redirect only applies when a login component is used for login. This determines the action to take after a successful login. Select,
'Current page'
if the user should stay on the page containing the login component.
'Same page'
for all logins' to send all users the same page after login.
'Page assigned by user profile'
to allow setting a specific page in the user profile.
Redirect page after login (when using login component)
This is the name of the page to go to after a successful login. If the redirect option is 'Page assigned by user', this page will be used if a redirect page is not assigned in the current user profile.
Login redirect only applies when a login component is used for login (as opposed to a Tabbed UI or UX component with integrated Login).Ignore return to page after login
When a person attempts to open a page or component for which they do not have permission, they are redirected to the login page. The default action is to always redirect to the page specified by the 'Login redirect option' and the 'Redirect page after login (when using login component)'. Uncheck this to return to the previous page. This option is automatically checked if component security is active.
Login redirect only applies when a login component is used for login (as opposed to a Tabbed UI or UX component with integrated Login).
User Id and Password Options
Overview
'The User Id and Password Options' tab presents you with a list of optional settings for both of these topics. To make the Password Option Settings visible it check the 'Password required' box under the 'Security Policy' in the Security Settings dialog.
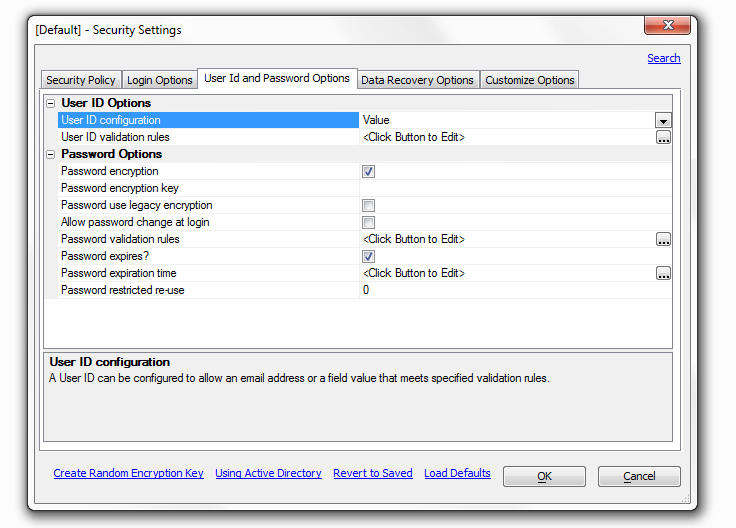
User ID Options
User ID configuration
A user id can be configured to allow an email address or a field value that meets specified validation rules. Whichever of these is selected will determine which option appears below.
User ID error message
This option is present when 'Email Address' is selected on the drop down list in the 'User ID configuration row above it. By default it is set to read 'Not a valid E-mail address' but you can customize the error message to you liking.
User ID validation rules
This setting appears when the User ID configuration is set to Value. You can use it to specify rules to test if the value for a user id is in fact valid. Click the box to the right and the User ID Validation dialog will appear. This allows you to set a specific value to be tested and to write a customized error message for cases in which the value of the user id is not valid.

Password encryption
Allows password data to be encrypted prior to saving in the user table. If you check this box a setting for a 'Password encryption key' setting and a 'Password use legacy encryption' setting will appear below it.
Password encryption key
This option only appears once the 'Password encryption' box above it is checked. Enter the key to use to encrypt all passwords. A key is required if encryption is selected. The key must be a minimum of 8 characters in length and a maximum of 64 characters in length. The key can use characters, numbers, and special characters.
Password use legacy encryption
Select to use the legacy encryption used by Alpha Five versions before Alpha Anywhere for new passwords
Allow password change at login
Allows the user to change their password at login when using the login component.
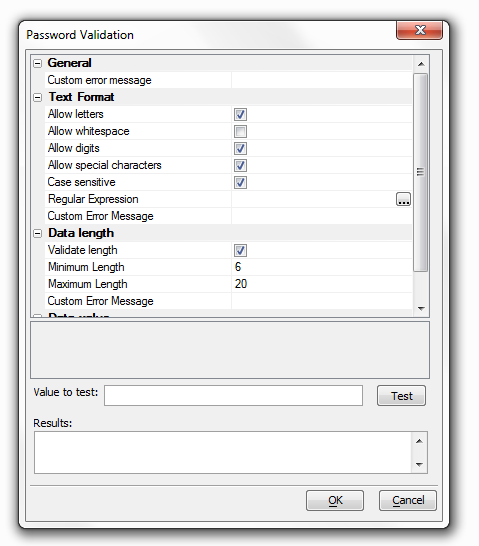
This option is only used by the login component.Password validation rules
Specify rules to test if the value for the password is valid. Click the button to the right to edit rules and a dialog entitled 'Password Validation' will appear.
Password expires?
Allows setting an expiration time for a password. A new password must be entered when the current password expires. If you check this box a setting for a 'Password expiration time' option will appear below it.
Password expiration time
The period of time a password will be active before it automatically expires. The expiration is re-calculated when a new password is entered. The default expiration time is one year. Password restricted re-use - The number of old passwords that are saved in a restricted list and can not be re-used. A value of 0 will allow any password to be re-used without restriction. A value of 1 will only require that a new password does not match the current password.
Overview
The 'Data Recovery Options' tab appears as long as the 'Use Active Directory' box under the 'Security Policy' tab on the Security Settings dialog is not checked. Generally speaking this option is not recommended.
Allow user ID recovery
Allow the user to recover their User ID if they have lost it.
Data required for recovery
The information that must be entered to identify the user to recover the User ID. From the drop down you can select either a 'Valid Email Address' or a 'Valid Email Address & Security Question'. If you select the latter of the two, a setting for 'Security questions will appear at the bottom of the page.
Lost password action
Allow the user to recover or reset a lost password. If 'reset' is selected, the system will automatically generate a new random password that meets the password validation rules. Normally the drop down next to 'Lost password action' is set to 'Not Allowed'. If you select 'Reset password' or 'Recover password' from the drop down the 'Data required for password reset or recovery' option should open underneath the 'Lost password action' option.
Data required for password reset or recovery
This option appears if 'Recover Password' or 'Reset Password' are selected in the 'Lost password action' drop down list. The data required for password reset or recovery is the information that must be entered to identify the user to recover or reset the password.
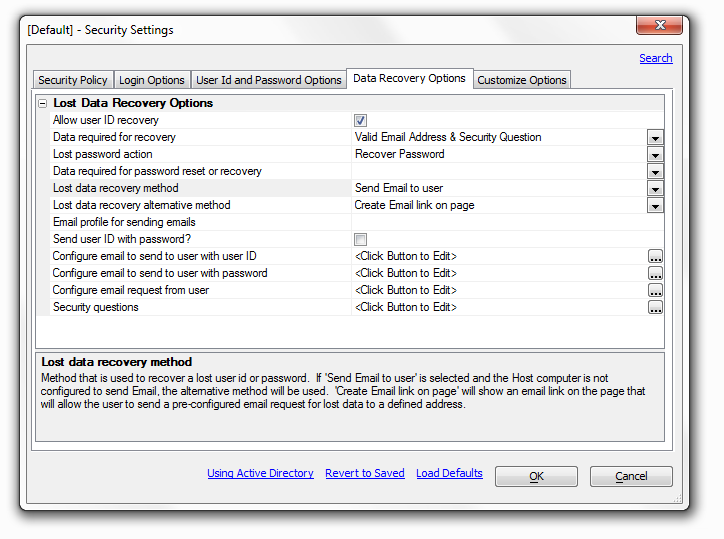
Lost data recovery method
This is the method that is used to recover a lost id or password. There are three options in the drop down list to the right, 'Send Email to user', 'Create Email link on page', and 'Show on Screen'
If 'Send Email to user' is selected five additional option settings will open below it in the Lost Data Recovery Options list. These include a 'Lost data recovery alternative method', an 'Email profile for sending emails' option, a 'Send user ID with password?' option, a 'Configure email to send to user with user ID option, and a 'Configure email to send to user with password' option. If 'Send email to user' is selected and there is no Host computer configured to send Email, the alternative method will be used.
'Create Email link on page' will show an email link on the page that will allow the user to send a pre-configured email request for lost data to a defined address. It will also open a 'Configure email request from user' option underneath it. that will create an email request from the user.
Lost data recovery alternative method
This is the method that will be used to recover a lost user id or password if 'Send Email to user' is selected and the Host computer is not configured to send email. If you select 'Create Email link on page' in the drop down list to the right a 'Configure email request from user' option will appear. In short, this will allow the user to send a pre-configured email request for lost data to a defined address.
Email profile for sending emails
Enter the name of an email profile that is configured on the application server in the published location. If no profile is specified, the send email process will attempt to use the current active email profile on the server. If the profile specified is invalid or not found on the server, the alternate recovery method will be used. This option appears if the 'Lost data recovery method' is set to 'Send Email to user'.
Send user ID with password?
Should the lost data recovery Email being sent to the user include both their User ID and their Password in the same message? If not selected, 2 emails will be sent if the recovery process was used to find their User ID. If checked, the 'Configure email to send to user with user ID' setting, directly below this option, will change to 'Configure email to send to user'. The 'Send user ID with password?' option should show up when the 'Lost data recovery method' is set to 'Send Email to user'
Configure email to send to user with user ID
This is the Email configuration to create an email to send to the listed Email address for the user. The Host computer MUST be configured to send email. The email will only contain the User ID and will be used if the user is requesting a lost User ID. This option appears if the 'Lost data recovery method' is set to 'Send Email to user' and the Send user ID with password? box is not selected.
Configure email to send to user with password
This is the Email configuration to create an email to send to the listed Email address for the user. The Host computer MUST be configured to send email. The email will only contain the password and will be used only if the user is requesting a lost password. The 'Configure email to send to user with password' option appears if the 'Lost data recovery method' is set to 'Send Email to user'.
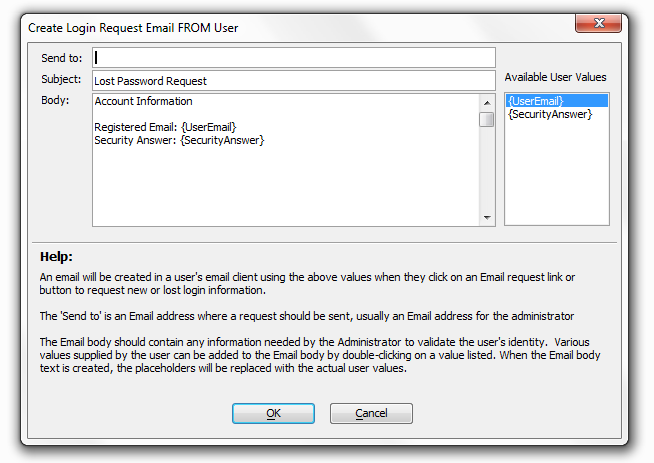
Configure email request from user
This option will appear when the 'Lost data recovery method' is set to 'Create Email link on page' or, alternatively, when the 'Lost data recovery method' is set to 'Send Email to user' and the 'Lost data recovery alternative method' is set to 'Create Email link on page'.
The configure email request from user dialog
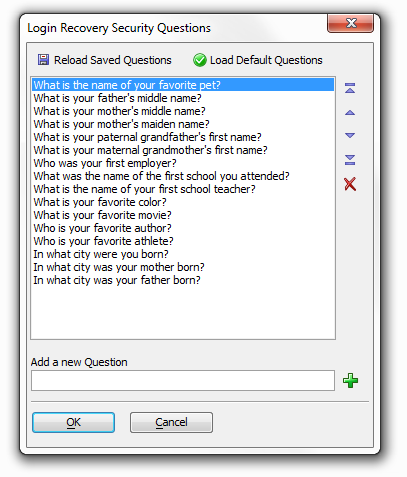
Security questions
The information that must be entered to identify the user to recover the User ID. You must set the 'Data required for recovery' option to 'Valid Email Address & Security Question' before the security question option will appear. If you click the button to the right of the option the Login Recovery Security Questions dialog will open. This dialog lets you select from a number of existing security questions and also gives you the option of creating your own questions.
Default security group
This option will allow setting a default security group or groups for a new user record. This default value would only be used for a new user if no groups were included in the data submitted for the new user. The default group will only be added to new users added by running on the application server.
Enable external user identifier field
This option will enable a special field named 'ulink'. The value entered in the 'ulink' can identify a related user record in the external table. While available this option is not recommended. The security 'userid' should be stored in an external table if linking is required. User records may also exist in tables outside the security system. Checking the box to the right of this option will reveal two more options , one for a 'Session variable for user identifier field' and a second one titled 'Prompt to display for identifier field'
This feature is not available for applications published to Alpha Cloud or IIS.
This feature is deprecated and should not be used. The userid field should be used to uniquely identify users and link related records to a user.
Session variable for user identifier field
An optional setting, this allows you to enter the name of a session variable to contain the value from the 'ulink' field. If the security framework is on, the session variable will always exist for every page. The variable value will be blank if no one is logged on, or contain a 'ulink' value from the logged in user record, if a value exist for that user. This option appears when the 'Enable external user identifier field' option in checked.
Prompt to display for identifier field
Enter the prompt to display on the Users and Groups from the 'ulink' field. The text can describe the source of the value. This option appears when the 'Enable external user identifier field' option in checked.
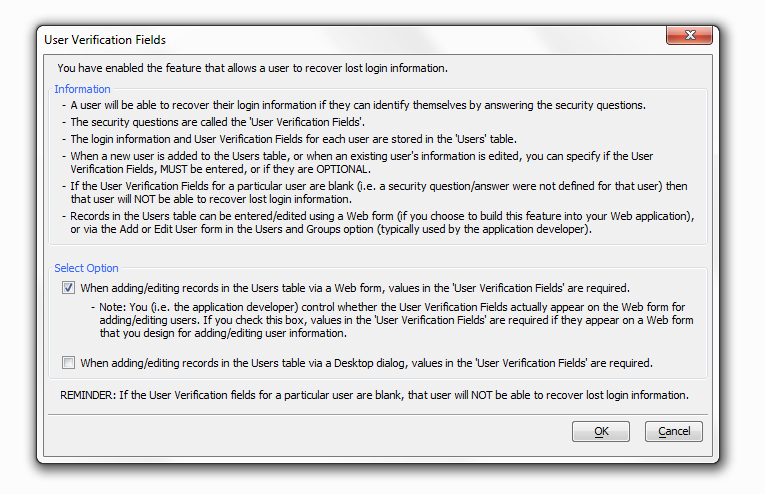
User verification field values required
You have enabled the feature that allows a user to recover lost login information. This option will determine if values in the User Verification Fields MUST be entered, or if they are OPTIONAL. Note: This option is only available when using the login component.
User recovery email invalid message
The message to show if the email entered to identify a user for data recovery is not a valid email address.
User ID not unique error message
Used ID values must be unique. This Message will display if the User ID entered already exists in the user table. This message is only used in a web component.
User file - required data missing message
This message is displayed if required data is missing when saving a new or changing a user record. This message is only used in a web component.
Password - confirm password doesn't match message
This message is only displayed if the optional 'confirm_password' value doesn't match the entered password. This message is only used in a web component.
Enable component security for 'virtual pages'
Some Ajax actions open grids and reports on virtual pages. The default security for virtual pages is 'Always Allowed'. Select this option to enable security at the component level. When selected, components and reports on virtual pages are 'Always Denied' by default and must be have permissions set. Grids on pages use the page permission. If this option is checked an 'Enforce security at the component level for AJAX components' option appears below it in the 'Customize Options' list.
Enforce security at the component level for AJAX components
AJAX enabled components on pages use the page permission. Checking this option will force all Ajax actions to use the component security permissions defined in the Web Security instead of the page permission. All components opened by Javascript or by virtual pages always use the component security permissions if component security is enabled. This option appears if the Enable component security for 'virtual pages' option is checked.
Ask browser to not cache requests requiring login
Check this option to ask a browser to turn off caching for any item that requires login. This ONLY applies to requests for items that require login to view. This will normally cause the browser to make a new request for a page if the browser 'back' or 'forward' buttons are used. Caching will still be permitted if security is off, or the page or component requested is always allowed.
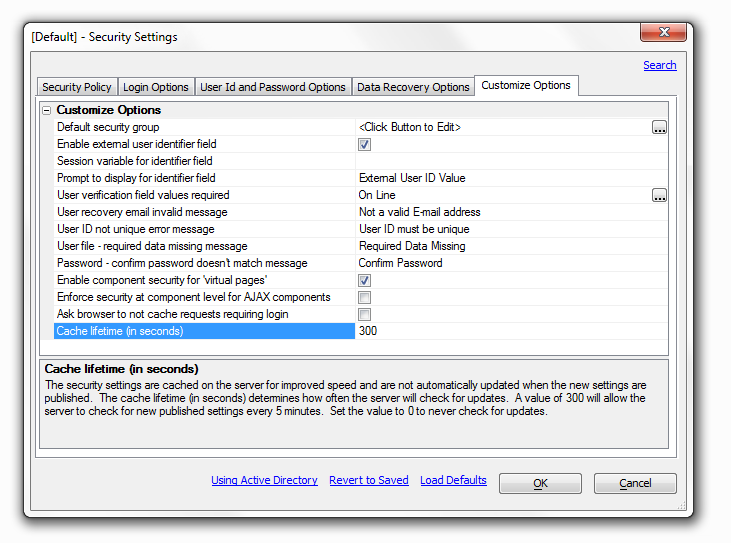
Cache lifetime (in seconds)
The security settings are cached on the server for improved speed and are not automatically updated when the new settings are published. The cache lifetime (in seconds) determines how often the server will check for updates. A value of 300 will allow the server to check for new published settings every 5 minutes. Set the value to 0 to never check for updates.
Alpha Anywhere uses a server cache to hold security settings for an application. The cache is cleared when the application server is started and restarted. The security settings for an application are loaded into the cache when the first request is made for the application. The security cache on the local application server running in the current Alpha Anywhere instance is cleared when anything is published to Local Webroot. Therefore any changes to the settings will be reflected in the next request to the local server after publishing any file from the project.
If revised security settings are published to a remote server, the remote server cache is NOT cleared after publish. Therefore any changes made to security settings are NOT applied until the cache is reloaded.
The cache lifetime (in seconds) determines how often the server will check for updates to the security files. A value of 300 (the default) will allow the server to check for new published settings or values every 5 minutes. If new security files were published and the cache lifetime has not expired, they will not be applied until the next time scheduled for an update check.
Set the value to a few seconds if publishing to a remote server and the new values should be loaded as soon as possible. This may cause a slight speed impact and should only be done for testing.
Set the value to 0 to never check for updates. This would be a recommended value for a production server where security updates are rare. If a change is published, stopping and restarting the server will clear the cache and force a reload of security settings.
Users and Groups

Overview
You must set up your Web Security Configuration under the Web Security Configuration option before the Users and Groups option will open.
Add User:
Click Add User under the Users and Groups Tab. The Add New User dialog will appear.
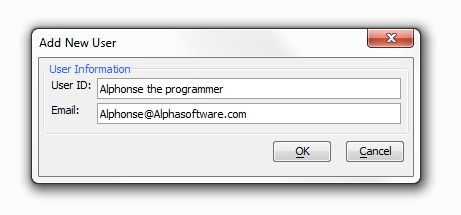
Enter the User's ID and Email address.
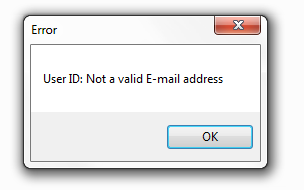
Click OK. Adding a user does require a valid email address. If the email address is not valid you should get the following error message.
Add Group
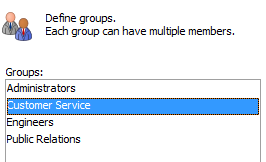
Click on the Groups tab of the 'Web Users and Groups' Dialog.
Click the Add Group button in the bottom left hand part of the dialog. The Add New Group dialog will appear.
Under 'Group Name' type the name of the group you want to create and click OK.
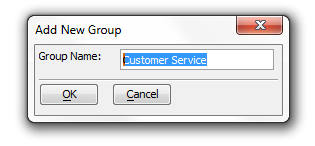
The new group will appear in the Groups menu in the 'Web Users and Groups' dialog.
Edit Group:
Click on the Groups tab of the 'Web Users and Groups' Dialog.
Left click on a Group and then Click the Edit Group button. The Edit Group dialog will appear.
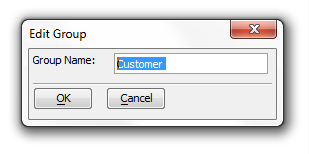
Edit the name of the Group and click OK. The edited group name should appear in the 'Web Users and Groups' dialog.
Delete Group :
Click on the Groups tab of the 'Web Users and Groups' Dialog.
Left click on the group you would like to delete.
Click the 'Delete Group' Button in the center bottom of the dialog. A Delete Group Dialog should appear.
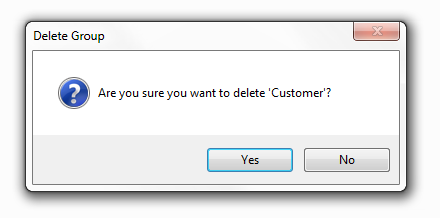
Click 'Yes', the group will be deleted from the 'Web Users and Groups' dialog.
What Data is Shown?
The web security users and groups data files must be published at least once for web security to work correctly.
This dialog shows the web users and groups assignments that are stored in the local web security files in this project. It does NOT show any data that may be in a published location.
If the security configuration allows a web user to edit information online, the user information in the published location will be different than in the local files.
Any changes made here are NOT made to the online data. If you want to edit the online data with this form, you must import the data from the published location, add any edit files, and re-publish the web security data files.
Importing the web security users and group data files from a published location will overwrite ALL local data.
Publishing the web security users and groups data shown here will overwrite ALL web security data in the published location.
If the security configuration allows a web user to edit information online, any changes made online between an import and re-publish will be lost when the data files are published.
Page Security
Overview of Page Security
Web security can be set for a specific page, all file types with specific file extensions, all files in a folder, or all file types with a specific file extension in a folder. Permissions are checked in the following order. Once a permission is found for a page or file that is 'allow' or 'requires login', no additional security options are tested.
Specific Page or File -
A specific file or page can be set as 'allowed' or 'requires login'
A page set as 'allowed' will always be allowed, regardless of any permission set at a folder level or for the file type
A page set as 'login' will only be permitted if a user is logged in with appropriate permissions to see the groups assigned to the page. If a user does not have permission, the page will always be denied regardless of any permissions set at the folder level or for the file type.
A page without permission will only be allowed if the file type is allowed, or the file is in a folder that allows all files.
Files Types Always Allowed
Permissions for file types by extension can be set at a global level.
Permissions set globally apply to all files in the project, regardless of the folder location Additional security may be set at the folder level.
Some file types are set by default in the system, such as Javascript and CSS files. These file types can either be 'allowed' or 'denied', but can not be removed from the file type list.
Additional file types can be added at the global level and can be 'allowed' or 'require login'.
A file type set as 'login' will only be permitted if a user is logged in with appropriate permissions to see the groups assigned to the file type. If a user does not have permission, that file type will always be denied regardless of any permissions set at the folder level.
All Files in Folder
Permissions can be set for all files in a folder
All files in the folder can be 'allowed' or set to 'require login'
If the folder is 'allowed', all files in the folder are allowed.
Files in a folder requiring 'login' will only be permitted if a user is logged in with appropriate permission to see the groups assigned to the folder. If a user does not have permission, files in the folder will not be allowed.
Folder permissions are NOT checked for any pages or files in the folder that have permission set at the page level to 'allow' or to 'login'. Page permission takes precedence over folder permissions.

Up one level
Move up one folder level for folders that show up in the 'Page and Folder Permissions' tab.
Open folder
Open a highlighted folder.
Pages and folders radio button
Shows only pages and folders in the 'Page and Folder Permissions' tab.
All Files radio button
Reveals all files in a given folder, like .png files for example.
Clear All Selections
Clears the selection option on any file selected.
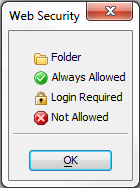
Page Security Legend
Publish
There is a 'Publish' link at the bottom of the 'Page and Folder Permissions' tab that will bring you to the 'Publish Security Files' tab.
Select All pages with the same Permissions as the Current Page:
Left click on a page in the 'Page and Folder Permissions' tab. The 'Select All Pages with the Same Permissions as the Current Page' should light up.
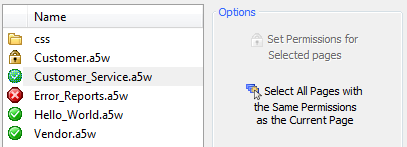
Click on the 'Select All Pages with the Same Permissions as the Current Page' option under the options menu. Now all pages that have the same permission should be highlighted.
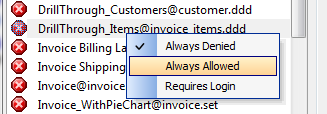
Set a Permission for an Individual Page:
Left click on a page to highlight it.
Right click to show the three permission options; 'Always Denied', 'Always Allowed', and 'Requires Login'.
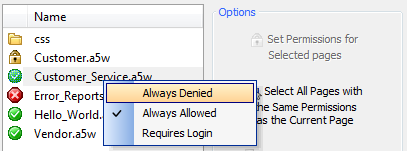
Select the option you wish, the selected page should now have this option set as its permission.
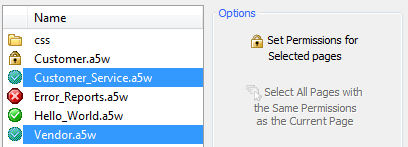
Set Permissions for Selected pages:
Left click on a page in the 'Page and Folder Permissions' tab. The 'Select All Pages with the Same Permissions as the Current Page' should light up.
Click on the 'Select All Pages with the Same Permissions as the Current Page' option under the options menu. Now all pages that have the same permission should be highlighted. The 'Set Permissions for Selected pages' option will become active.
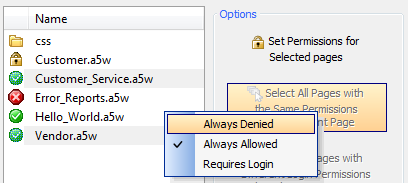
Click on the 'Set Permissions for Selected pages' option. A list will open with three options: 'Always Denied', 'Always Allowed', and 'Requires Login'. Click on the permission you wish to set. All of the files selected should now be set to that permission.
If a page is defined as a redirect page in the security settings it must always be allowed. In this example Hello_World.a5w is a redirect page and so can not be altered directly in the 'Page and Folder Permissions' tab. In fact, if you click on a redirect page Alpha Anywhere will only show one option 'Always Allowed by Current Security Settings' on you permissions list. See the 'Login Options' tab under the 'Web Security Configuration' Option to change a redirect page.

Set Permissions for Pages within Folders:
Left click on a folder so that it is highlighted.
Right click on the highlighted folder. A list of permission options should appear; 'Deny by Folder', 'Allow All Files in Folder', 'Allow All Files in Folder with Login', and 'Allow Files by Type'.
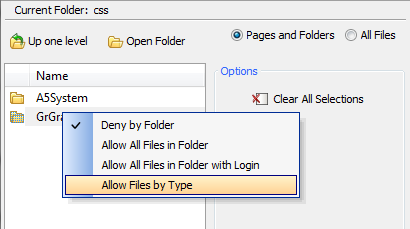
Click to choose a permission.
Select All Pages with Different Login Permissions than the Current Page:
Left click on a page that has a login option placed on it. If a page has a login required a small lock icon should appear to the left of the file name. The 'Select All Pages with Different Login Permissions than the Current Page' option should light up when you do this.
Click the 'Select All Pages with Different Login Permissions than the Current Page' option.
Adding Global File Extension Permissions (in a project):
At the bottom of the Options menu in the 'Page and Folder Permissions' Tab is an option for 'File Types Always Allowed'.

Click the 'File Types Always Allowed' option. A list of file extensions will load that have global permissions. You will notice that most of these file extensions are for image files.
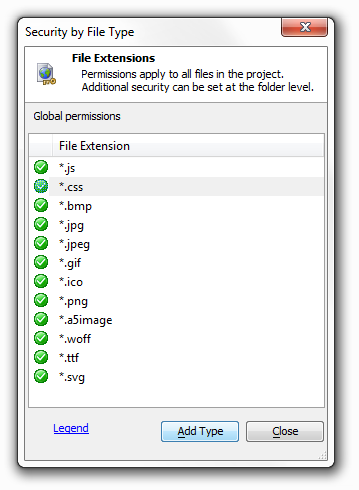 When security is activated, files with these extensions must pass through security just like every other request. For many projects it is limiting not to have global access to such file extensions; particularly given the fact that these extensions can be required to have permissions or even login requests at the folder level. This is why, by default, these file extensions are set to 'Always allowed'. However, it is still possible to put such permissions in place if you so choose.
If you want to place a global permission on a file extension for a project left click on the file extension to highlight it.
Right click and a list of permissions should open, 'Always Denied' and 'Always Allowed'
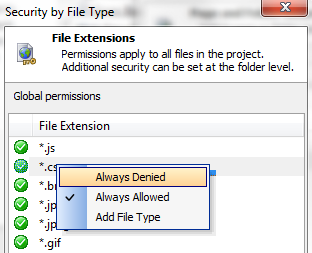
Click on the permission you would like to set. Clicking the Add File Type option will allow you to add additional file extension types to the list.
Adding file extensions that require permissions (in a folder):
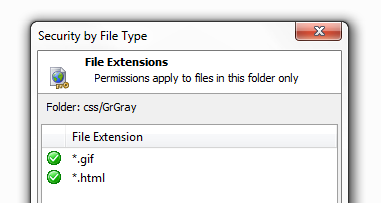
If you left click on a folder in the 'Page and Folder Permissions' dialog and then right click on that folder, you should see a list of permissions with 'Allow Files by Type' given as the last option. If you click 'Allow Files by Type' the 'Security by File Type' dialog for that folder will appear.
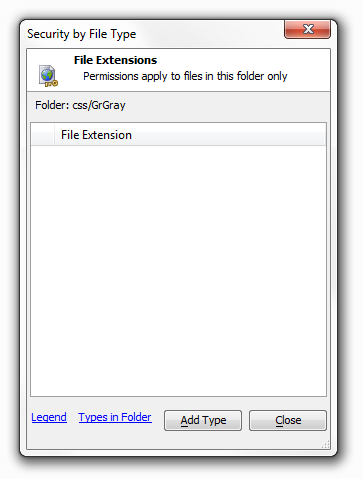
If you click on the 'Types in folder' link, this will load a dialog that will show you all of the file extensions that exist in a folder, as demonstrated below.
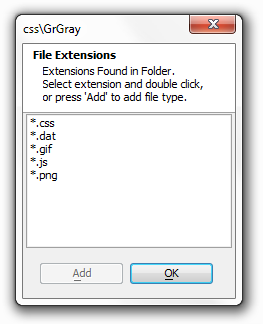
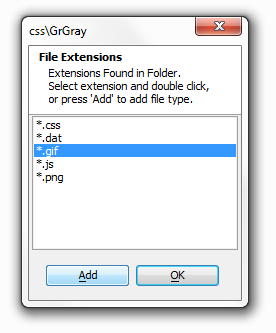
Knowing what file extensions exist in the folder, you can now place permissions on those file extensions that you want to place permissions on. Left click on any of the extensions in the list you wish to place a permission on and then click the Add button.
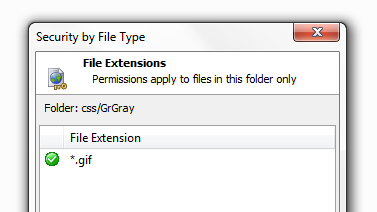
The file extension, in this case a .gif, will now appear in the 'Security by File Type' Dialog.
If you would like to add permissions on more types you can refer back to the 'Types in Folder' link or, alternatively, Click on the 'Add Type' button at the bottom of the 'Security by File Type' dialog. This will allow you to add security on any file extension. When you click the 'Add Type' button the following dialog appears:
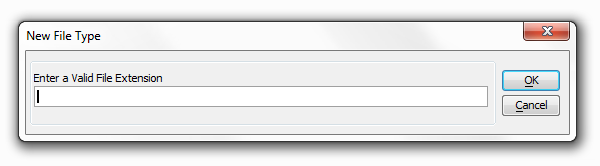
Type in a valid file extension and click OK.

The file extension should now appear in the 'Security by Type' dialog box.
Removing File Extensions from requiring permissions:
Left click on one of the file extensions that was placed in the 'Security by File Type' Dialog to highlight it.
Right click to load the permissions options list.
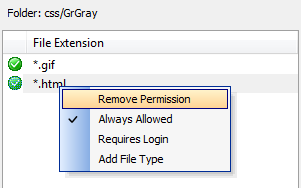
Click Remove Permission.
Setting a file extension in a folder to require a login:
Left click on one of the file extensions that was placed in the 'Security by File Type' Dialog to highlight it.
Right click to load the permissions options list.
Click 'Requires Login', the dialog for selecting groups that can login will load.
Select groups allowed for the login an click OK. Files with this extension in this particular folder will now require a login from the selected group.
Component Security
The Component Security Tab
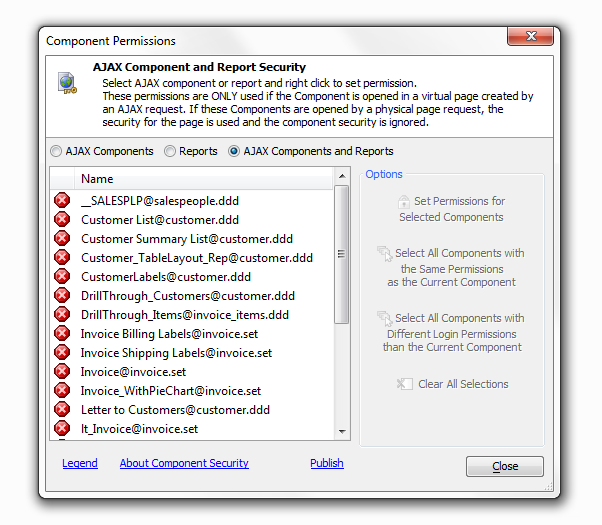
About Component Security
Web security is normally set for a specific physical page, or for controls and fields within a web component. 'Page Security' can limit access to a physical page based on the current logged in user permissions. The use of AJAX techniques allows Reports and AJAX enabled components to open in a 'virtual' page. An existing physical page uses Javascript to make a request to the server to construct the grid or report. This call does NOT request a physical page. The returned content is placed in a <div> or <iframe> on the page by Javascript. Because these AJAX requests do not open an actual page, 'Page Security' can Not be used to limit access to Reports and AJAX enabled components opened by request.
'Component security' allows setting permissions for Reports and AJAX enabled components when they are requested directly by an AJAX call the permissions set in 'Component Security' are NOT used if the Report or AJAX enabled component is opened by requesting a physical page.
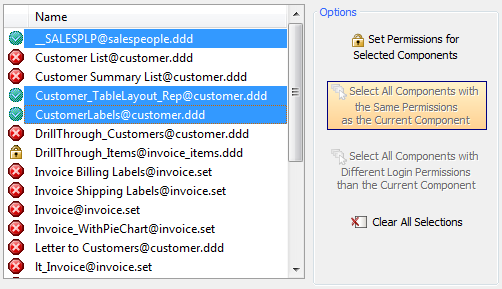
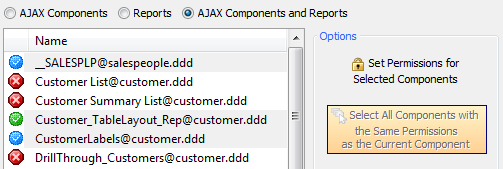
Select All Components with the Same Permissions as the Current Component:
Left Click on a Component to highlight it. The 'Select All Components with the Same Permissions as the Current Component' should light up.

Click the 'Select All Components with the Same Permissions as the Current Component' Option. All other components with the same permission will be highlighted as well.
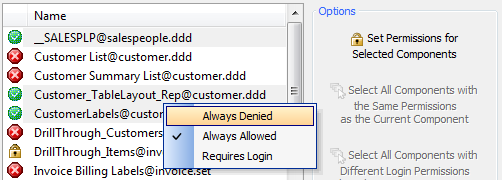
Setting a Permission for a Selected Component:
Left Click on a Component to highlight it.
Right Click on the same component. A list should appear allowing you to set permissions for the component
Left Click on the Permission you want to select.
Set Permissions for Selected Components:
Left Click on a Component to highlight it. The 'Select All Components with the Same Permissions as the Current Component' should light up.
Click the 'Select All Components with the Same Permissions as the Current Component' Option. All other components with the same permission will be highlighted as well. The 'Set Permissions for Selected Components' option should go from grey to being colored in.
Click the 'Set Permissions for Selected Components' option. A list should appear allowing you to set the same permission for all the Selected components. Select the permission you wish to set.
Requires Login Option
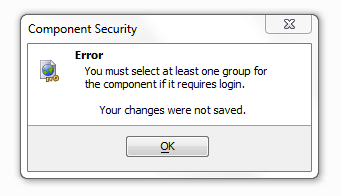
The requires login option is the third option on the list that appears when you set a permission or permissions for a single or selected group of components. If you check this option a dialog will appear to ask you which groups you would like to be able to see the login. After setting who will be allowed to see the component click Ok.
The component with the 'Requires login' permission should now have a lock icon next to it in the Component Permissions list. If a component requires a login you should select at least one group for that component in the dialog that loads after clicking 'Requires Login'. Otherwise, if you click OK, you will get the following error message:
To change the permission back from 'Requires Login' to 'Always Allowed' or 'Always Denied' simply follow the same procedure used in 'Setting a Permission for a Selected Component'.
Select All Components with Different Login Permissions than the Current Component:
Click on a component from the Component Permissions list that has a 'Required Login' option selected. There should be a lock icon to the left of this component. Once selected the 'Select All Components with Different Login Permissions than the Current Component' option should highlight.
Click on the 'Select All Components with Different Login Permissions than the Current Component' option and all components that don't have the same login group as the current one will be highlighted.
Clear All Selections Option
Simply clears all the components selected if you selected multiple components with the same permission.
Publish Security Files
Publishing data tables will overwrite any user data for this project on the server. Web security requires that the Web Security Framework is enabled on the server. If the security settings are configured to activate security, but the security framework is not enabled on the server, no security rules will be enforced.
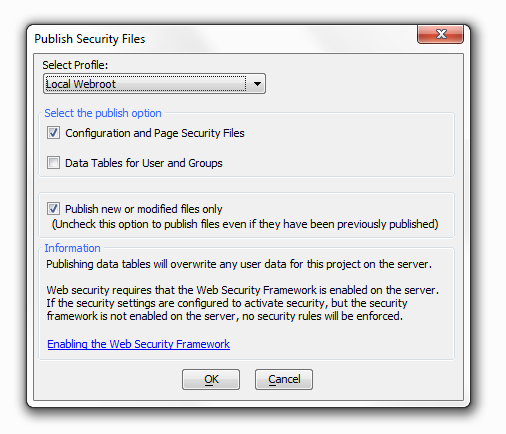
On the Publish Security Files page, you are presented with several choices. Under Select Profile:, selecting the Local Webroot profile simply publishes your project to the local folder on your machine where all the a5W files are stored.
There is also the Select the Publish Option that presents you with two possibilities, to publish Configuration and Page Security Files and/or to publish Data Tables for Users and Groups. Having this distinction makes it possible to update your security without necessarily overwriting all of your security settings. For example, you might have already configured the Web Security and Page security on a project to your liking but would like a way to update the User and Group data without altering the rest of your project security. This gives you a way to do that.
Similarly, the Publish new or modified files only option lets you selectively publish new files. You should uncheck this option to publish files even if they have been previously published.
Enabling the Web Security Framework
Open the Application Development Server from the 'Web' menu option on the Web Control Panel.
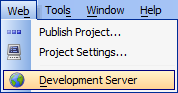
Select the 'General' tab.
Verify the 'Enable Security Framework' option is checked.
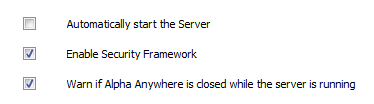
Save the changes. You may be instructed to restart the server.
Login Component
The Login Component Builder:
Overview
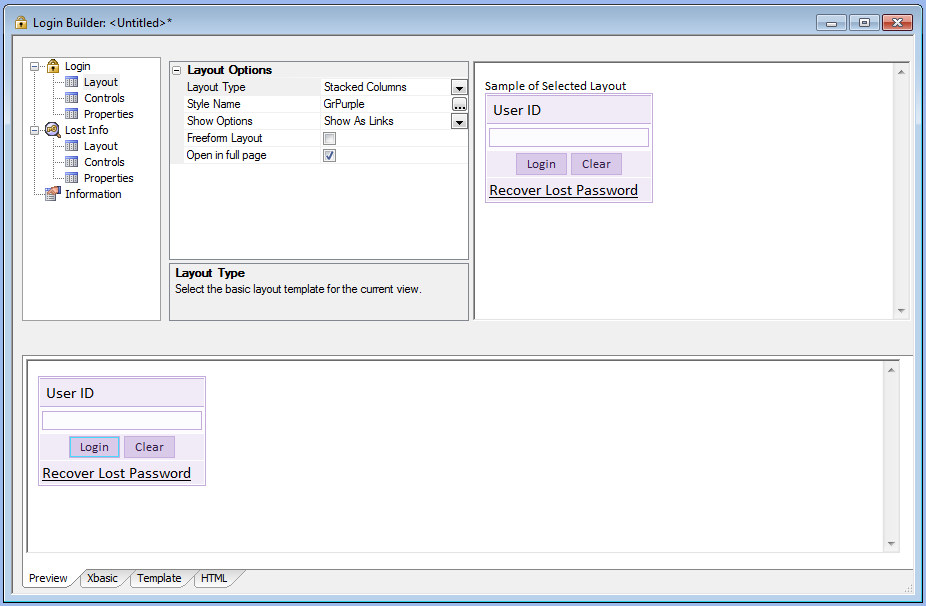
Clicking the Login Component Option in the Web Security dialog will open the Login Builder. This lets you customize the login on you application to your liking. You can select from pre-existing login templates or load your own under the Layout Options.
Layout Options
Layout Type
Select the basic layout template for current view.
Style Name
Click the button to select a new style, or edit the existing style.
Show Options
Select the method to allow the user to go to other views such as change password or lost password.
Freeform Layout
Specify if you want to use a freeform layout for this view.
Open in full page
Open login component on a full page. Uncheck to allow page with component to open in the current context, such as in an iframe in a Tabbed UI page.
Utilities
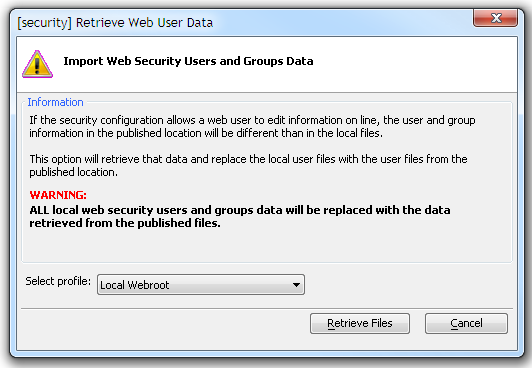
The utilities are different for .dbf based and SQL based web security. If your tables are stored as .dbf files then the utility is a method to import data from a server back to the local .dbf tables. In this case, when you click on utilities you should see something like this...
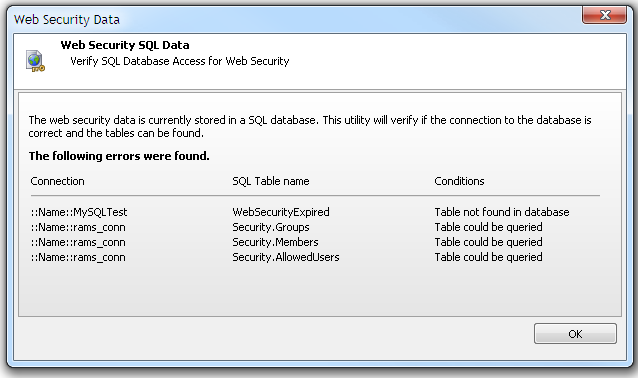
Alternatively, if your tables are SQL, then the utility simply verifies that the system can access the SQL data. It will look to make sure that the connection to the database is correct and that the SQL tables can be located. In this case, you will should see something like this when you click utilities...
Maintenance Capabilities in the Web Security System.
The Alpha Anywhere web security system also includes a number of options designed to assist the developer in maintaining the system. You may access and edit the security related fields in the user table from the Users and Groups dialog or from a web based form.
A developer may design a standard UX Component following some simple rules and then very easily add the capability to populate the form with an existing user record, create a new user record, validate all data entered, and then save the results. This is done with a few simple function calls added to the UX Component server events. You can then add the UX Component to a page to allow editing the information directly on the web.
The users and group assignments shown on the Users and Groups dialog may not be the same as the values used by the application on the server. All of the web security tables are published to the application folder on the server and do not reside in the same location as other data files. If the security configuration allows a web user to edit information online, the user information in the published location will be different than in the local files.
The Web Security Menu has an additional option named Utilities. This opens the Retrieve Web User Data dialog. This option will retrieve the data on the server for the application and replace the local user files with the user files from the published location. All existing local user, group, and permission data will be replaced with the data retrieved from the published files. This option is also available from the Users and Groups dialog Import Users option.
Additional functions are available for use on a web page to return information about a current logged in user. This information can include almost any data from the user record and limited information about the security group assignment for the user. A security settings option exists to automatically create a session variable to hold a value from the user security table 'ulink' field if the field is activated. This information could then be used for other purposes, such as filtering records for display.
Summary
Web Application Security provides these high level capabilities.
Architecture
The Application Server enforces all security. There is no need to publish any user access tables. The Application Server tests every page and file request. The developer does not need to write any code or place any code on pages. You may enable or disable security with a single setting in the Application Server Control Panel. Security settings are unique to each project.
Login
Login is an essential first step to providing any type of application security. Login identifies the user and requires a user name. Login may optionally also require a password. The new Login Component Builder simplifies the process of building login dialog components and enforcing login policies. Important password options include:
-You may set rules for validating acceptable login names.
-You may define when logins expire.
-You may lock out a user after N failed login attempts.
-You may log login activity.
-You may set rules for recovery of lost user names.
-When login fails, you may redirect all users to a specific page.
-When a logged in user permission does not allow access to a specific page, you may redirect the user to the login page or to another page.
-When login succeeds, you may redirect all users to the same page or each user to a specific page.
-You may set rules for recovery of lost login names.
Passwords
Passwords are an default part of the login process. Important password options include:
You may encrypt passwords.
You may set rules for validating acceptable passwords.
Passwords may expire after a specified period of time.
You may prevent passwords from being reused.
You may set rules for recovery of lost passwords.
Users and Groups
A user may belong to one or more groups. You may grant access to a page, a control on a component, or a menu entry to one or more groups. Whether or not a user belongs to a group depends on whether it is important to selectively provide access to specific pages.
Login Component
The Login Component Builder provides support for nearly every login option. The Login View presents the familiar request for user ID and, optionally, password. The optional Change Password View allows a user to change a password. The optional Recover Login Information allows a user to make a request for user ID and/ or password. Each view may have its own style sheet. All views may have Freeform designs. You may customize all text used in the login component to support non-English language applications.
Pages
There are many aspects of page security. You may place the pages of your web application into one of three categories: access not defined, login not required, and login required. If a page requires login, you must specify one or more groups of users which are allowed to access the page.
Utilities
Alpha Anywhere provides the Web Users and Groups dialog that you may use to enter, edit, or export basic user security information. You can also retrieve any user data added or edited on the web and update local user data. An import option exists to import security data from the server back to the project.
Functions
There is a large set of web application functions that will enable the developer to enter, edit, and validate web users from page scripts.
Other Administrative Features
The web application administrator may also lock out any user by user Id or unlock any user who is locked out.