Geocode an address
Description
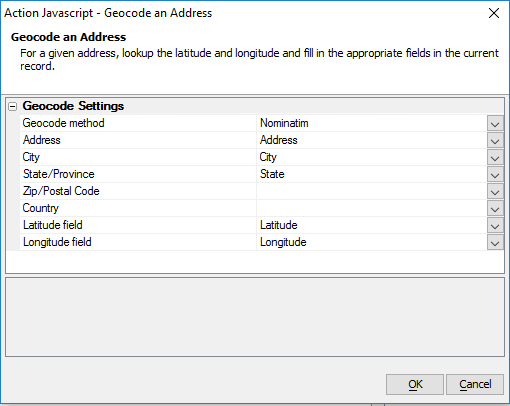
Makes an Ajax callback to a web service to geocode an address. Fill in the latitude and longitude fields in the current record with the information.
If using Google, an API key is required.
Geocode Settings
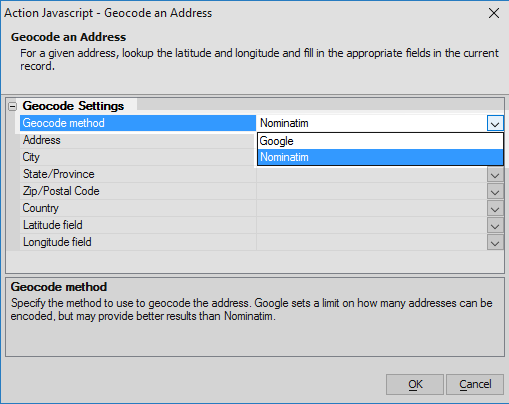
- Geocode method
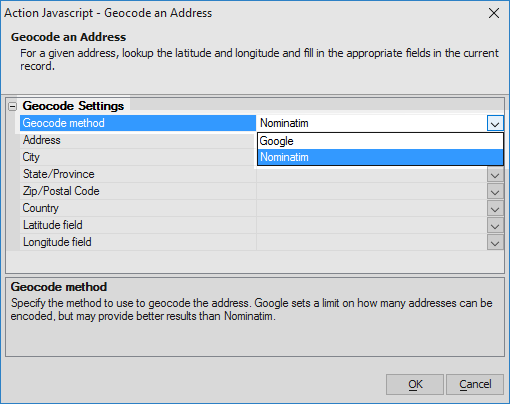
Specify the method to use to geocode the address. Google sets a limit on how many addresses can be encoded, but may provide better results than Nominatim.
- Address
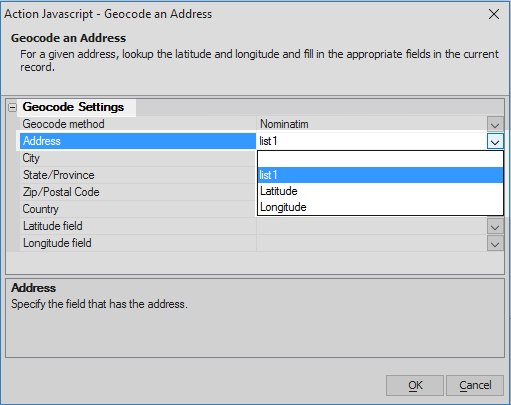
Specify the field that has the address.
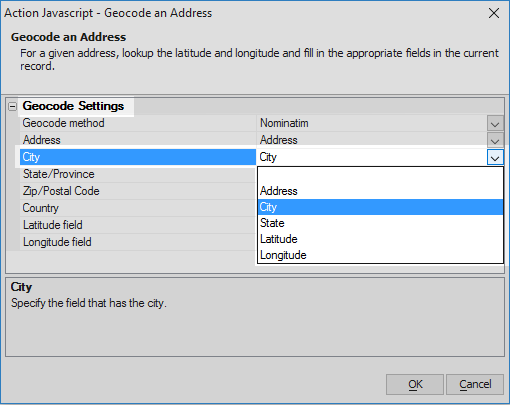
- City
Specify the field that has the city.
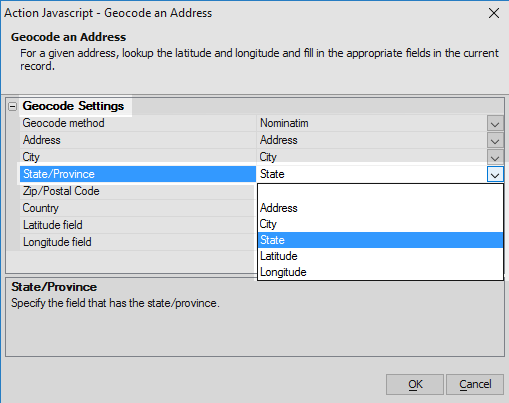
- State/Province
Specify the field that has the state/province.
- Zip/Postal Code
(Optional) Specify the field that has the zip/postal code.
- Country
(Optional) Specify the field that has the country.
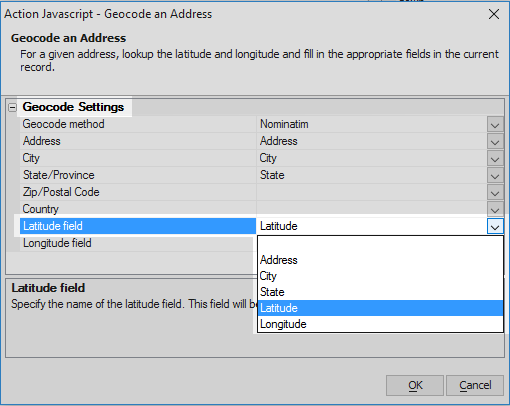
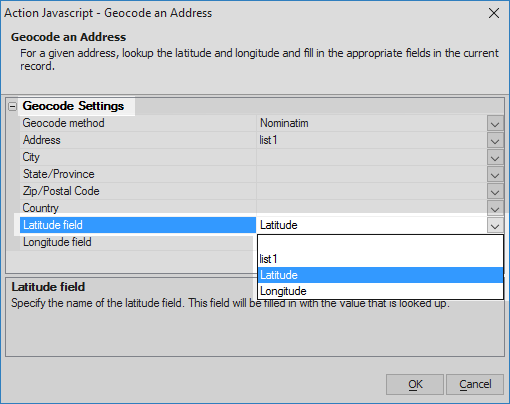
- Latitude field
Specify the name of the latitude field. This field will be filled in with the value that is looked up.
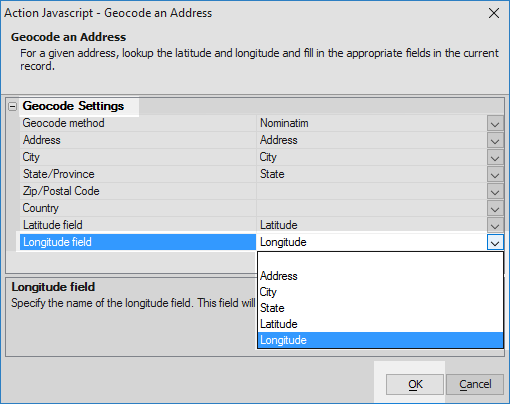
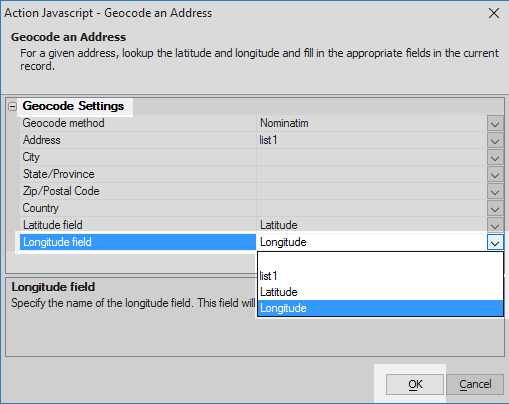
- Longitude field
Specify the name of the longitude field. This field will be filled in with the value that is looked up.
Return the Latitude and Longitude of an Entered Address
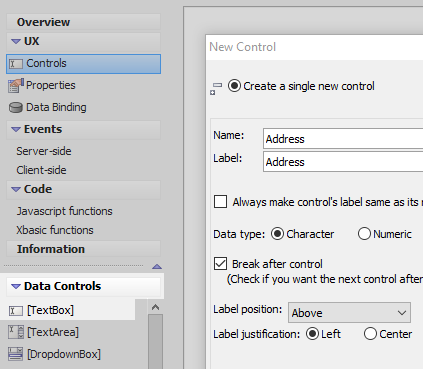
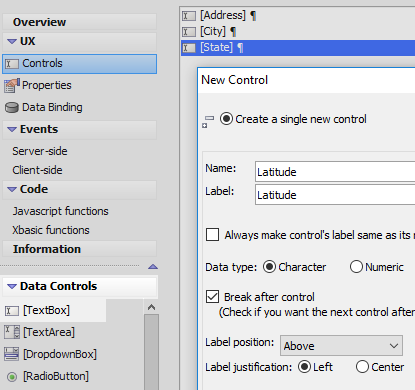
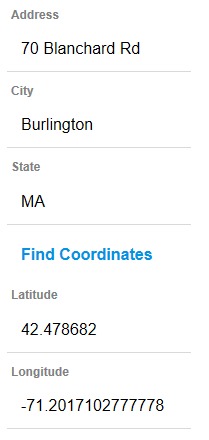
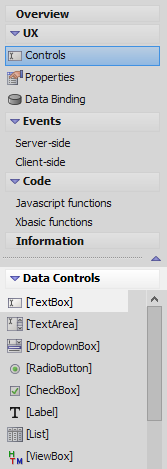
In the UX Builder on the UX Controls page open the 'Data Controls' menu. Click on the [TextBox] option to add a textbox control to the component. Give this textbox the name and label of 'Address'
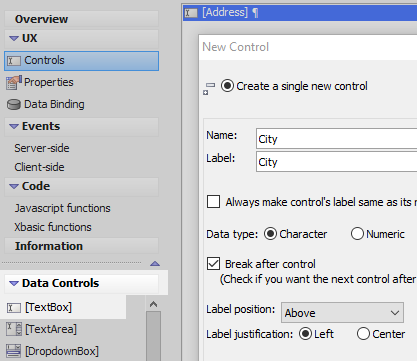
Click on the [TextBox] option again to add a second textbox control. Name and label the control 'City'
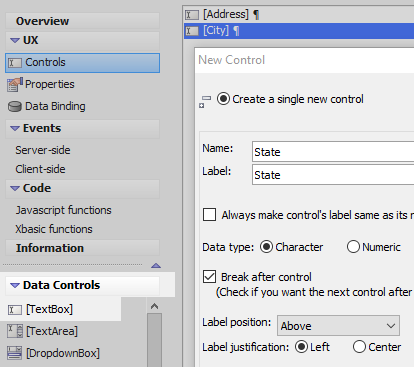
Add a third [TextBox] control to the component. Name and label this control 'State'.
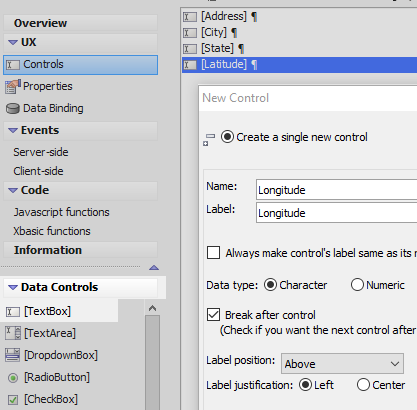
Add a fourth [TextBox] control with the name and label of 'Latitude'
Add a final [TextBox] control to the component with the name and label of 'Longitude'
Highlight the 'State' textbox control in the controls tree. Open the 'Other Controls' menu and click on the [Button] option to add a button under the 'State' textbox.
Highlight the button. In the properties list on the right under 'Button Properties' set the 'Button text' to read 'Find Coordinates'
Scroll down the properties list to the 'Javascript - (Touch, Mouse, Pointer Events)' section. Click the
 button next to the 'click' property.
Check the 'Action Javascript' radio button and click the 'Add New Action' button.
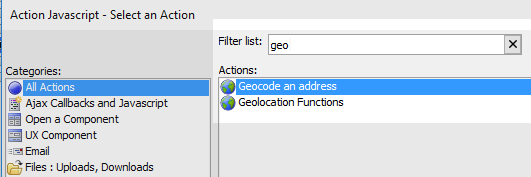
Type 'geo' into the Filter list, highlight the 'Geocode an address' action in the actions list, and click OK.
In the Geocode an Address properties set the 'Geocode method' to be 'Nominatim'.
Click the dropdown next to the 'Address' property and select the 'Address' textbox.
Click the dropdown next to the 'City' property and select the 'City' textbox.
Click the dropdown next to the 'State/Province' property and select the 'State' textbox.
Click the dropdown next to the 'Latitude' property and select the 'Latitude' textbox.
Click the dropdown next to the 'Longitude' property and select the 'Longitude' textbox. Click OK and Save
Run the component in Live Preview. Fill in the Address, City, and State fields and click the 'Find Coordinates' button.
The latitude and longitude should appear in their respective textbox controls.
Obtain a Latitude and Longitude from an Address in a List
In the UX Builder on the UX Controls page open the 'Data Controls' menu. Click on the [List] option to add a list control to the component.
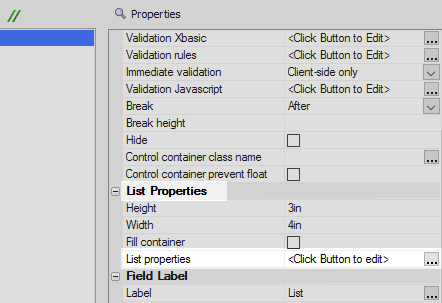
Highlight the list control. In the properties list on the right, scroll down to the 'List Properties' section and click the
 button next to the 'List properties' property to open the
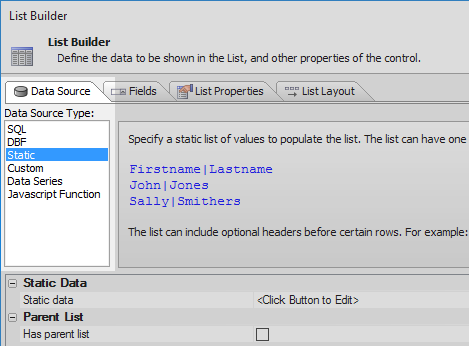
List Builder.
On the List Builder's Data Source pane select 'Static' from the 'Data Source Type' menu.
Click the
 button next to the 'Static data' property in the Static Data section.
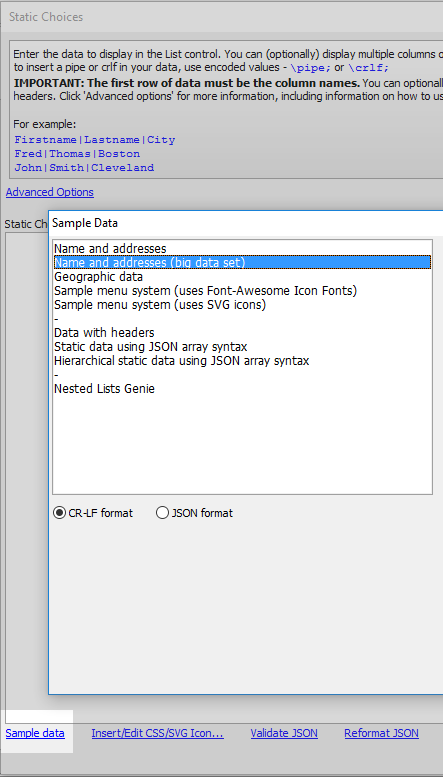
In the Static Choices dialog click on the 'Sample data' button in the lower left corner. From the sample data choices select the 'Name and addresses (big data set)' option and click OK and OK.
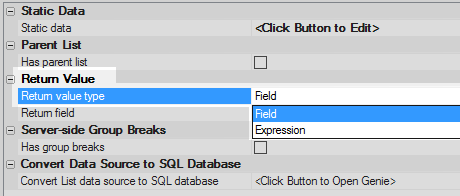
In the 'Return Value' section set the 'Return value type' property to be 'Field'
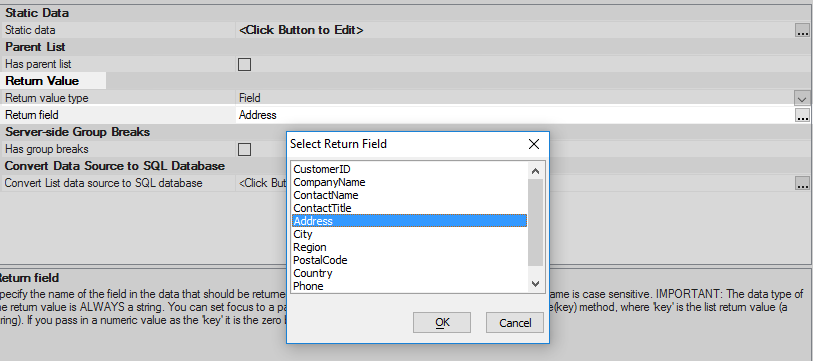
Click the
 button next to the 'Return field' property and select 'Address' as the
return field.
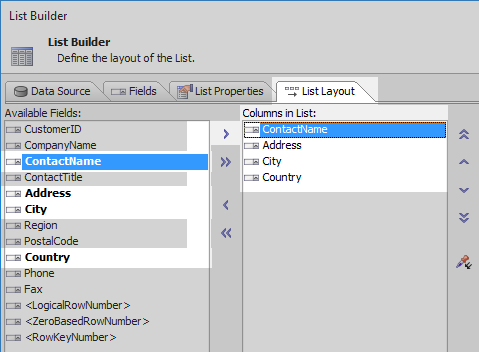
Open the 'List Layout' pane and use the blue > arrow to move the 'ContactName', Address', 'City', and 'Country' fields from the 'Available Fields' list to the 'Columns in List' section. Click OK to close the List Builder.
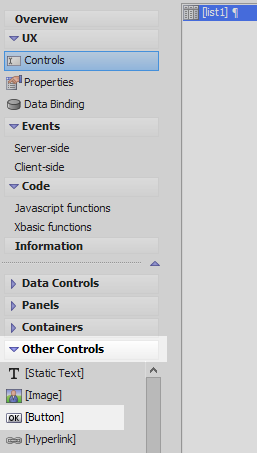
In the 'Other Controls' menu select the [Button] option to add a button control under the list control.
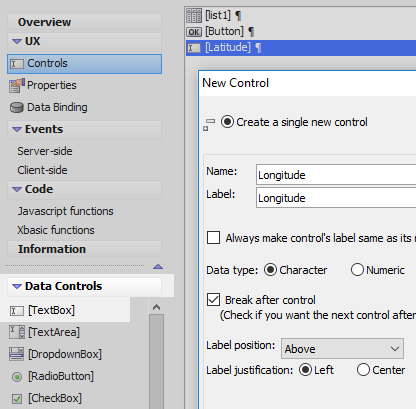
Open the 'Data Controls' menu click on the [TextBox] option to add a textbox control underneath the button in the controls tree. Name and label the textbox 'Latitude'.
Click on [TextBox] again to add a second textbox to the component. Name and label this textbox 'Longitude'.
Highlight the button control in the controls tree. In the properties list in the 'Button Properties' section set the 'Button text' property to be 'Find Coordinates'.
Scroll down the properties list to the 'Javascript - (Touch, Mouse, Pointer Events)' section. Click the
 button next to the 'click' property.
In the Edit Click Event dialog select 'Action Javascript' from the radio button options. Click the 'Add New Action' button.
Type 'geo' into the Filter list, highlight the 'Geocode and address' action in the actions list, and click OK.
In the Geocode an Address properties list set the 'Geocode method' property to be 'Nominatim'.
Click the dropdown next to the 'Address' property and select the list you defined, 'list1'.
Click the dropdown next to the 'Latitude field' property and select the 'latitude' textbox from the list of choices.
Set the 'Longitude field' property to be 'longitude'. Click 'OK' and 'Save' to exit.
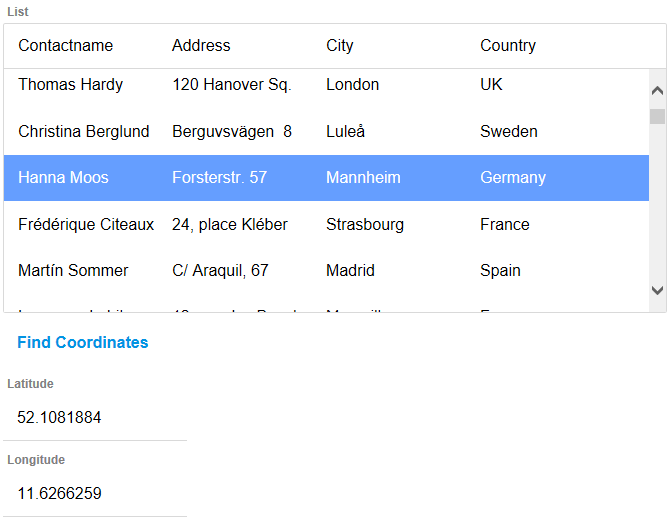
Run the component in Live Preview. Click on a row in the list and then click the 'Find Coordinates' button. The latitude and longitude values for the address should appear in the Latitude and Longitude textboxes.
See Also
