Create a Publish Profile
Overview
Creating a publish profile for publishing to the Application Server for IIS is done using a Genie in the same manner as is done for creating a publish profile to the stand-alone Application Server.
Prerequisites
- An IIS server must be configured to allow publishing to it. See the Publish Directly to IIS section in the Installation Guide for details on configuring IIS to allow publishing.
-
If publishing to a local IIS server (IIS is running on the same machine that is running the Developer Edition) you
will need to ensure that Web Deployment Agent Service is installed and running. This can be checked in the Windows
services control panel:
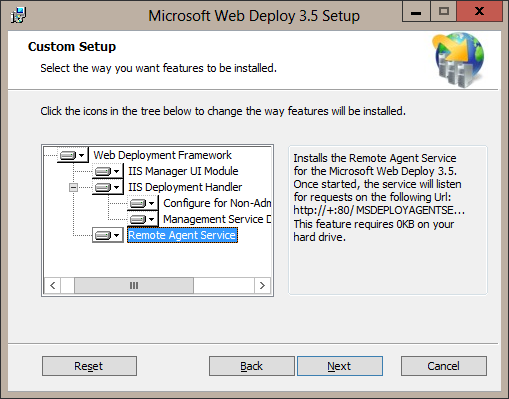
If "Web Deployment Agent Service" is missing, go to the Windows Control Panel - Programs and Features, find Microsoft Web Deploy 3.5, right click and then select change. Go to the next wizard page and you'll then need to click the Change button. Make sure the Remote Agent Service feature is installed.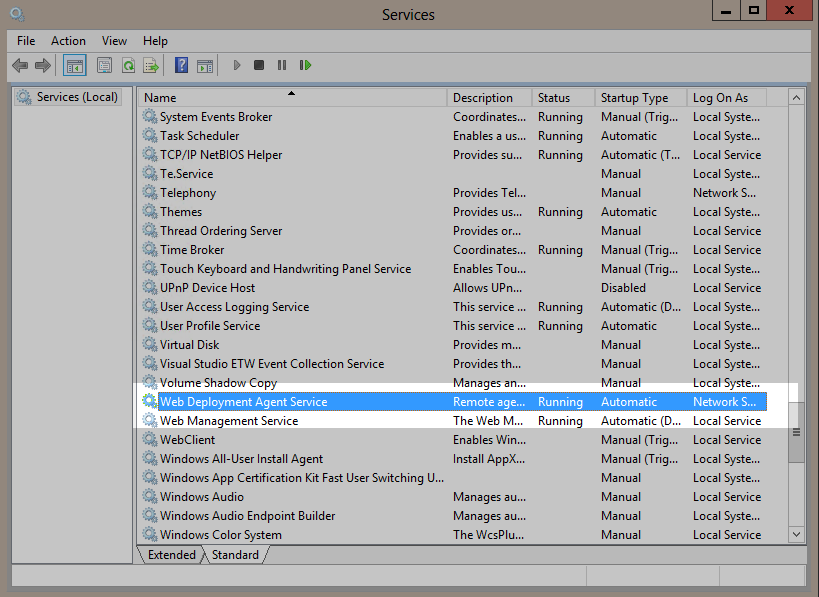
Create Publish Profile Genie
-
Open the profile dialog by clicking on the Profiles toolbar button.

-
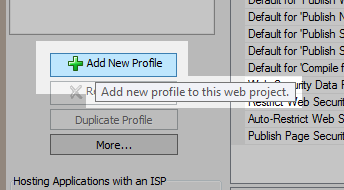
Click on the Add New Profile button.
-
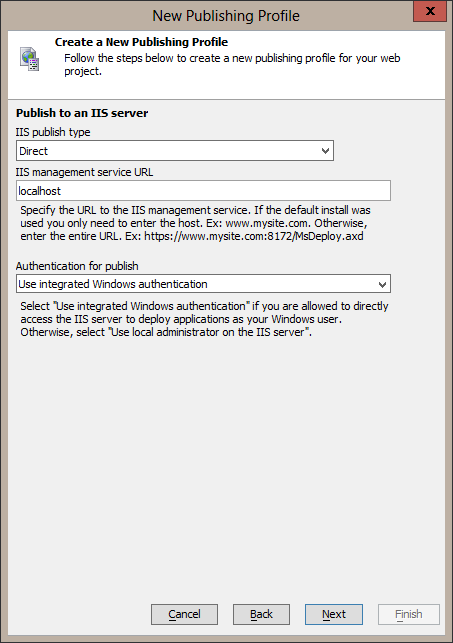
Select the IIS type radio button

-
Configure IIS server publish settings
-
IIS publish type
The only option currently available is "Direct" which means the development machine must be able to connect to the IIS server. -
IIS management service URL
In most cases the IIS management service is configured with the default settings so this value is the host address to the IIS server like localhost, 127.0.0.1, or www.mysite.com. If IIS management service is installed with non-default values, the entire management service URL is needed such as https://www.mysite.com:8172/MsDeploy.axd. -
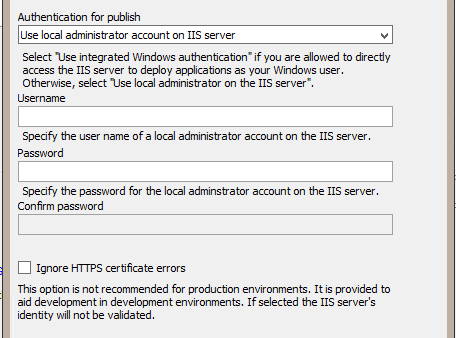
Authentication for publish
The user that connects to the IIS management service must be a local machine administrator on the machine that the IIS server is installed on. Alpha Anywhere Application Server for IIS must also be configured to allow this user, or a group this user belongs to, to publish to IIS by way of the "Direct Publishing" feature in IIS Manager. See the Publish Directly to IIS section in the Installation Guide for more details.-
Use integrated Windows authentication
Using the IIS management service requires an authenticated connection. Check this option to connect as the user you are currently logged in as on the development machine.When using integrated Windows authentication to publish to a local IIS server you must run Alpha Anywhere Developer Edition as administrator since this requires elevated privleges on the local system. To run Alpha Anywhere Developer Edition with elevated privleges, right click on the Alpha Anywhere Developer Edition icon and select Run as Administrator. -
Use local administrator account on IIS server
-
Username
Enter a user name that is a local machine administrator on the IIS server machine and is allowed to publish to IIS (see note above) when integrated Windows authentication is not being used. -
Password
Password for the above user name. -
Confirm password
Re-enter password. -
Ignore HTTPS certificate errors
User credentails are passed to the IIS server using basic HTTP authetication. The connection is secured using HTTPS, but the default certificate that is used is a self-signed certificate which is typically not trusted. This will cause publish authentication to fail unless a trusted certificate is set in the IIS management server configuration. Alternatively, check this option to ignore when a certificate is untrusted.This option should only be selected when publishing to a non-production IIS server. A production IIS server should have its IIS management service configured with an appropriate certificate.
-
-
-
-
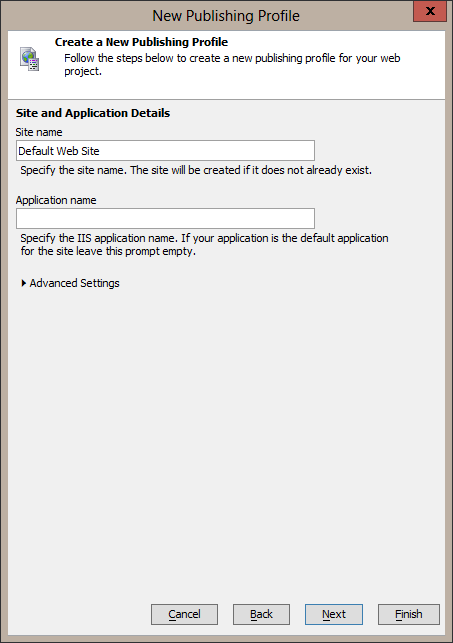
Configure IIS site and application settings
-
Site name
Enter the site name as it is labeled in IIS Manager. This name is independent of the DNS name for the site. The initial site that IIS sets up is named "Default Web Site" and that is also the default value for this setting. If the site doesn't exist, pubilsh will create the site. -
Application name
More than one application can be hosted in a site. This is left blank by default to have the application published as the "default" application for the site. Applications are loaded by using the application name in the requested URL's path. When no path is used in the URL and only the host name is used the "default" application is used. For example, if a user enters https://www.mysite.com/ into a browser the default page for the default application will be returned. But, if a user enters https://www.mysite.com/purchasing into a browser, the default page for the "purchasing" application will be returned. In most cases the desired behavior is to have an application available by only entering the host name so leave this prompt empty. -
Advanced Settings
Click on Advanced Settings to show the advanced settings.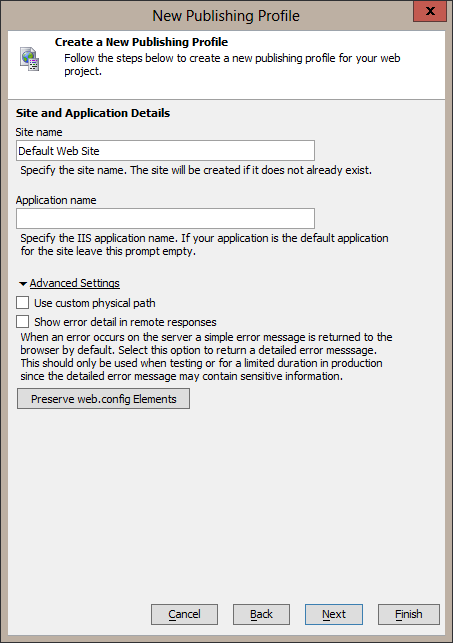
-
Use custom physical path
This setting is only needed if sites and applications need to be published to specific paths on the IIS server. This is typically not needed. Any new sites will default to being stored in the path c:\inetpub. -
Show error detail in remote responses
If an error occurs during a page request detailed error messages including stack traces are not sent back in the response when the request comes from a remote client (a client that is not on the same machine as the IIS server). The errors messages and stack traces are logged. However, during application development it may be more convenient to have this information returned in the response instead. Check this setting to allow this information to be return in a response.Sensitive information may be included in error messages and stack traces that may make the site vunerable to attack. This option should be disabled when publishing to a production server. Error messages and stack traces are stored in logs so this option should not be needed on a production server. If it is used on a production server, it should only be used for the needed duration and then disabled. -
Preserve web.config Elements
Each time an application is published a new web.config file is generated from the profile settings, web project security settings, and the web project properties. This web.config file will overwrite the web.config file on the IIS server. The web.config file on the IIS server may contain configuration changes that are not accounted for by the profile settings, web project security settings, or the web project properties. This could include settings like HTTP redirect. These settings need to be preserved when the new web.config file is generated. This feature allows that to be done.This feature assumes familiarity with XML files, XML namespaces, and XPath.To preserve settings in a web.config file on an IIS server the XPath to the element needs to be found for that setting in the web.config file. The following example uses the HTTP redirect feature. Here is a sample web.config file:<configuration> . . . <system.webServer> . . . <httpProtocol> <customHeaders> <remove name="X-Powered-By" /> <add name="X-Powered-By" value="Alpha Anywhere Application Server" /> </customHeaders> </httpProtocol> <httpRedirect enabled="true" destination="https://www.mysite.com/" httpResponseStatus="Permanent" /> </system.webServer> </configuration>The XPath to the HTTP redirect setting is /configuration/system.webServer/httpRedirect. This gets entered into the XPath list.
The next example demonstrates a set more complicated elements. Here's the example web.config file.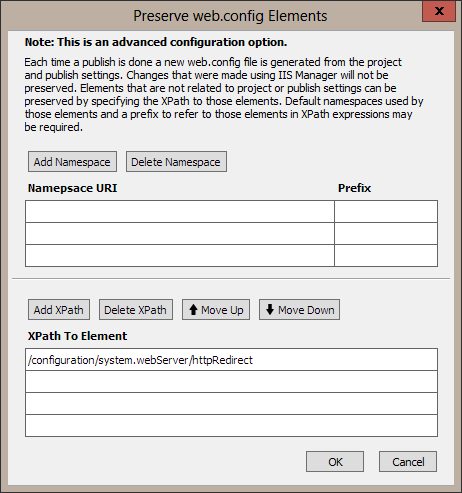 <configuration> <configSections> <sectionGroup name="common"> <section name="logging" type="Common.Logging.ConfigurationSectionHandler, Common.Logging, Version=3.3.1.0, Culture=neutral, PublicKeyToken=af08829b84f0328e"/> </sectionGroup> <section name="nlog" type="NLog.Config.ConfigSectionHandler, NLog, Version=3.2.0.0, Culture=neutral, PublicKeyToken=5120e14c03d0593c"/> </configSections> . . . <httpProtocol> <customHeaders> <remove name="X-Powered-By" /> <add name="X-Powered-By" value="Alpha Anywhere Application Server" /> </customHeaders> </httpProtocol> </system.webServer> <common> <logging> <factoryAdapter type="Common.Logging.NLog.NLogLoggerFactoryAdapter, Common.Logging.NLog32, Version=3.3.1.0, Culture=neutral, PublicKeyToken=af08829b84f0328e"> <arg key="configType" value="INLINE"/> </factoryAdapter> </logging> </common> <nlog xmlns="http://www.nlog-project.org/schemas/NLog.xsd" xmlns:xsi="http://www.w3.org/2001/XMLSchema-instance"> <targets> <target name="logfile" xsi:type="File" archiveAboveSize="1000000" autoFlush="true" layout="${longdate} ${uppercase:${level}} ${message}" createDirs="true" enableFileDelete="true" fileName="c:\Temp\${date:format=yyyy-MM-dd}-pgprovider.log" /> <target name="eventlog" xsi:type="EventLog" layout="${message}" log="Application" source="Garbio pgProvider" /> </targets> <rules> <logger name="*" minlevel="Trace" writeTo="logfile" /> <logger name="*" minlevel="Trace" writeTo="eventlog" /> </rules> </nlog> <runtime> <loadFromRemoteSources enabled="true" /> <assemblyBinding xmlns="urn:schemas-microsoft-com:asm.v1"> <dependentAssembly> <assemblyIdentity name="Common.Logging" publicKeyToken="af08829b84f0328e" culture="neutral" /> <bindingRedirect oldVersion="0.0.0.0-3.3.1.0" newVersion="3.3.1.0" /> </dependentAssembly> <dependentAssembly> <assemblyIdentity name="NLog" publicKeyToken="5120e14c03d0593c" culture="neutral" /> <bindingRedirect oldVersion="0.0.0.0-3.2.0.0" newVersion="3.2.0.0" /> </dependentAssembly> </assemblyBinding> </runtime> </configuration>This example shows the need for correct ordering of XPath to elements and shows the use of a custom namespace (shown in bold with a red, dashed border in the example).
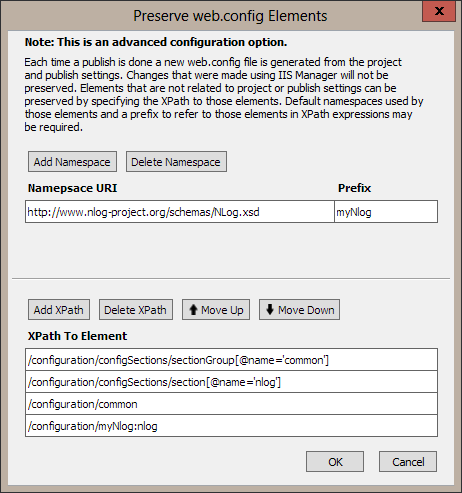
The image that follows shows the settings needed to preserve the highlighted sections in the example.
-
<configSections> element
The example shows that XPaths are included for <sectionGroup name="common"> and <section name="nlog"> which are the only sub-elements of <configSections>. It might seem to make sense to only include an XPath for <configSections>, but a <configSections> element may be already be in the generated web.config file. This generated element and its sub-elements would be replaced if only the XPath for <configSections> was used, and the generated sub-elements would be lost. This is why each sub-element is listed in the XPath separately. -
XPath order
The order of the XPaths in the list is significant so that the elements to be preserved can be positioned correctly in the newly generated web.config file. In this example, <sectionGroup name="common"> is before <section name="nlog"> so the XPath for the sectionGroup element (/configuration/configSections/sectionGroup[@name='common']) needs to be listed before the XPath for the section element (/configuration/configSections/section[@name='nlog']). In the same way, the XPath /configuration/common must be listed before the XPath /configuration/myNlog:nlog. -
Custom namespace
This example has an element that defines a namespace by using the xmlns attribute. The namespace must be defined with a prefix name in order to be able to write an XPath that will find this element. The prefix name can be anything and is only used by the XPath expression. In this example, the prefix myNlog is defined for the http://www.nlog-project.org/schemas/NLog.xsd namespace and the prefix is subsequently used in the /configuration/myNlog:nlog XPath. A namespace only needs to be defined with a prefix if it is needed in an XPath.
-
-
-
Application Pool
-
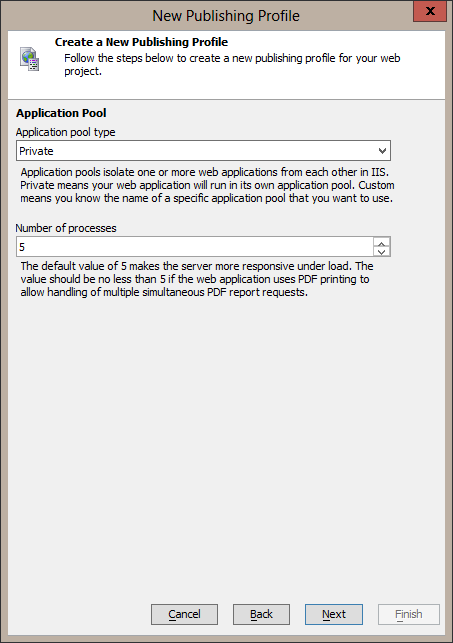
Application pool type
An application pool defines how an application runs under IIS. It controls the account the application runs as, the number of processes the application can use, and when an application is restarted.-
Private
This is the default and means that the application will be the only application in the application pool. -
Custom
This type means that the name of an application pool is known and this application is to be added to that application pool. Enter the application pool name into the application pool name prompt. All applications in an application pool use the same settings and are controlled by the application pool. If the application pool is stopped, all the applications in the application pool are stopped.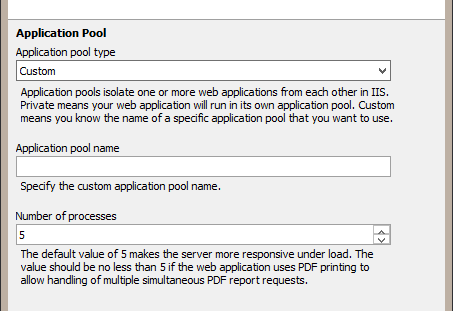
-
-
Number of processes
This sets the number of processes that IIS will use to handle requests. More processes will give an application better responsiveness when it is under load. The default is 5.
-
-
Alpha Anywhere Application Server Location
-
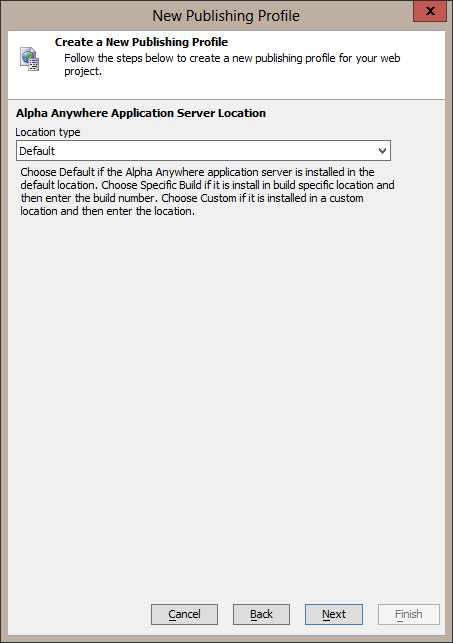
Location type
-
Default
The installer for Alpha Anywhere Application Server for IIS set a registry key with the install location. This registry key value will be used by IIS to locate Alpha Anywhere Application Server for IIS. -
Specific Build
This is reserved for future use. -
Custom
If more than one version of Alpha Anywhere Application Server for IIS is installed, the last one that was installed will set the registry key used by the "Default" location type. If an application needs to use the other version, use "Custom" as the location type and then enter the installation path of the other version in the "Path" prompt.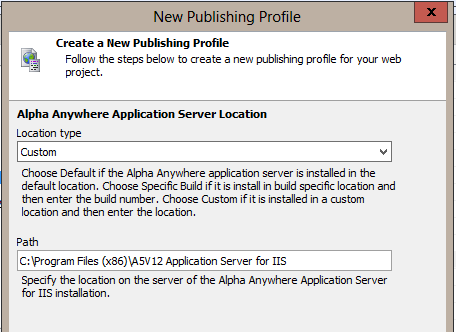
-
-
-
Security Store Configuration
The security store configuration has many potential variations and it is documented in the Provider Configuration page.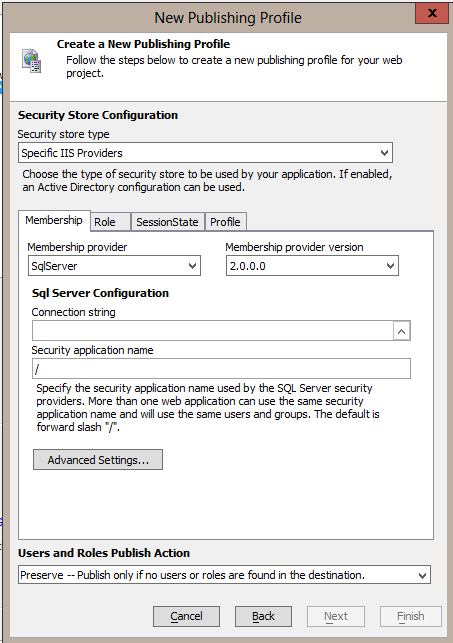
Page Last Checked on 4/26/2016
Report an issue with this page