Define an AlphaDAO SQL Query
Description
Step by step instructions for defining an SQL Query, from establishing a connection to retrieving data.
This procedure is part of the Grid Builder procedure for building a component. You can click on the Create a new grid component button at the top of the Web Projects Control Panel (between the 'New' and 'Add File' buttons).

This will bring you to the Select Grid Component Template Dialog. Here you have the option of working with a blank grid component or choosing from a list of pre-existing templates; to construct a grid component. Choose what you wish to work with and click OK. This will bring you to the Grid Builder Dialog. Web publishing applications only.
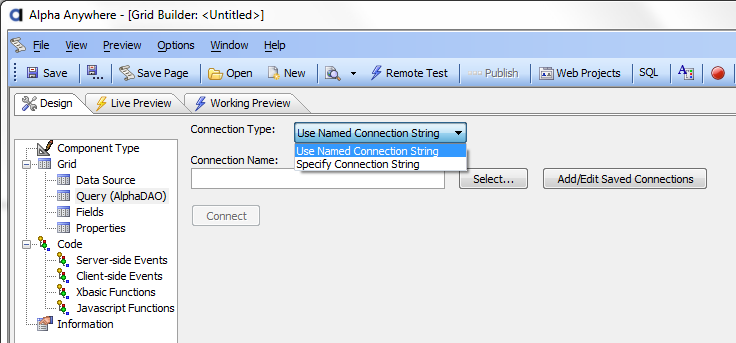
Establishing the Connection
Select Grid > Query (AlphaDAO).
Select the Connection type. The options are:
"Used Named Connection String"
"Specify Connection String"
If you selected "Used Named Connection String" in step 1.
Optionally, select a saved connection from the Connection Name list.
Optionally, click Add/Edit Saved Connections to display the Connections dialog.
Click Connect. If the Grid Builder was able to open the database, additional fields will appear on the dialog box.
If you selected "Specify Connection String" in step 1.
Optionally, click '...' and enter the connection string, then click OK to return to the Grid Builder.
Optionally, click Build.
Enter the parameters necessary to connect to your database.
Click Test Connection.
If the connection succeeded, click OK to continue.
Click Connect. If the Grid Builder was able to open the database, additional fields will appear on the dialog box.
Retrieving Your Data From a Table or View
Select how to retrieve data. The options are:
Table or View
SQL Select Statement
If you selected "Table or View", click the 'down arrow' icon to select a table or view from the Table/View list.
A table alias can make your grid portable, by separating it from direct reference to a table name. as long as a table has the same structure and the same alias, it can use a grid originally built for another table.Optionally, enter an alias for the table into the Table/View alias field. If you do not enter an alias, it will default to the name of the table.
Optionally, click Define Arguments to display the Define Arguments dialog. You use arguments to provide run-time values for filter and order expressions.
Optionally, specify a filter expression in the Filter field that selects records from the table. Click '...' to display the Specify Filter dialog. Refer to Specifying a Filter Expression.
Optionally, specify a ordering expression in the Order by field that sequences selected records. Click '...' to display the Specify Order dialog. Refer to Specifying an Order Expression.
Optionally, check Read only to prevent user updates. If you are in the process of creating a grid, continue with Selecting the Fields to Display.
Click Select Primary Key(s) to display the Specify Primary Keys dialog. Select the field(s) that uniquely identify each record and click OK.
Retrieving Your Data with a SQL Statement
If you want to retrieve your data with a "SQL Select Statement":
Select SQL Select Statement.
Click Edit SQL to display the SQL Builder to define the table(s) and fields that you want to work with. Continue with SQL Builder.
See Also