Using the Pop-Up Event Editor - Action Scripting
Description
The Pop-Up Event Editor differs from the Code Editor in that it's a modal window, whereas the Code Editor is modeless. The pop-up editor is useful for making quick changes to an event, or getting a quick overview of all the events for a particular object. In this lesson you will use the form's onactivate event to maximize the form (make it fill the entire screen) whenever the form gets focus. Then you will use the form's CanSave event to fill in the shipping address fields if they haven't been set. The CanSave event fires whenever an attempt is made to save a record in a form or browse. The script typically checks if certain conditions have been met. If these conditions have not been met, the script can cancel the event (the record won't be saved).
In this example, your CanSave script will check to see if ship_address_1 is blank. If so, it will ask the user if they want to set the shipping address fields to be the same as the billing address fields. If the user selects "Yes," Alpha Anywhere will fill in the shipping address fields, and then save the record. If the user selects "No," the record will be saved as is. If the user selects "Cancel" the record will not be saved.
To open the Pop-Up Script Editor, select the object whose events you want to edit. To define events for the form itself, click anywhere on the form background, making sure that you don't select any object on the form.
Click the Events? button on the toolbar, or press F11.

The Pop-Up Script Editor appears. Note that it shows all the events for the form. At this point, none of the event names are bold because no events have been defined.
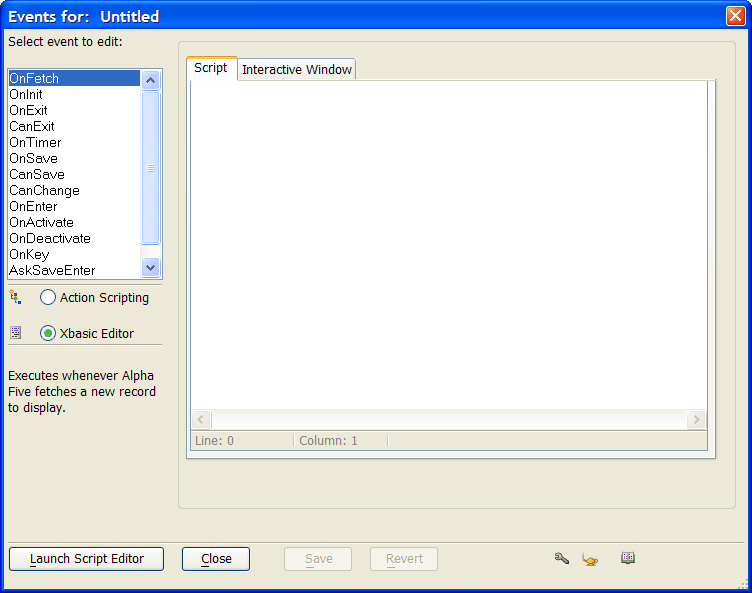
Select the Action Scripting button.
Click on the onactivate event.
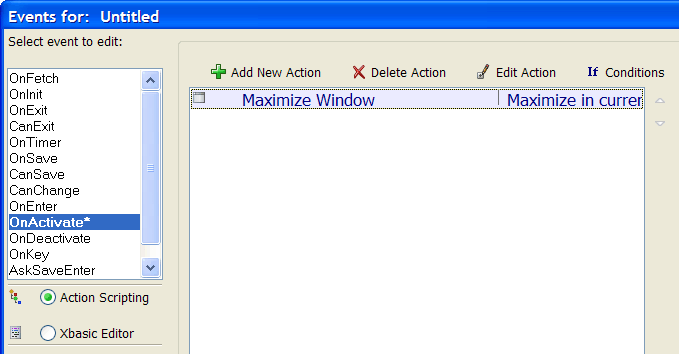
Click Add New Action.
Select the "Window Commands" category and the "Maximize Window" Action.
The Maximize Window Genie appears. To maximize the current window, accept the default entries. Click OK, Next >, and Finish.
The Pop-Up Script Editor shows the action. Note the asterisk next to onactivate, indicating that the script for this event has not been saved.
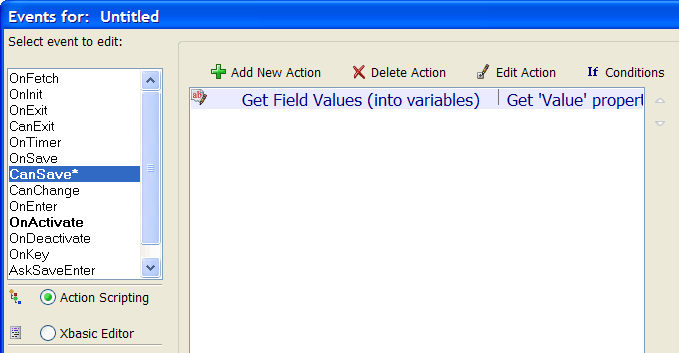
Click the Save button to save the script. Now define the CanSave event. Highlight the "CanSave" event in the event list.
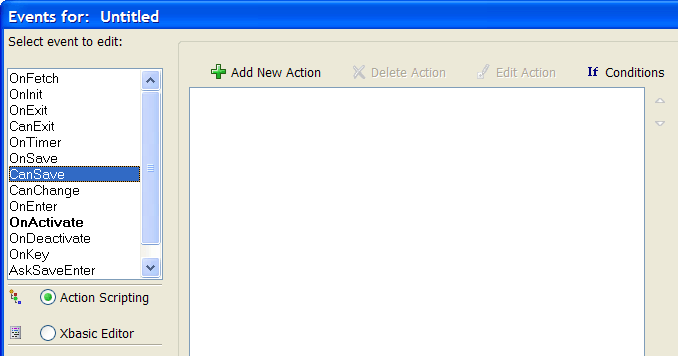
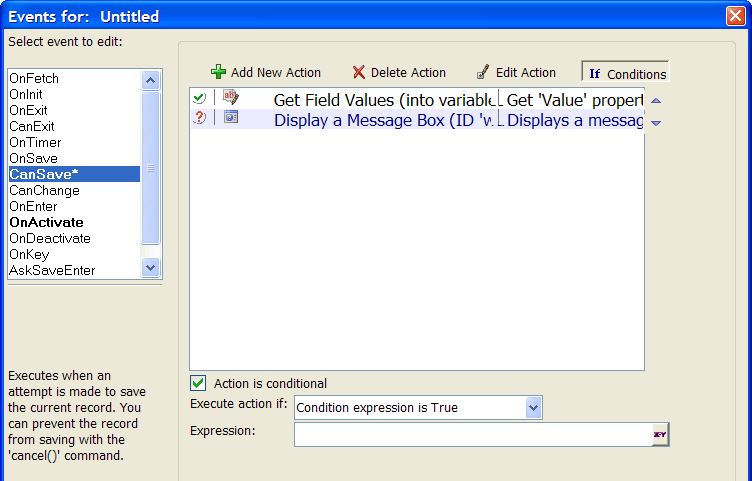
The first step the our script will be to get the value from the ship_address_1 field into a variable. Click Add New Action.
Select the "Fields" category and the "Get Field Values (into variables)" Action. Click OK.
Click the '+' button.

Select the "ship_address_1" field.
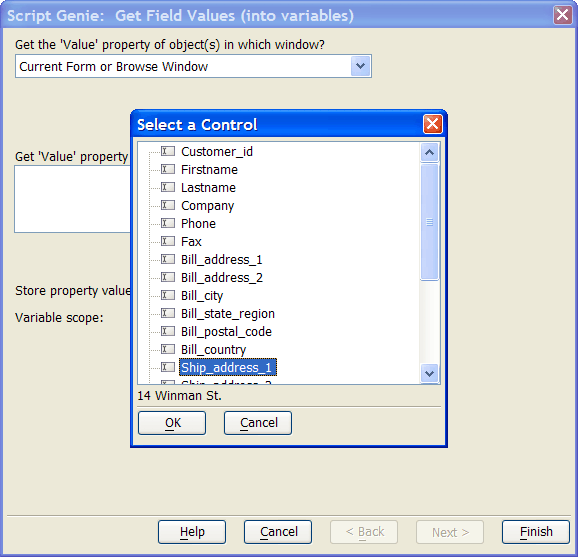 You are actually selecting the "ship_address_1" object (which happens to be bound to the ship_address_1 field).
Click OK to accept "ship_address_1".
Enter "vcShipAddress" for the variable name.
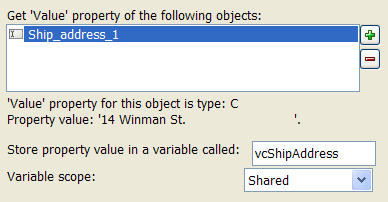
Click Next > Finish to complete the Action. The Pop-up Action Script Editor should look like this:
The next step is to display a message box to the user if the "ship_address_1" field is blank. Click Add New Action.
Select the "Dialog Boxes" category and the "Display a Message Box" Action. Click OK.
The Message Box Genie appears. Select the Yes No Cancel option.

Click Next > to proceed to the next Genie page. Fill in the options as shown below:
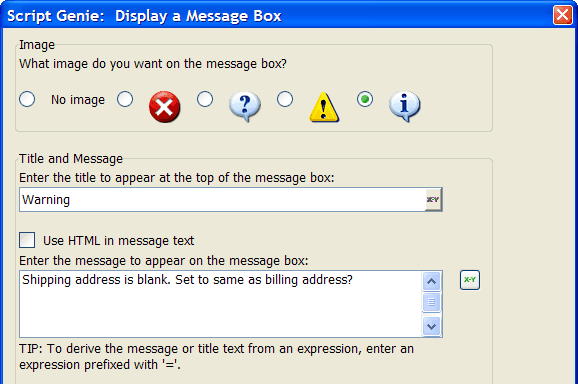
Click Next > to proceed to the next Genie page.
Enter "warn" as the message box name.
Click Finish to complete the Action.
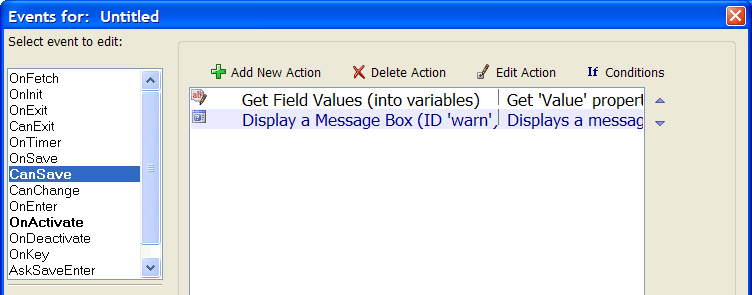
The Pop-Up Script Editor should look like this:
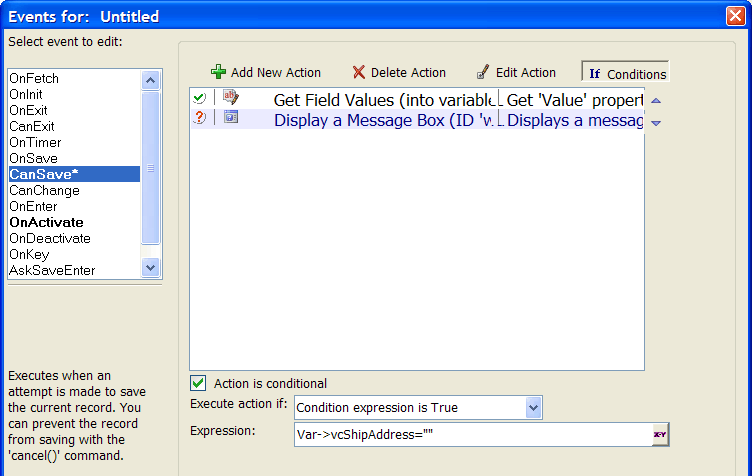
The Action should only appear if the "ship_address_1" field is blank. Click the If Condition button. Alpha Anywhere displays the If conditions column in the Action List and shows the Action is conditional check box.
Check the Action is conditional check box.
Select "Condition expression is true" in the Execute Action if combo box.
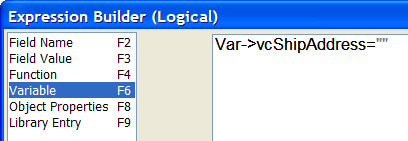
You only want to display the message box if the variable vcShipAddress (which is set in the previous Action) is blank. Click the button at the right edge of the Expression field to open the Alpha Anywhere Expression Builder.
Press the F6 key to open the list of variables.
Select the "vcShipAddress" variable and click Insert. The Expression Builder should look like this:
Click OK to close the Expression Builder. The Pop-Up Script Editor should look like this:
This message box will have Yes, No and Cancel buttons. The Cancel command prevents the record from being saved. as you might expect, the Cancel command is just another Action Script action. To add this action to your script, click Add New Action.
Select the "Xbasic" category, and the "Cancel Event" Action and click OK.
The Cancel Event Genie appears. This Genie allows you to set the condition under which the event should be canceled, which is when the user clicks the Cancel button in the message box defined in the previous action. You can either define the condition on this screen of the Genie, or you can define it on the Pop-Up Script Editor. This example uses the latter option in this case. Do not fill in anything on this page.
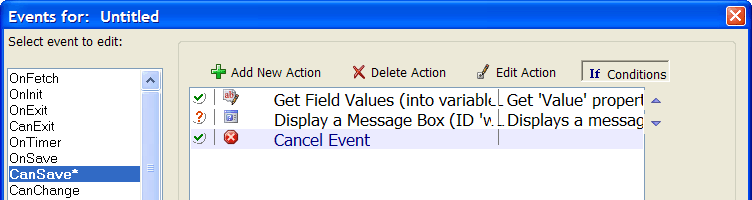
Click Next > and Finish to complete the Action. The Pop-Up Script Editor should look like this:
Next, make the Cancel Event action conditional. Check the Action is conditional check box.
Select "Flag variable is True" in the Execute Action if combo box.
Select "warn_CANCEL_Button" as the flag variable.
This flag variable will be set to True if the user clicks the Cance l button.

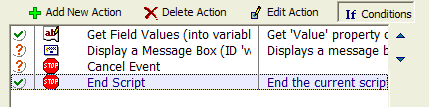
After the Cancel Event Action has executed, the script should stop. To add the End Script Action to the script, click Add New Action.
Select the "Xbasic" category and the "End Script" Action. Click OK.
The Pop-Up Script Editor should look like this:
You need to make the End Script Action conditional. Click the Action is conditional check box and the Same as Previous condition check box.
The Pop-Up Script Editor should look like this:
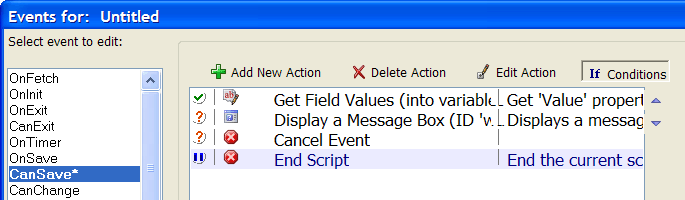
Note that the "ditto" icon to the left of the "End Script" action indicating that the condition for this action is the same as the condition for the Action above it.
The next step is to define the actions that will execute if the user selects the Yes button on the message box displayed by the second step of this Action Script. (You'll recall that the Yes button indicates that the user wants to set the shipping address fields to be the same as the billing address fields before the record is saved). To set the shipping address field to be the same as the billing address fields, you first need to set variables for each of the billing address fields.
Click Add New Action.
Select the "Fields" category and the "Get Field Values (into variables)" Action. Click OK.
The Genie appears. To get values from the current form, leave the selection as is in the combo box.
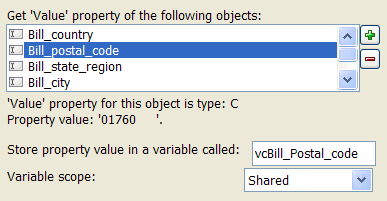
The click '+' to specify fields whose values you want to capture.
Select all of the billing address fields.
For each field you select, you must specify the corresponding variable that will be created to hold the value in the field. Make up any name you want for each field. Preface each name with "vc" to remind you that you're creating character variables. Choose names that make sense. For example, choose a name like "vcBillAddress1" to hold the "Bill_address_1" field.
After you have selected all the billing address fields (there are six of them in total) and defined the corresponding variable names, your screen should look like this: Picture
Click Next > and Finish. The Pop-Up Script Editor should look like this:

As the preceding Actions, this Action needs to be conditional. It should only be executed if the warn_YES_button flag variable is True. Check Action is conditiona l.
Select the "warn_YES_Button" flag variable. The screen should look like this:

The final Action in the script is to set the shipping address fields. Click Add New Action.
Select the "Fields" category, and the "Set Field Values" Action. Click OK.
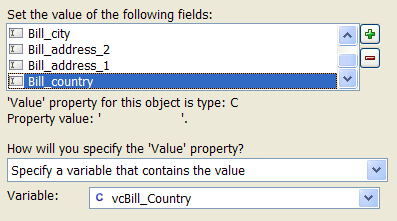
At the Genie screen, click '+' to select fields whose values you want to set.
Select all the shipping address fields, and for each field select the corresponding billing address variable.
Click Next > and Finish to complete the Action.
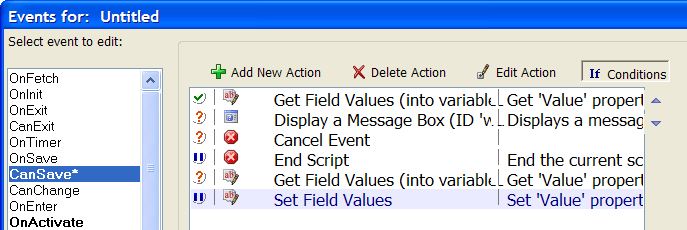
Click the Action is conditional check box and the Same as Previous condition check box. Your completed Action Script should look like this:
Click the Save button to save the script and the Close button to close the Pop-Up Script Editor.
At this point the script has been "saved" in the form that you are editing. But the form itself has not been saved. If you were to close the form without saving it, your script would be lost. It is therefore very important to also save the form when you're editing Event Scripts on forms.Click the Save button to save the form.
Click the Form View button to switch from Design Mode to Run Mode.
Now you can test your script. Enter a new record in the form. Fill in the billing address fields, but don't fill in the shipping address field. Click the Save button on the toolbar. Do not click the Save Record button you created in the previous lesson because it will start a new record.
See what happens when you click the Yes, No and Cancel buttons.