Alternate View Type
Description
There are three types of Alternate Views that you can add to your grid; Chart, Custom, and Google Map.
Selecting an Alternate View:
From the Web Projects Control Panel open the Grid Builder. On the Design tab open the Data Source page and choose either .dbf or SQL.
Under Query(DBF) or Query(AlphaDAO) choose a table to connect to that contains fields that can be applied to an alternate view.
On the Fields page move a number of fields from the Available fields: list into the Selected fields list. Select fields that can be used for your alternate view. For example if you are doing a map choose fields that contain records for Addresses, Cities, Latitudes, Longitudes, and/or Countries.
On the Properties page find the Alternate View properties and check Has Alternate View property checkbox.
Click the button
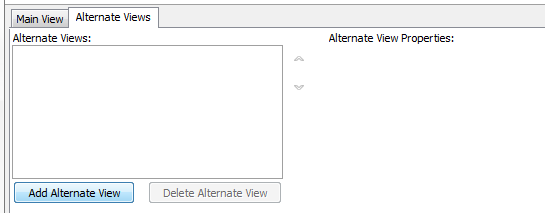
 next to the Alternate Views definition property. This will open the Alternate View Builder. At first you will see no properties
On the Alternate Views tab click the Add Alternate View button.
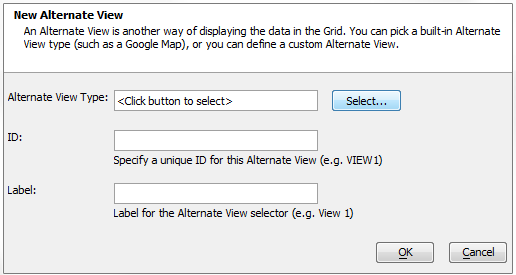
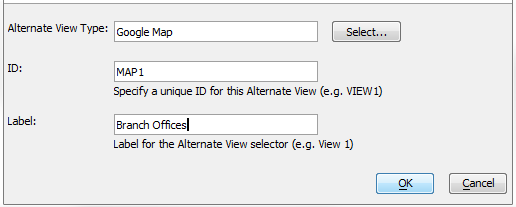
The Add New Alternate View dialog will open. Click the Select button next to the Alternate View Type: box.
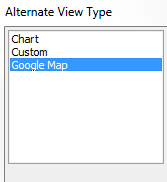
This will open the Alternate View Type dialog. Select the Alternate View you want to use and click OK.
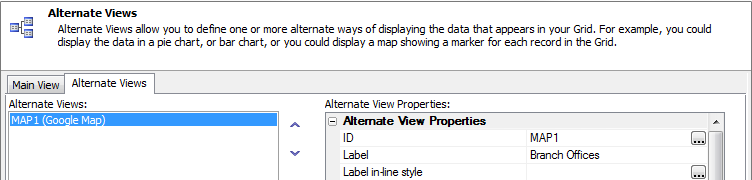
You will see the Alternate View Type you selected appear in the Add New Alternate View dialog. Now type in an ID: and Label: for your Alternate View, these can be any string.
Click OK. Your selected Alternate View should appear in the Alternate View Builder's Alternate Views: menu. You should also now see an Alternate View Properties list.