Defining the Detail View
Description
The Detail View has most of the functionality and properties characteristic of a regular grid. You therefore have many options in shaping both the appearance of the Detail View and what it is capable of doing. You can define your Detail View's fields and properties on the Detail View > Fields and Detail View > Properties pages. These pages open automatically when you select the Grid contains a Detail View checkbox on the Component Type page.
Detail View Fields and Field Properties:
Open the Grid Builder .
Open the Component Type Page, click Grid is:Read Only , and check the Grid contains a 'Detail View' partcheck box.
As with a grid, you must define the type of data you will use and the table from which the data will be drawn. Open to the Data Source page and choose .dbf or SQL for your data type.
Go to Grid > Query (DBF) or Grid > Query (AlphaDAO) and establish which .dbfor SQLtables you will use..
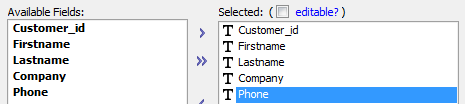
Display the Detail View > Fields page.
Select fields in the Available Fields list and move them to the Selected list, as you would with any grid. Use the arrow key to move them. If you are using AlphaSports Customergrid, for example, select the " Customer_Id", " Firstname", " Lastname", Company", and " Phone" fields and then click
 .
.
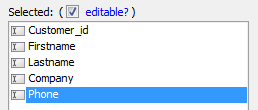
Check the Detail view is editablecheck box.
Click OK to change all the fields on the Detail View to editable TextBox controls.
On the Grid Builder Design page under Grid open the Properties page .
On the Properties list that opens find Detail View Display properties. The Hyperlink field property will be displayed here. Click the dropdown button next
 to Hyperlink field.
Select a field, like the "Customer_Id" field, in the Hyperlink field list and click OK. This is the field that will connect the record in the Detail View form with the record in the grid. Both the grid and the detail view forms must have a unique key value that links them together.
 The Hyperlink field set to Customer_Id.The grid must also contain, but not necessary display, the hyperlink field. Also, when you add fields to the grid, you can set the control type. As you will see below, the list of control types for a data bound field can be seen by clicking on the 'control type' in the Detail View > Fields > Field Properties > Display settings . You might also notice the Insert.. button at the bottom of the Available Fields list on the Detail View > Fields page. This is for inserting a Detail View control that is NOTdata bound to one of the fields in the Grid. For example, this is how you would put a button in a grid row. The list of controls that the Insert.... button shows includes hyperlink, which is really just another way of showing a button. For both buttons and hyperlinks, you can define javascript events, such as onclick.
Display the Grid > Fields page.
Select a field in the Selected Fields list, like Customer_ID, and look at the Field Properties list on the right side of the Fields page.
1. Under Display Settings find Control type. Click the button
 next to the property.
2. The Select Control Type dialog will open. Change the Control from 'Textbox' to ' Link '. The Customer_Idfield will uniquely connect each record in the grid to its detail view.
3. Below the Display Settings section you should now see a Link Properties section open.
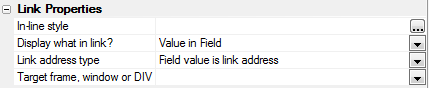
4. Under the Link Properties find the Link addresstype property. Click the dropdown and select " DetailView link ".
Change the labels used for the Firstnameand Lastnamefields.
Click Save and close the Grid Builder. This returns you to the HTML Editor.
How to Set Default Value for a New Record to The Values of the Previously Entered Record
In some applications, you might want to set the default value for a field in a new record to be the same as the value in the previously entered field. Here is how you can to this: This example shows how you can make the lastname field in a new record use the previously entered lastname as a default. Obviously, when you adapt this for your own use, you could define defaults for as many fields as you wanted. In the AfterInsertRecord event in the Grid builder, define this code:
function AfterInsertRecord as v (e as p)
e.rtc.mydata.lastname = e.datasubmitted.lastname
end function
In the OnIntialValueCalculate event, define this code:
function onInitialValueCalculate as v (e as p)
dim e.rtc.mydata.lastname as c = default ""
if e.rtc.mydata.lastname <> "" then
    e.newvalues.lastname = e.rtc.mydata.lastname
end if
end functionSee Also: Grid, Dialog and Custom Components Storing state information