Adding a Map to a Window Container
Description
Create a dropdown window container with a map. This requires acquiring a Google Map API key from Google.
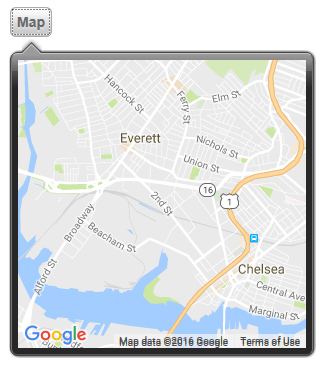
A Window Container with a Map
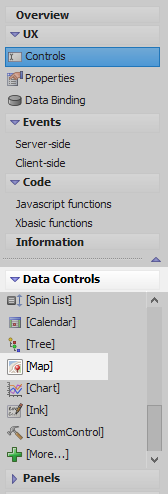
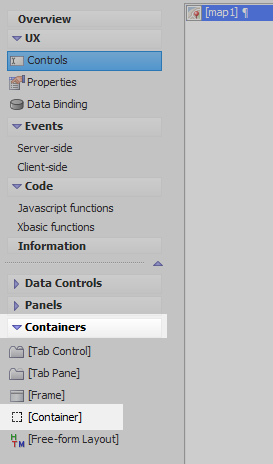
In the UX Builder on the UX Controls open the 'Data Controls' section. Click on the [Map] option to add a Map Control to the component.
Highlight the map control in the controls tree. In the properties list on the right scroll down to the 'Map Properties'. Check the 'Fill container' checkbox, even though a window container has yet to be defined.
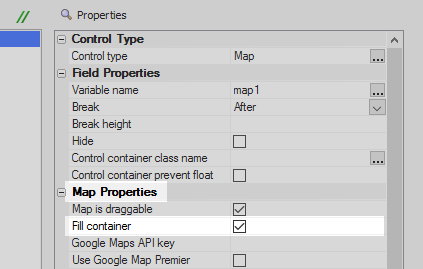
Next to the Google Maps API key property place the API key that you received from Google's developers website. This key can also be added to the [Project Properties], in which case it will not be necessary to define it here.
With the map control highlighted open the 'Containers' menu and click on the [Container] option.
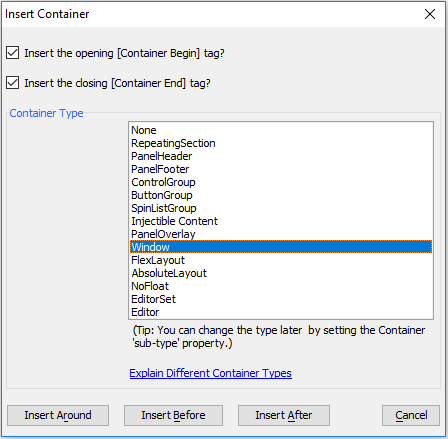
In the Container Type list select the 'Window' option. Click the 'Insert Around' button.
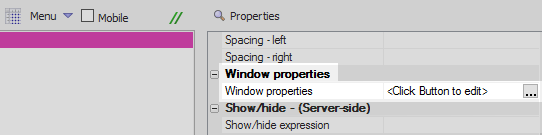
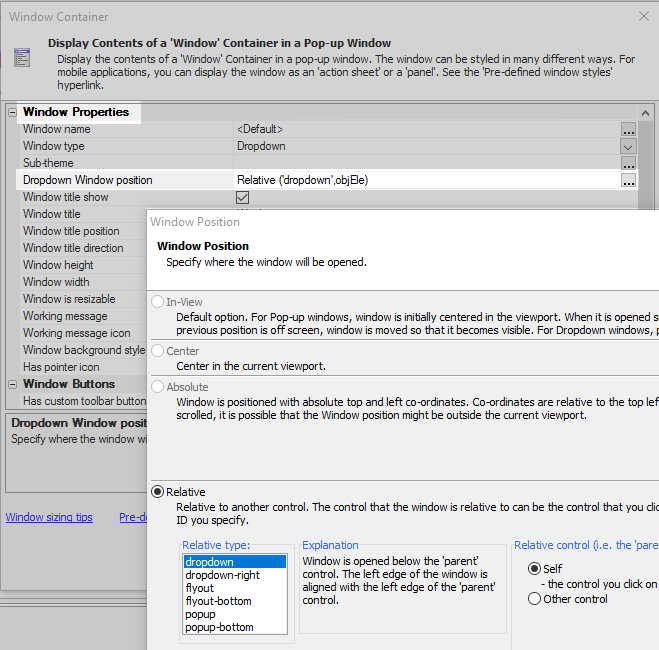
Highlight the opening window container tag. In the properties list on the right click the [...] button next to the 'Window properties' property in the 'Window Properties' section.
In the 'Window Container' dialog set the 'Window type' property to 'Dropdown'.
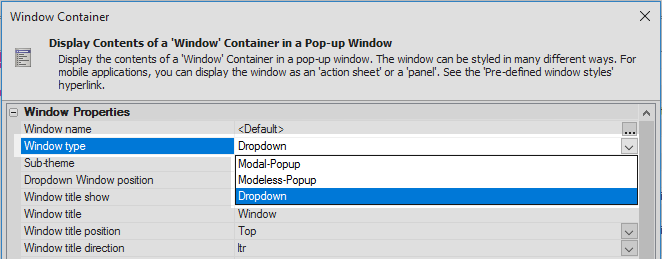
Click the [...] button next the 'Dropdown Window position' property and select the 'Relative' radio button option. Click OK and return to the 'Window Container' dialog.
Uncheck the 'Window title show' checkbox.

Set the 'Window height' and 'Window width' properties to '3in'.
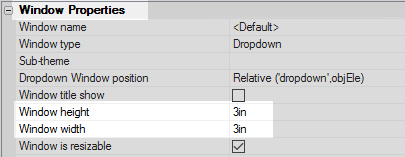
Uncheck the 'Window is resizable' checkbox.

Check the 'Has pointer icon' checkbox. Click OK to close the Window Container dialog.

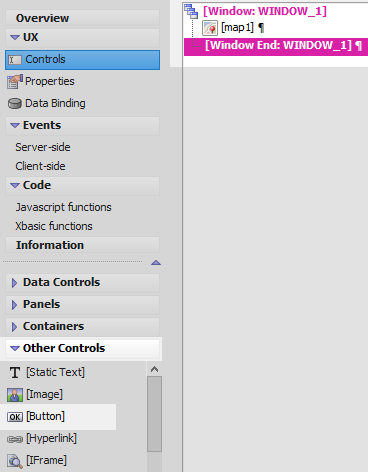
Highlight the window end tag, [Window End:WINDOW_1]. Open the 'Other Controls' click on the [Button] option to add a button control to the component.
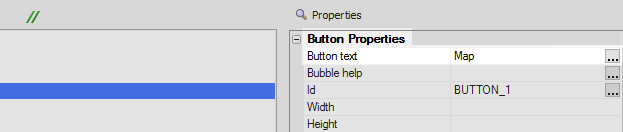
Highlight the button control. In the properties list on the right set the 'Button text' to read 'Map'.
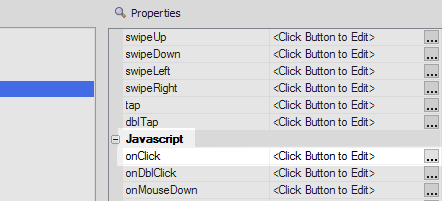
Scroll down to the 'Javascript' section and click on the [...] button next to the 'onClick' property.
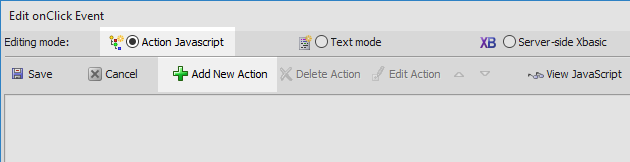
Set the editing mode to the 'Action Javascript' radio button. Click the 'Add New Action' button.
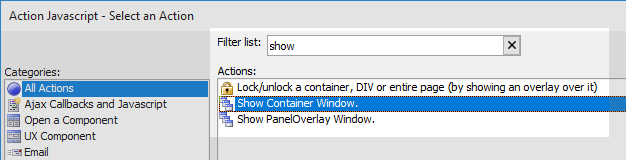
Type 'show' into the 'Filter list' control and select the 'Show Container Window' option. Click OK.
In the 'Display Window' dialog set the 'Container ID' property to be 'WINDOW_1'. Click OK, OK, and click 'Save'.

Run the component in Live Preview. Click the 'Map' button, the map should be displayed.
See Also