Built-in List Control Editors in a Form View
Description
You can create built-in list controls to use inside an editor that edits items in a Form View control. Because the 'Editor-List' is an editor only one of these controls needs to be defined in order for multiple items to make use of it. The example below uses an Editor-List to edit the 'City' and 'Country' fields. You can easily add filters to items that use an editor so that, for example, an editor-list that shows cities will only show cities that apply to the selected country in a Form View.

How to create a Built-in list in a Form View control is described in the guide below and in this video. You can also download the component.
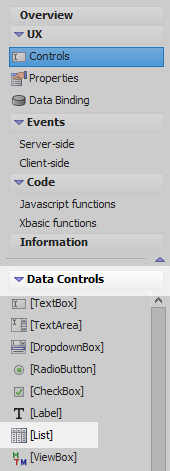
Create a List Control
In the UX Builder on the UX Controls page open the Data Controls menu. Click on the [List] option to add a list control to the component.
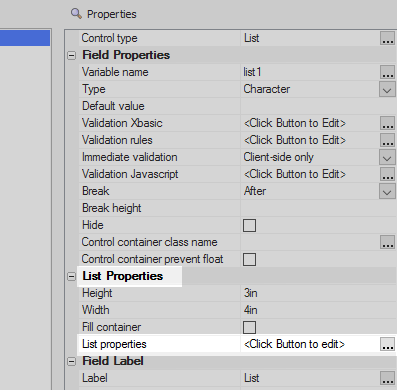
In the properties list's List Properties section click the ... button next to the 'List properties' property to open the List Builder.
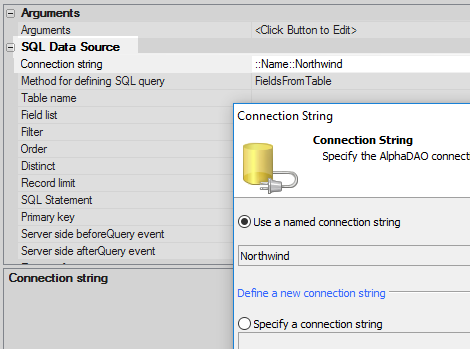
On the List Builder's Data Source pane set the 'Data Source Type' to 'SQL'.

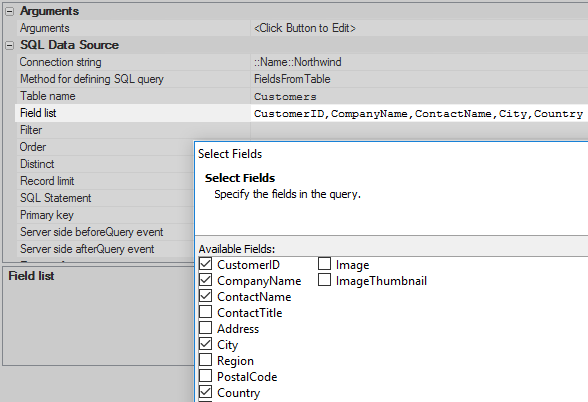
In the SQL Data Source section click the ... button next to the 'Connection string' property. Set the connection string to the 'Northwind' database.
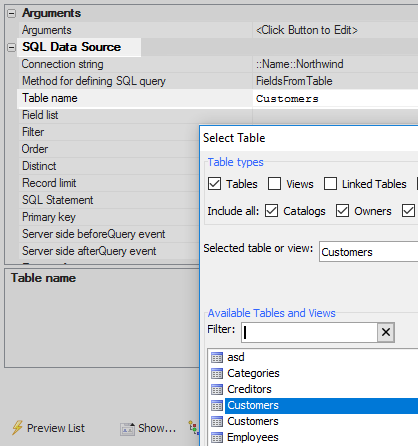
Click the ... button next to the 'Table name' property and select the 'Customers' table.
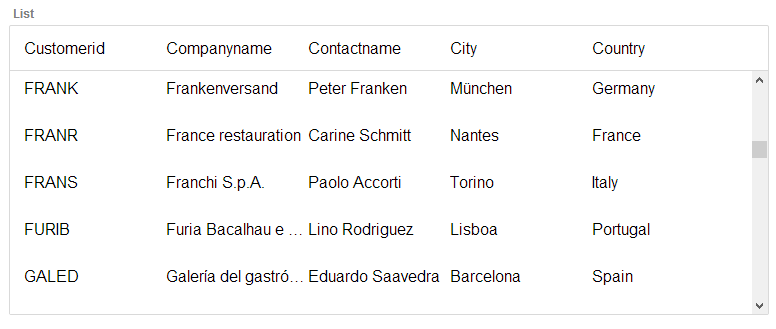
Click the ... button next to the 'Field list' property and select these fields: 'CustomerID', 'CompanyName', 'ContactName', 'City', and 'Country'.
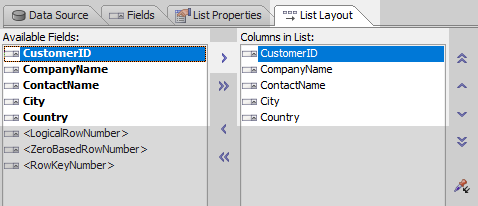
Open the 'List Layout' pane. Use the blue > arrow to move the five data fields from the 'Available Fields' list into the 'Columns in List' section. Click OK to close the List Builder.
Add the FormView Control and EditorSet
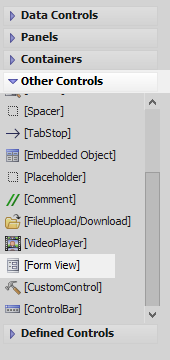
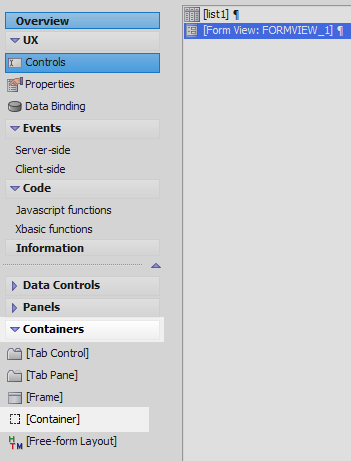
On the UX Controls page, select the list control. Open the 'Other Controls' menu and click on the [Form View] option to add a Form View control to the component.
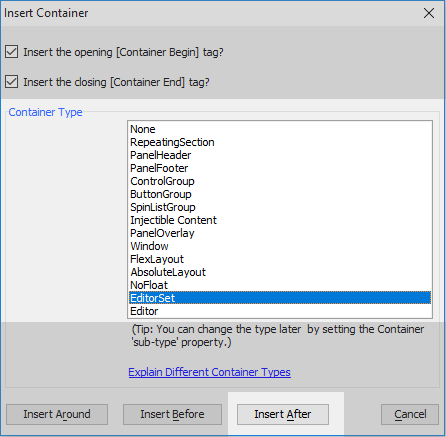
Select the form view control in the tree. Open the 'Containers' menu and click on the [Container] option.
From the Container type list select the 'EditorSet' option and click 'Insert After'.
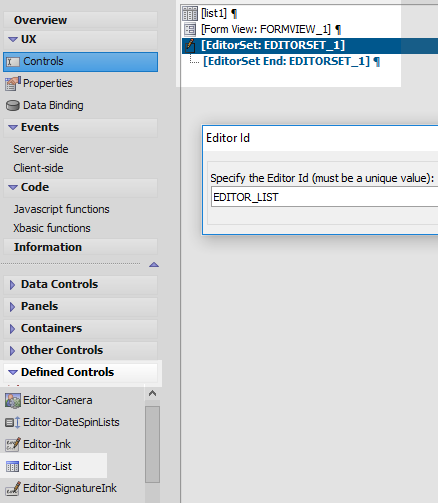
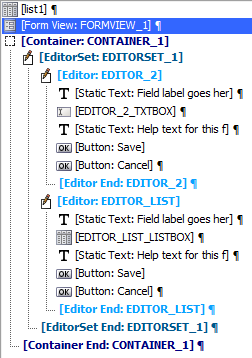
Select the EditorSet in the tree. Open the Defined Controls menu and select the 'Editor-List' option. Give this Editor the name 'EDITOR_LIST'.
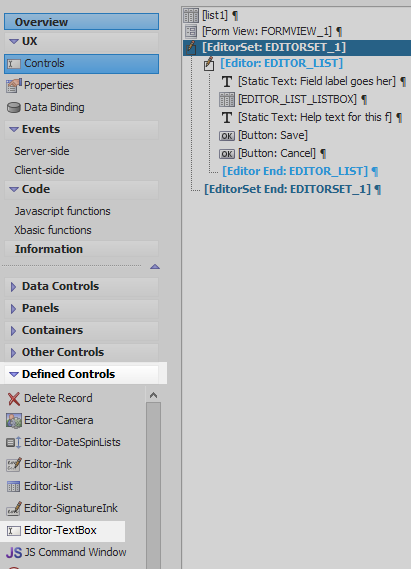
Select the EditorSet in the tree. From the Defined Controls menu select the 'Editor-TextBox' option. Use the default name and click OK.
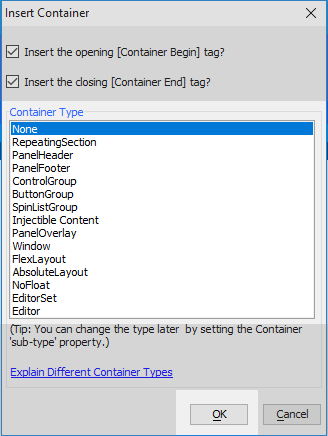
Select entire EditorSet and everything inside it. Open the 'Containers' menu and click on the [Container] option.

From the 'Container type' list select the 'None' option and click 'OK'
Adding to the Client-Side Data Cache
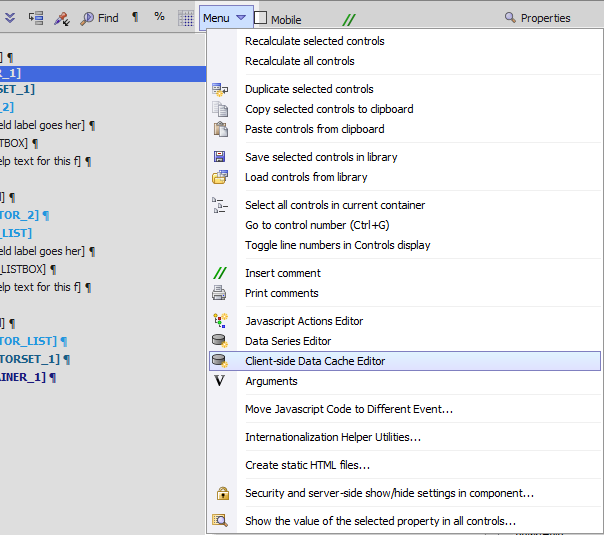
On the UX Controls page click locate the 'Menu' dropdown in the Controls page toolbar. Click on the 'Client-side Data Cache Editor' option.
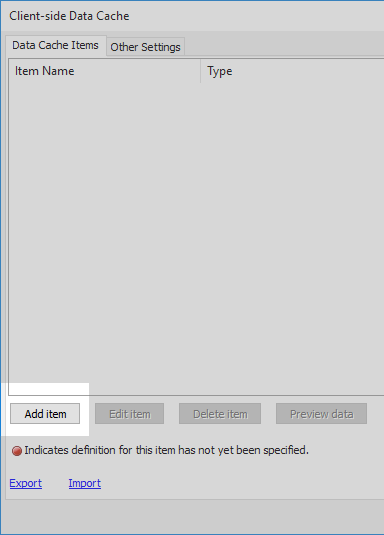
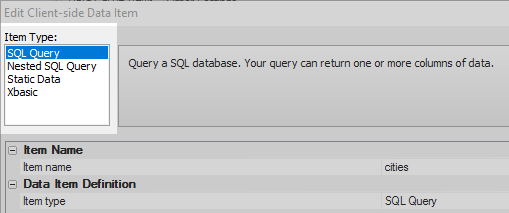
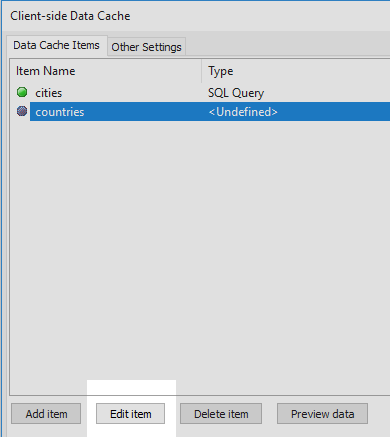
In the Client-side Data Cache Editor click on the 'Add item' button.
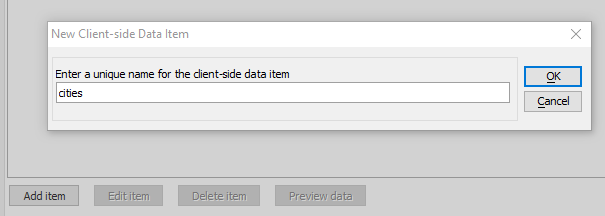
Name the new item 'cities' and click OK.
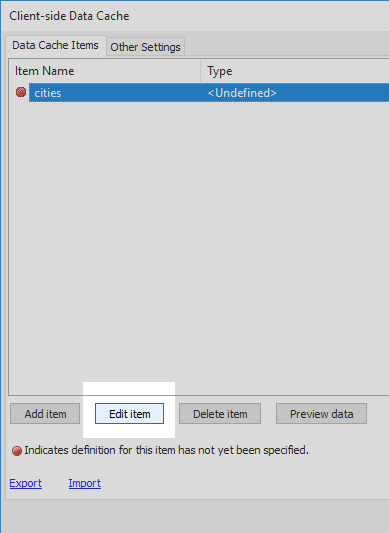
Select the cities item and click the 'Edit item' button.
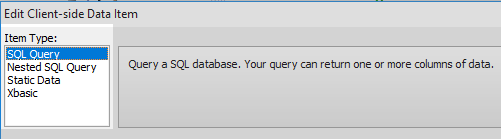
From the Item type menu select the 'SQL Query' choice.
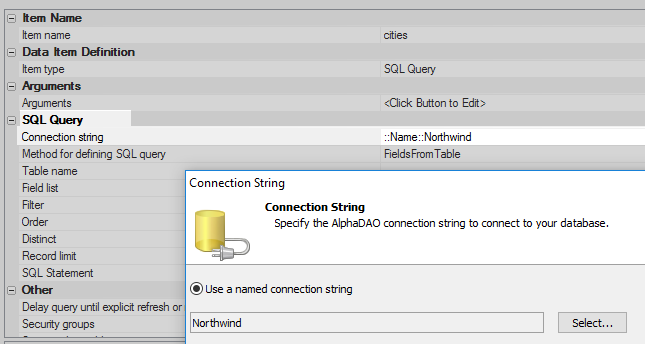
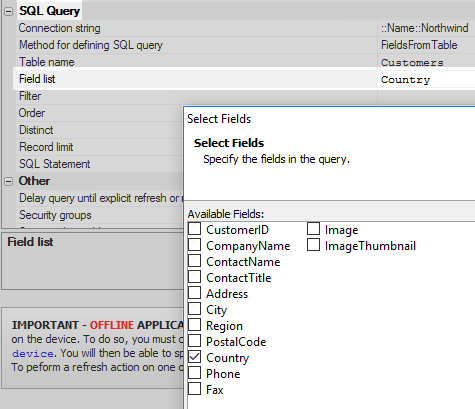
In the SQL Query section of the properties list that appears click the ... button next to the 'Connection string' property. Set the connection string to 'Northwind'.
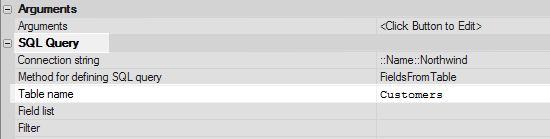
Click on the ... button next to the 'Table name' property and select the 'Customers' table.
Click the ... button next to the 'Field list' property and select the 'City' and 'Country' fields.

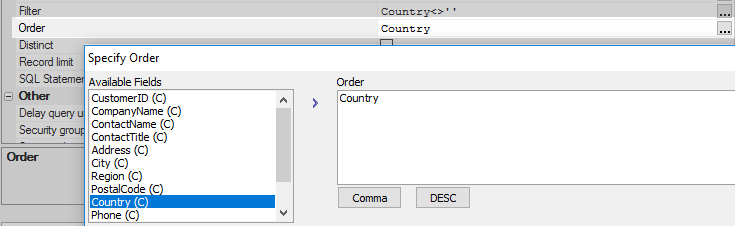
Click the ... button next to the 'Order' property. Select the 'City' and 'Country' fields again. Make sure to separate the two fields with a comma.

Check the 'Distinct' checkbox and click OK.

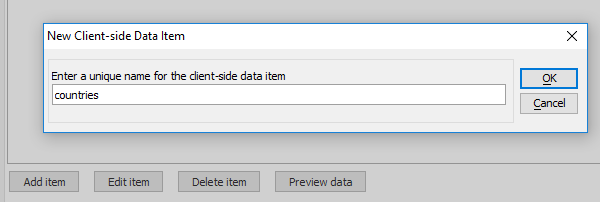
Click the 'Add item' button.

Give the new item the name 'countries' and click OK.
Select the 'countries' item and click the 'Edit item' button.
In the 'Edit Client-side Data Item' select the 'SQL Query' option.
In the SQL Query section of the properties list click the ... button next to the 'Connection string' property. Create a connection string to the 'Northwind' database.

Click the ... button next to the 'Table name' property and select the 'Customers' table.

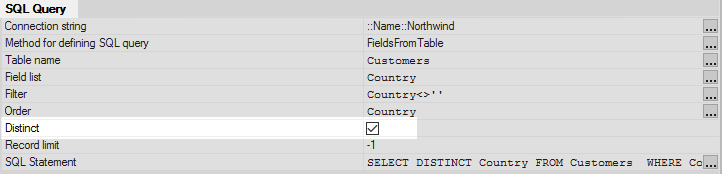
Hit the ... button next to the 'Field list' property and select the 'Country' field.
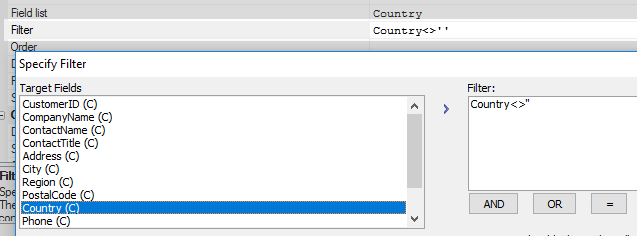
Click the ... button next to the 'Filter' property.

Define the following filter and click OK.
Country<>''
Click the ... button next to the 'Order' property and select the 'Country' field.
Check the checkbox next to the 'Distinct' property and click OK to close the 'Edit Client-side Data Item' dialog. Click OK again to close the Client-side Data Cache Editor.
Define the FormView
On the UX Controls page, click the Form View control in the control tree.
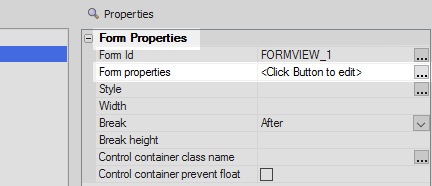
In the properties list on the right click the ... button next to the 'Form properties' property in the Form Properties section. The Form View Builder should open.
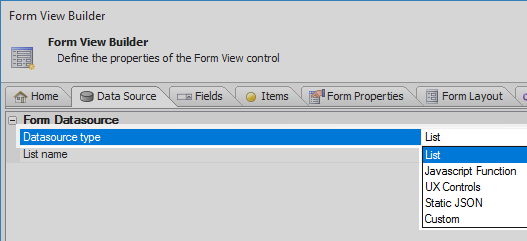
On the Form View Builder's Data Source pane. Set the 'Datasource type' to 'List'.
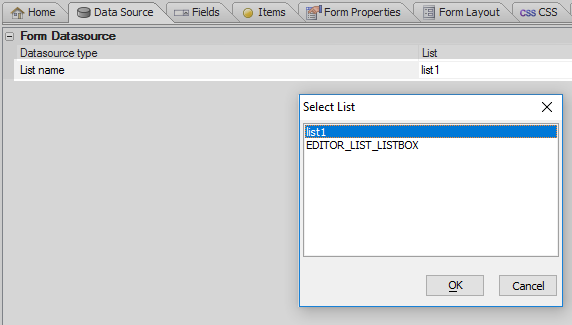
Click the ... button next to the 'List name' property and select the list control 'list1'. Click OK.
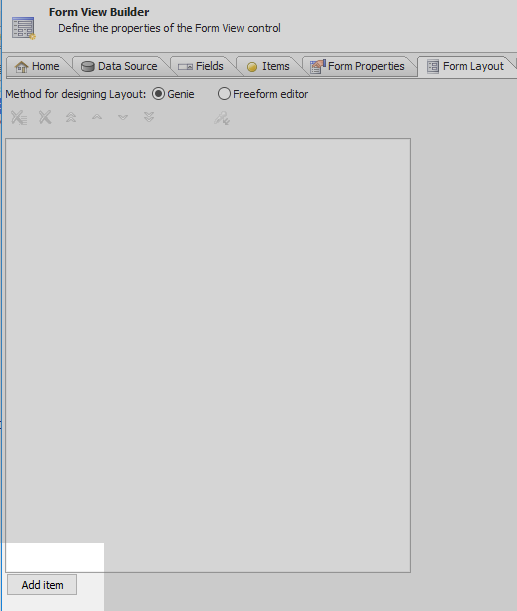
Open the 'Form Layout' pane and click the 'Add item' button.
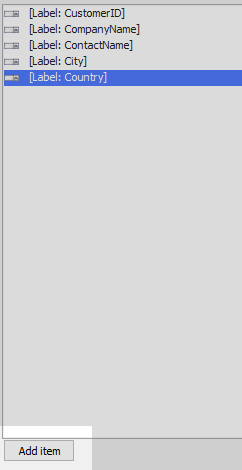
In the 'Select Control Type' dialog's Category menu select 'Data Controls'. In the Control menu select the [Label] option. Select all the data fields in the list on the right and click OK.

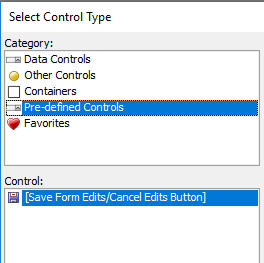
Click the 'Add item' button again.
In the 'Category' menu select 'Pre-defined Controls' option. From the 'Control' menu select [Save Form Edits/ Cancel Edits Button] option and click OK.
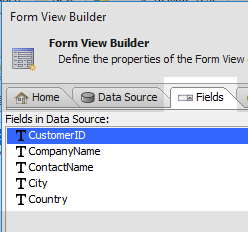
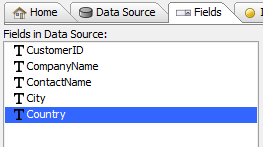
Open the Fields pane. Select the 'CUSTOMERID' field in the 'Fields in Data Source' menu.
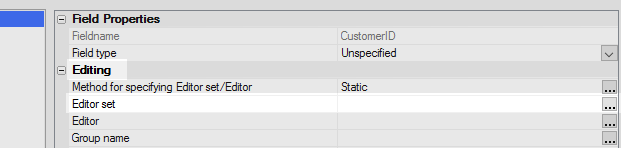
Click the ... button next to the 'Editor set' property in the 'Editing' section of the properties list.
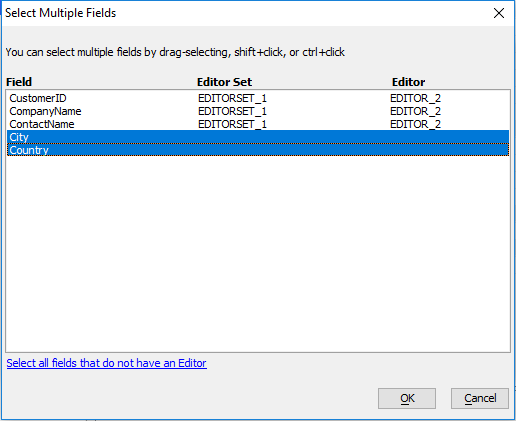
In the 'Select Editor' dialog select the 'EDITORSET_1' in the 'Editor Set' list and 'EDITOR_2' in the Editor list. Click the 'Assign selection to multiple fields' button.
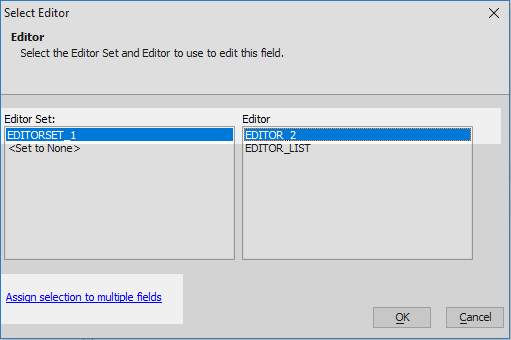
Select the 'CustomerID', 'CompanyName', and 'ContactName' fields and click OK.

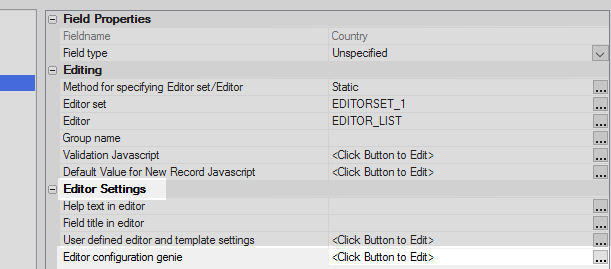
Select the 'City' field in the 'Fields in Data Source' list. Click the ... button next to the 'Editor set' property.
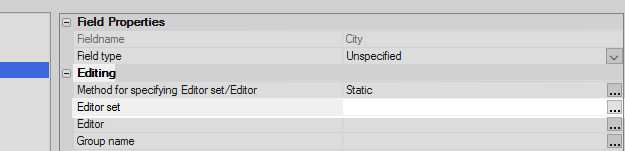
In the Select Editor choose the 'EDITORSET_1' option in the 'Editor Set' list. In the 'Editor' list select the 'EDITOR_LIST' option. Click the 'Assign selection to multiple fields' button.
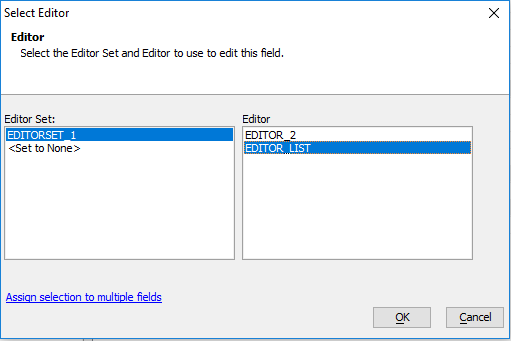
Select the 'City' and 'Country' options and click OK.
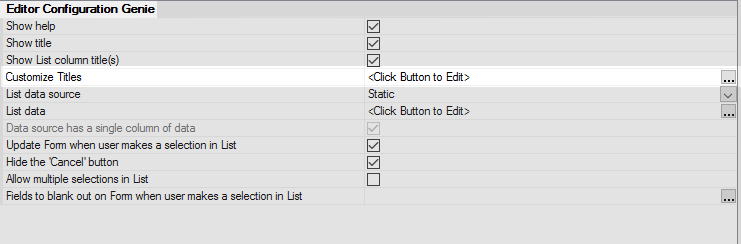
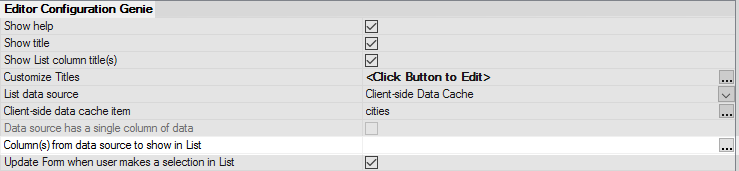
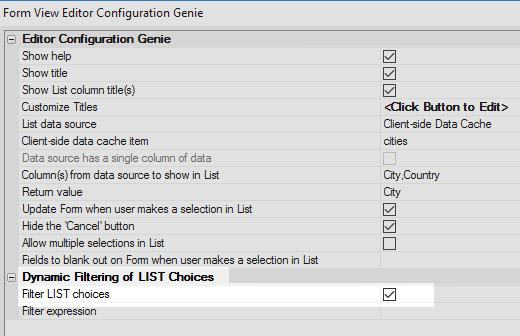
In the 'Fields in Data Source' menu, click the 'City' field. In the properties list on the right. click the ... button next to the 'Editor configuration genie' property.

In the 'Form View Editor Configuration Genie' check the 'Show List column title(s)' property checkbox.
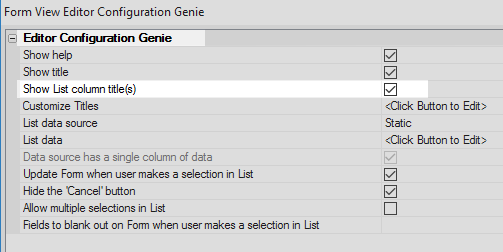
Click the ... button next to the 'Customize Titles' property.
Add the following code to the Custom Titles dialog and click OK:
{
    "CITY": "Cities (for selected country)"
}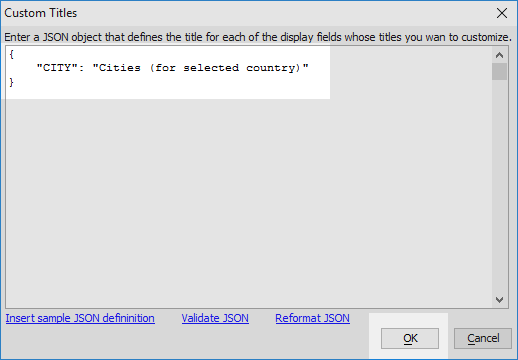
Set the 'List data source' property dropdown to 'Client-side Data Cache'.
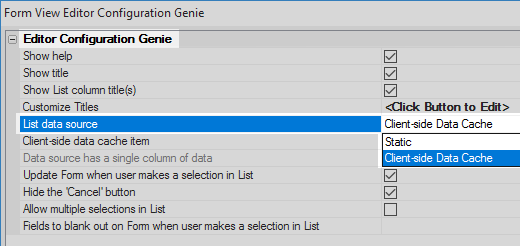
Click the ... button next to the 'Client-side data cache item' property and select the 'cities' item; that you defined in the previous section of this guide.
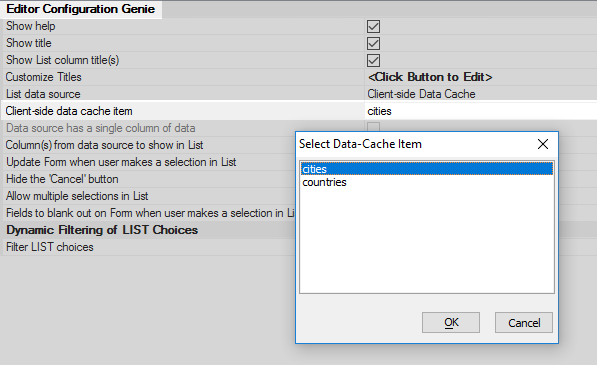
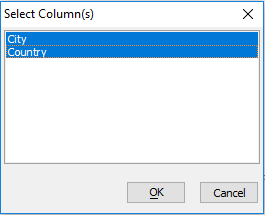
Click the ... button next to the 'Column(s) from data source to show in List' property.
Select 'Country' and 'City' and click OK.
Click the ... button next to the 'Return value' property. Set the Return value to be City
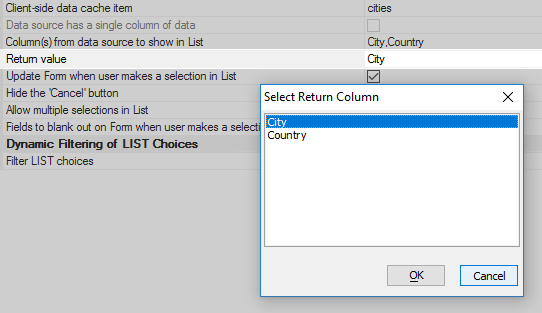
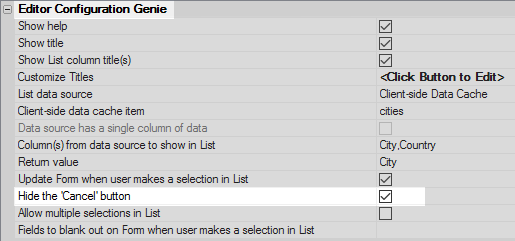
Check the "Hide the 'Cancel' button" checkbox.
In the 'Dynamic Filtering of LIST Choices section check the 'Filter LIST choices' checkbox.
Click the ... next to the 'Filter expression' property.

Click the 'Insert field name' button and select the 'Data field' option. Choose the 'Country' field.
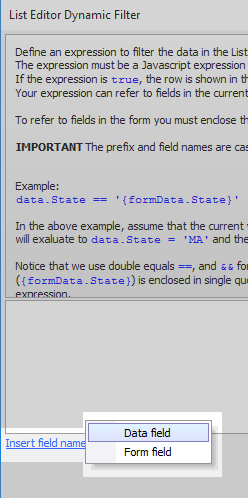
Put two equals sign after the data field, '==', and click the 'Insert field name'. Click the 'Form field' option and select the 'Country' field again. The expression should look like this:
data.Country == '{formData.Country}'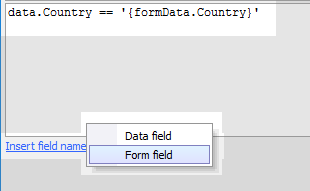
Click OK. Then click OK again. Select the 'Country' field in the 'Fields in Data Source' list.
Click the ... button next to the 'Editor configuration genie' property.
From the 'List data source' property's dropdown select 'Client-side Data Cache'.
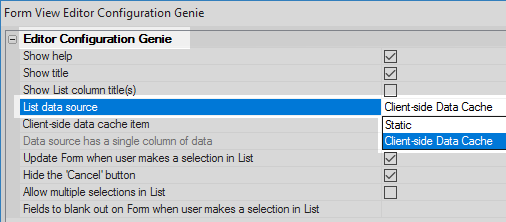
Click the ... button next to the 'Client-side data cache item' property and select 'countries'.

Click the ... button next to the 'Fields to blank out on Form when user makes a selection in List' property. Set this property to 'City'

Click OK to close the genie and OK again to close the Form View Builder. Run the component in Live Preview.
Select a row in the list control. The Form View should appear.
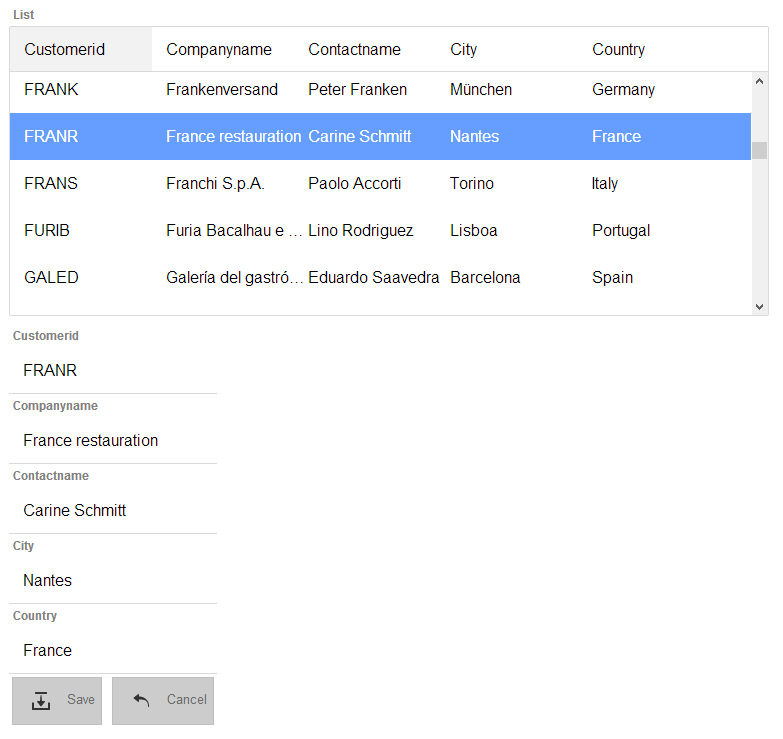
Click on the Country field to edit it and you should be presented with a list of all of the countries in the data. Change the Country.
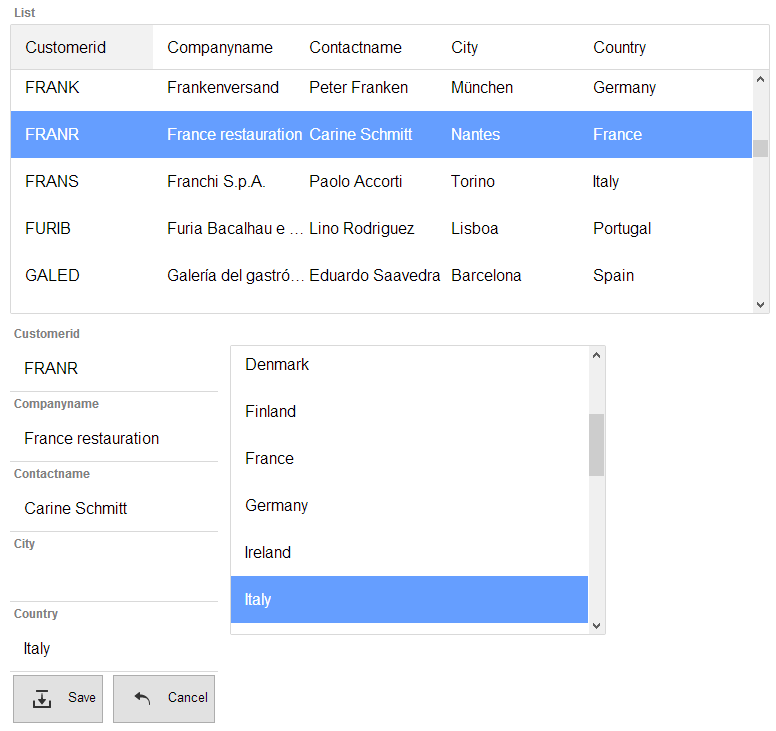
Try changing the 'City' field in the FormView. The editor-list control should filter the city options based on the selected country.