Displaying Calculated Values on a FormView
Description
When you design a FormView control you may want the form to display calculated values (typically computed from other fields in the form). Since the Form is really just an HTML template that is rendered using Alpha Anywhere's client-side templating features, this is easily done.
For more on displaying calculated values on a formview watch this video (Date added: 2016-10-10) or follow the guide below.
Create the List Control
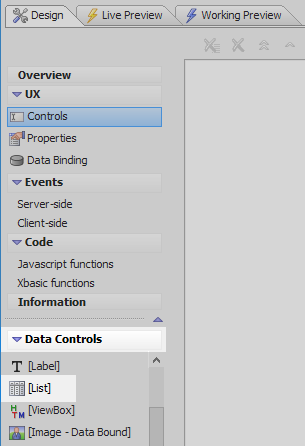
In the UX Builder on the UX Controls page open the 'Data Controls' menu. Click on the [List] option to add a List control to the component.
Highlight the list control. In the properties section on the right click on the [...] button next to the 'List properties' property in the 'List Properties' section. The List Builder will open.

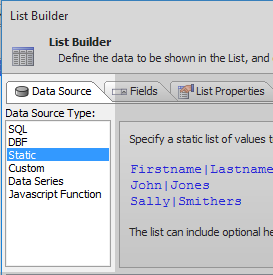
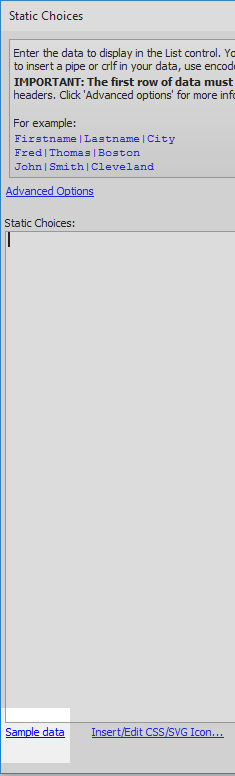
Open the List Builder's 'Data Source' pane. From the 'Data Source Type' menu select the 'Static' option.
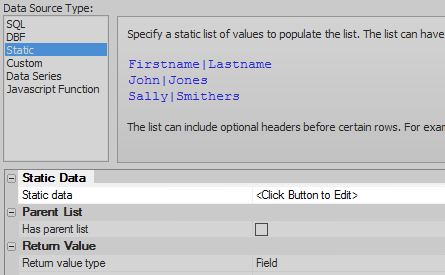
Click the [...] button next to the 'Static data' property in the 'Static Data' section.
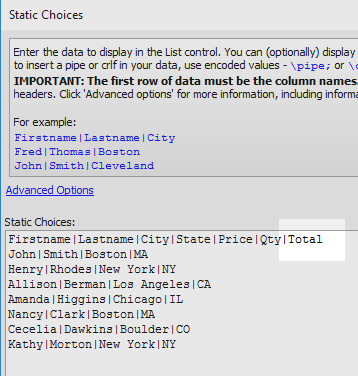
Click the 'Sample data' button at the bottom of the Static Choices dialog.
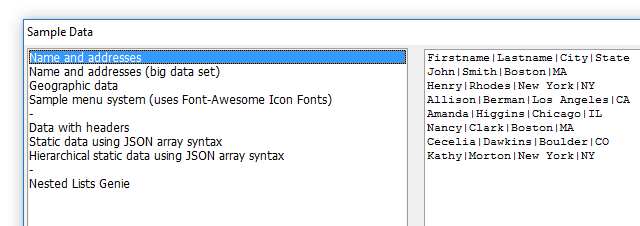
Select the 'Name and addresses' option in the Sample Data dialog and click OK.
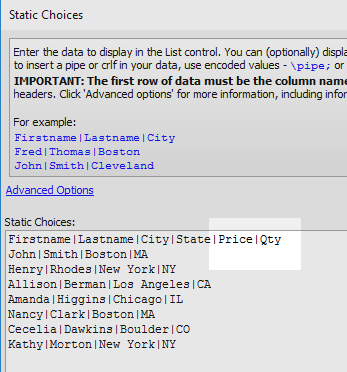
Add 'Price' and 'Qty' fields to the data by added the field names to the first row of data. Separate each field with a pipe '|' character. Click OK.
Firstname|Lastname|City|State|Price|Qty
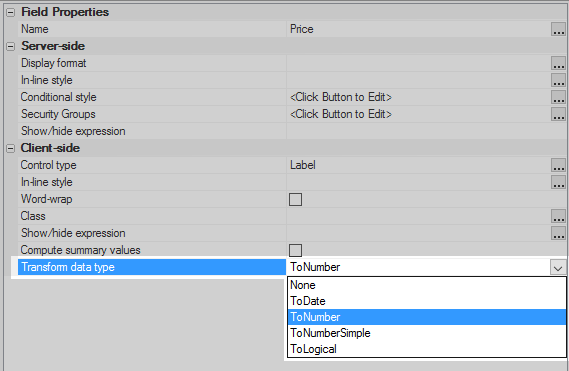
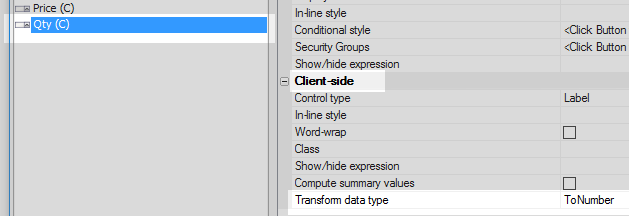
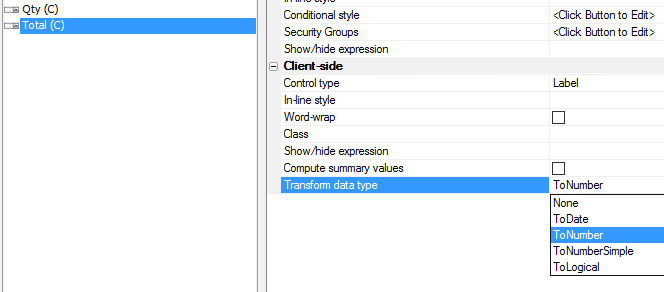
Open the Fields pane. Highlight the 'Price' field.

In the properties list on the right set the 'Transform data type' dropdown to the 'ToNumber' setting. This property is in the 'Client-side' section.
Highlight the 'Qty' field. Set the 'Transform data type' for the 'Qty' field to 'ToNumber'.
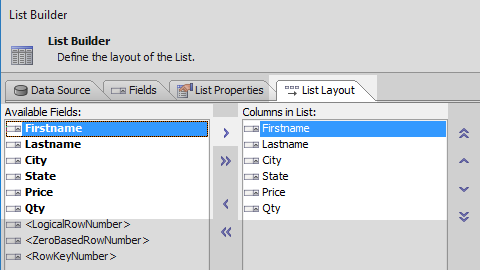
Open the 'List Layout' pane. Use the blue '>' arrow to move all of the data fields from the 'Available Fields' list into the 'Columns in List' that contains all of the existing fields. Click OK to close the List Builder
Add a Form View and Defined Controls
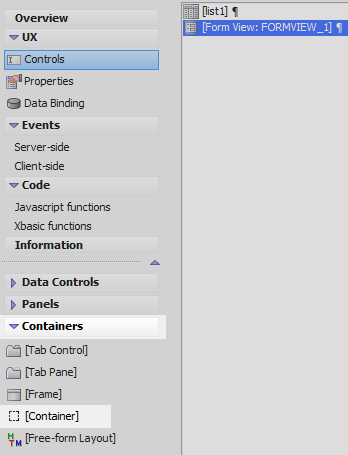
Open the 'Other Controls' menu on the UX Controls page. Click on the [Form View] option to add Form View control under the list control.

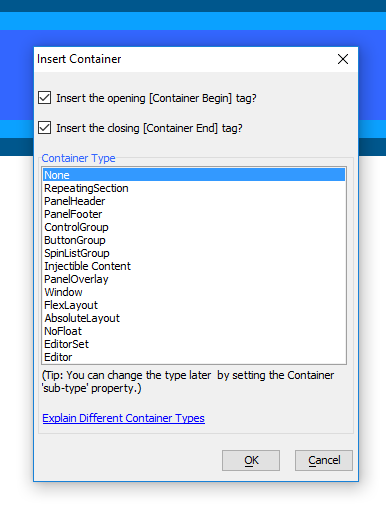
Highlight the Form View control in the control tree. Open the 'Containers' menu and click the [Container] option.
From the Container type list select the 'EditorSet' option and click 'Insert After'.

Highlight the Editor Set. Open the 'Defined Controls' menu and select the 'Editor - TextBox' option. Leave the name as EDITOR_1 and click OK.
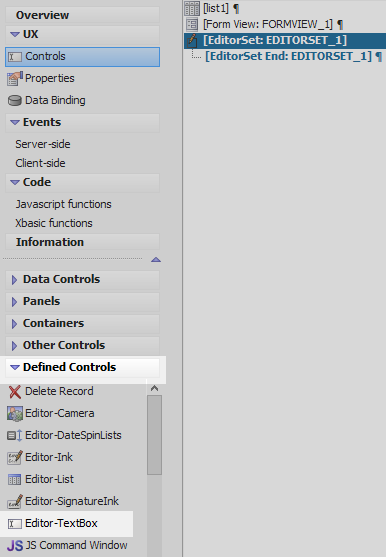
Highlight the Editor Set and Everything it contains. Open the 'Containers' menu again and click on the [Container] option.
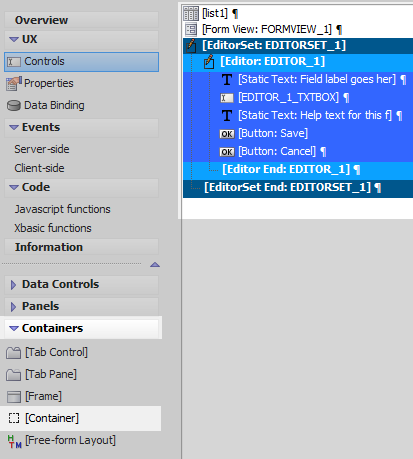
Select the 'None' option and click 'OK'.
Display Calculated Values in a FormView
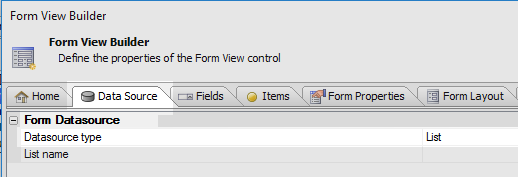
Highlight the Form View control. In the properties list on the right click the [...] button next to the 'Form properties' property to open the Form View Builder.
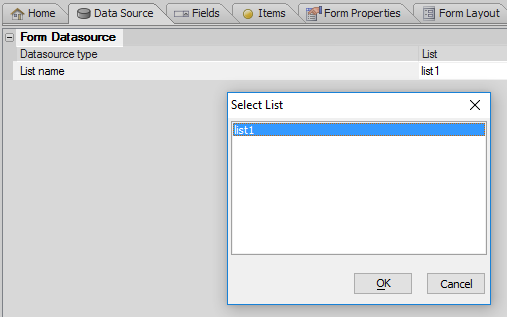
On the Form View Builder's 'Data Source' pane. Set the 'Datasource type' property to 'List'.
Click the [...] button next to the 'List name' property and select the list control you defined, 'list1'.
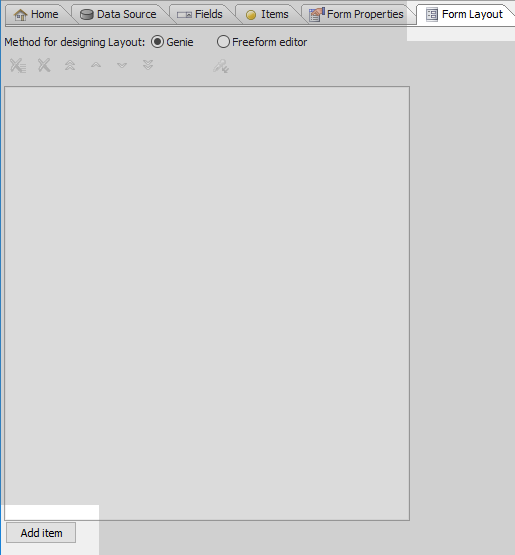
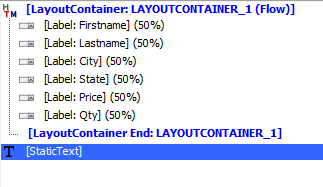
Open the Form Layout pane and click the 'Add item' button in the lower left.
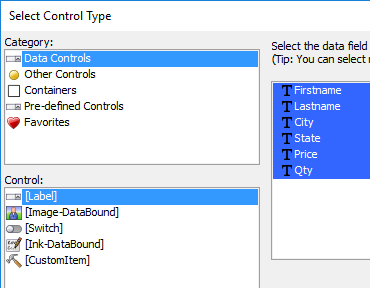
Highlight the 'Data Controls' option in the category menu and the [Label] option in the 'Control' menu. In the list of fields on the right highlight all of the fields and click OK.
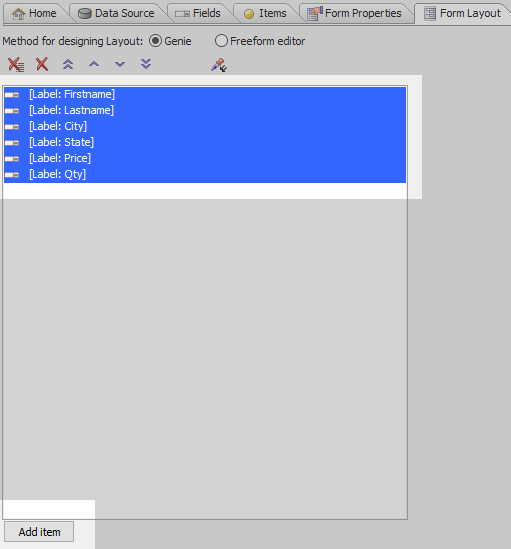
Highlight all of the [Label] items and click on the 'Add item' button again.
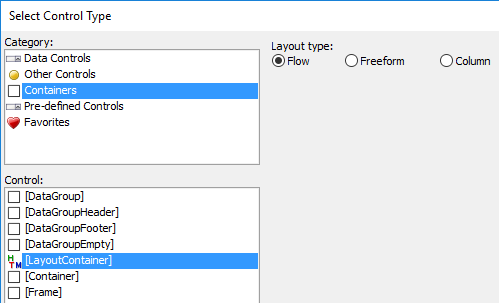
In the Category menu select the 'Containers' option. In the Control menu select [LayoutContainer]. From the 'Layout type' choices select 'Flow' and click the 'OK' option.
Highlight the [Label:Firstname] item. In the item's properties list under 'Flow Layout Settings' set the 'Width' property to be 50%.
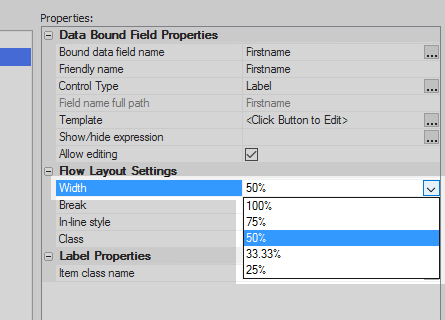
Change the remaining [Label] items to have a 'Width' of 50% in their Flow Layout Settings section.
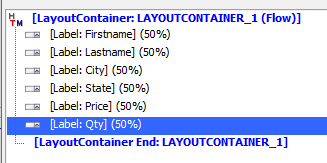
Highlight the [LayoutContainer End: LAYOUTCONTAINER_1] tag. Click the 'Add item' button again.
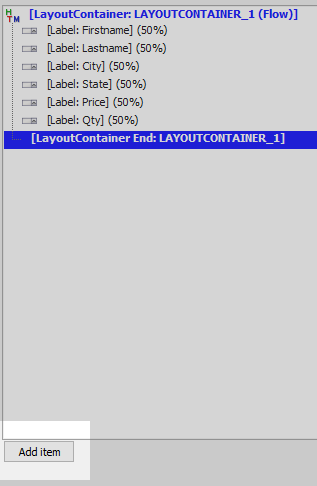
In the Select Control Type dialog's Category menu select the 'Other Controls' option. In the 'Control' menu select the [Static Text] option and click OK.

Highlight the StaticText item.
In the item's Properties list on the right click the [...] button next to the 'Text' property.

Add the following HTML text to defined the Static Text item then click OK:
<div style="padding: 10px;">
     Total: <b>{Price * Qty:number('$#,##0.00;$ (#,##0.00;$ (#,##0.00);------')}</b>
</div>
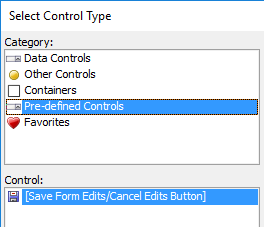
Click the 'Add item' button again.

In the Category menu select the 'Pre-defined Controls' option. In the 'Control' menu select the [Save Form Edits/Cancel Edits Button], then click OK.
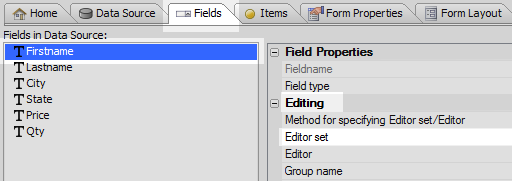
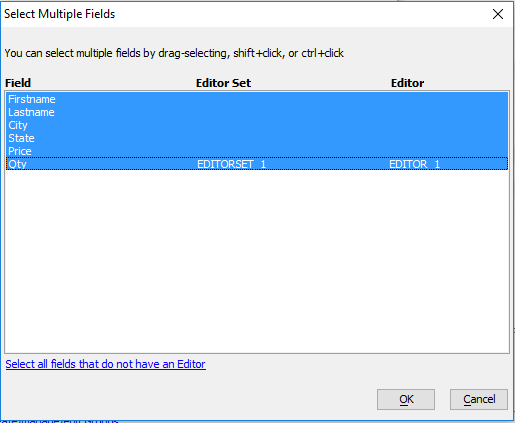
Open the Fields pane and highlight the first field. In the properties list on the right click the [...] button next to the Editor set property.
In the Select Editor dialog highlight 'EDITORSET_1' in the Editor Set list and 'EDITOR_1' in the Editor list. Click the 'Assign selection to multiple fields' button in the lower left.
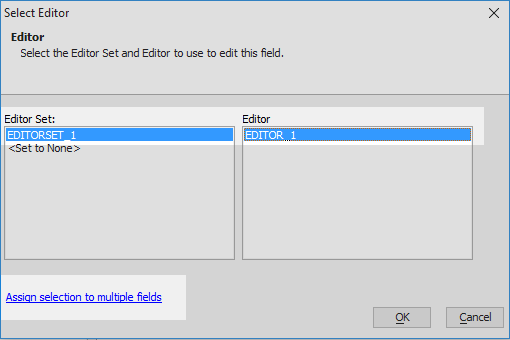
Highlight all of the fields and click OK.
Open the Form View's 'Form Properties' pane and scroll down to the 'Other Form Properties' section. Click the [...] button next to the 'Default template' property.
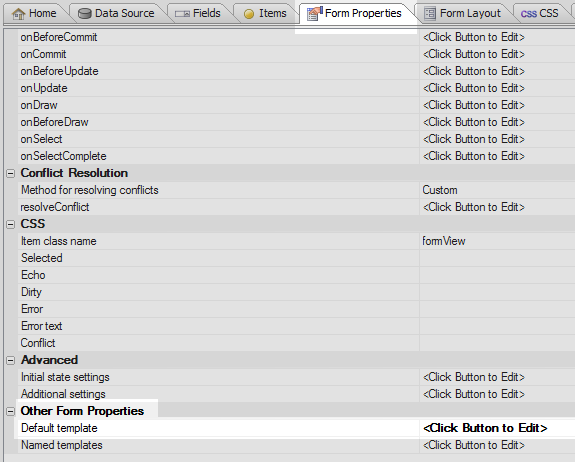
Add the following code to the 'Default template' and click OK. Click OK again to close the Form View Builder
<div class="[theme:ux.base.labelClassName|class.dialogFieldLabel]" style="font-size: 75%">{*fieldLabel}</div> <div class="[theme:edit.base.className|class.dialogInput]">{*field}</div> {*fieldError}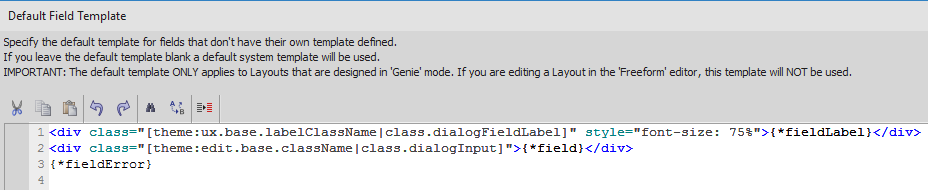 After closing the Form View Builder you might want to increase the width of the list control to 6in.
Run the component in Live Preview.
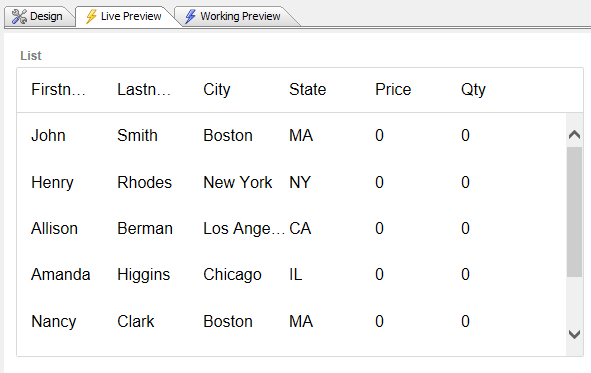
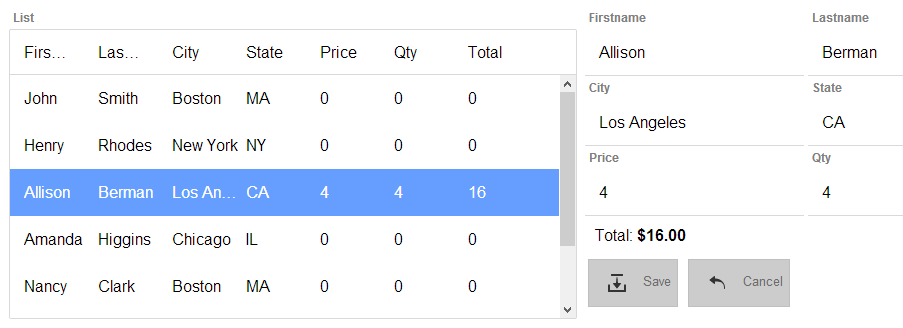
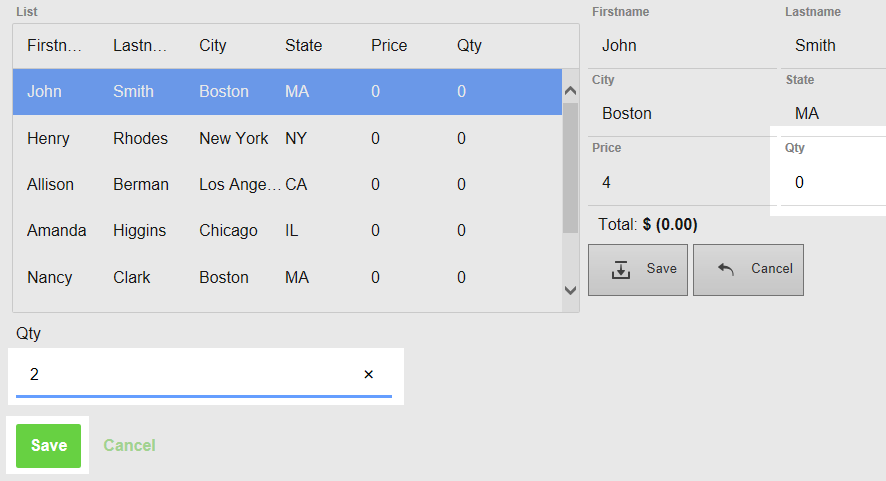
When you highlight a row in the list control the Form View should appear.

Click on the Price or Quantity value and change it in the editor, then click 'Save'
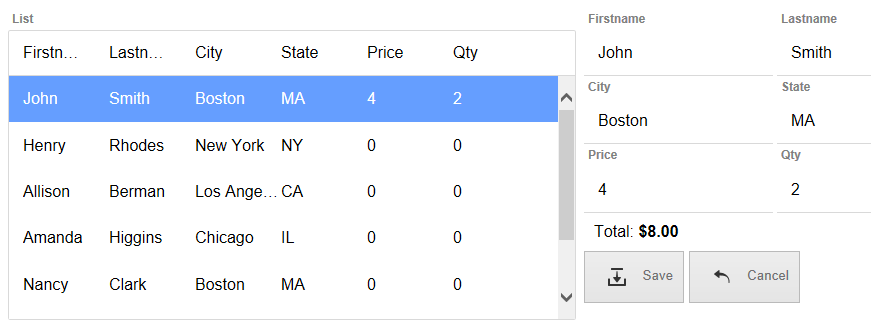
The value for the 'Total' in the Form View should change. Click the 'Save' in the FormView to add the change to the list control.
Create a Computed Column in the List Control
On the UX Control's page highlight the List control. In the Properties list click on the 'List properties' property to open the List Builder.

Open the List Builder's 'Data Source' pane. Click the [...] button next to the 'Static data' property in the 'Static Data' section.
In the first row of the static data add a '|' character and a 'Total' field and click OK.
Firstname|Lastname|City|State|Price|Qty|Total
Open the 'Fields' pane and highlight the 'Total' field. In the 'Client-side' section set the field's 'Transform data type' property to 'ToNumber'.
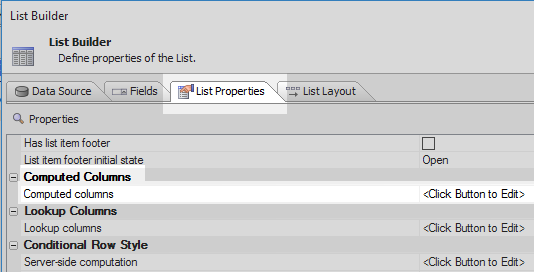
Open the 'List Properties' pane. Scroll down the properties list to the 'Computed Columns' section. Click the [...] button next to the 'Computed columns' property.
Create the following expression to defined the value of the 'Total' field. Click OK.
data.Total=data.Price*data.Qty;

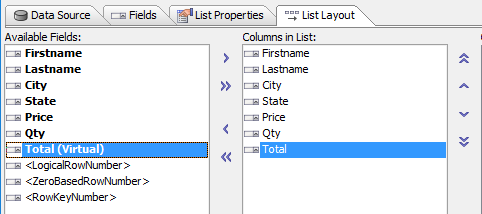
Open the 'List Layout' pane. Use the blue '>' arrow to move the 'Total' field from the 'Available Fields' list into the 'Columns in List' that contains all of the existing fields. Click OK to close the List Builder
Run the component in Live Preview. Now when you submit a price or quantity change from the Form View control you should see a total in the List control.