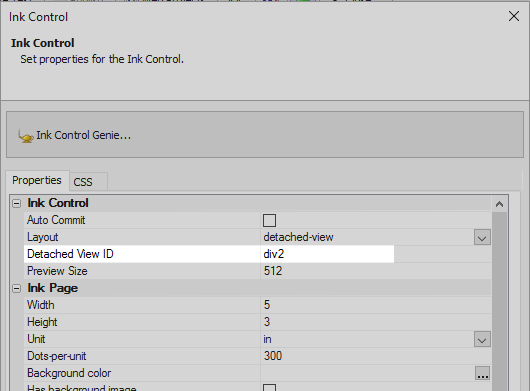
Detached View ID
Description
This property appears when the 'Layout' property is set to 'detached view'. The ID of the element to contain the Ink Control view part in a "detached-view" layout.
Create a detached view
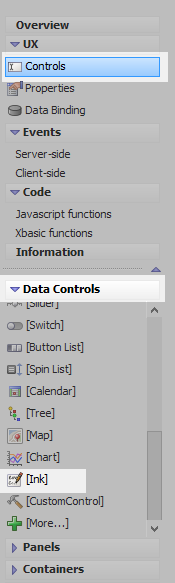
In the UX Builder's UX Controls page open the Data Controls menu. Click on [Ink] to add an ink control to the page.
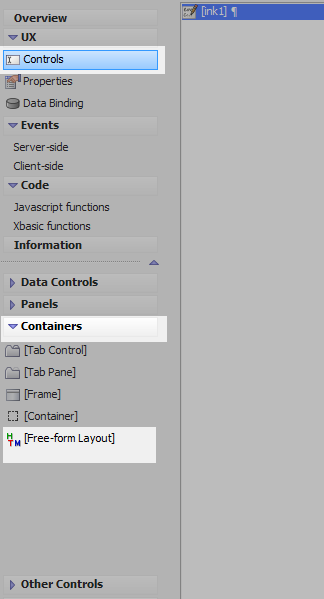
Open the Containers menu. Click on the [Free-form Layout] option to add a free-form container to the component.
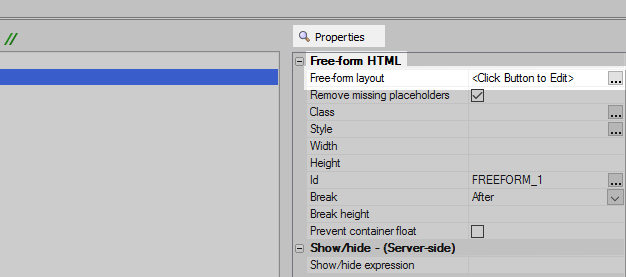
Highlight the free-form container. In the properties list, under the Free-form HTML section, click the
 button next to the
Free-form layout property.
button next to the
Free-form layout property.
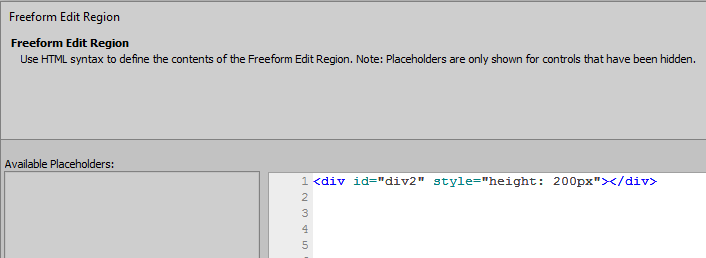
In the Freeform Edit Region dialog add the following html and click OK.
<div id="div2" style="height: 200px"></div>
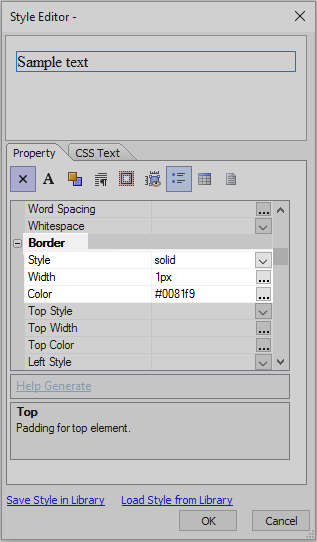
Click the
button next to the Style property, also in the Free-form HTML section of the properties list.
In the Property tab's 'Border' section set the Style setting to 'solid', the Width setting to 1px, and the Color setting to a color. Click OK.
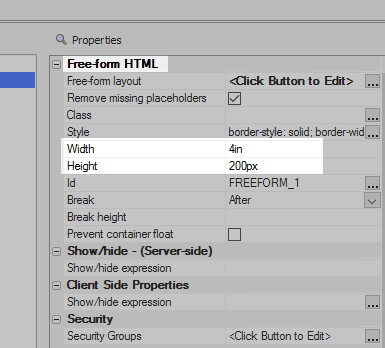
In the Free-form HTML section of the properties list set the Width property to be '4in' and the Height property to be '200px'.
Highlight the Ink control. In the properties list click on the Ink properties property to open the Ink settings.
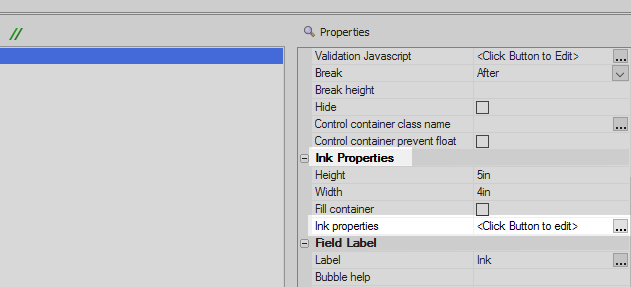
In the properties tab, under Ink Control, set the 'Layout' property dropdown to 'detached-view'.
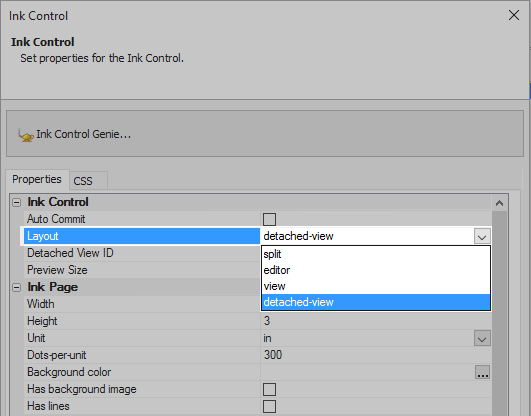
Set the Detached View ID to 'div2'. This references the div that was defined in the Free-form layout property. Click OK.
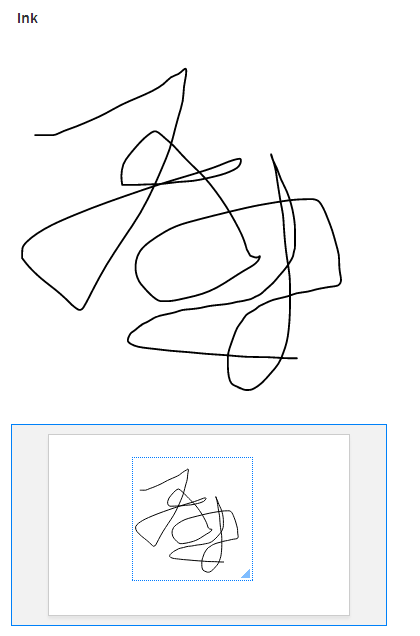
Run the component in Working Preview. You should see the view part of the Ink control appear in the Free-form layout container.