List Builder Detail View PropertiesDirty control class name
Description
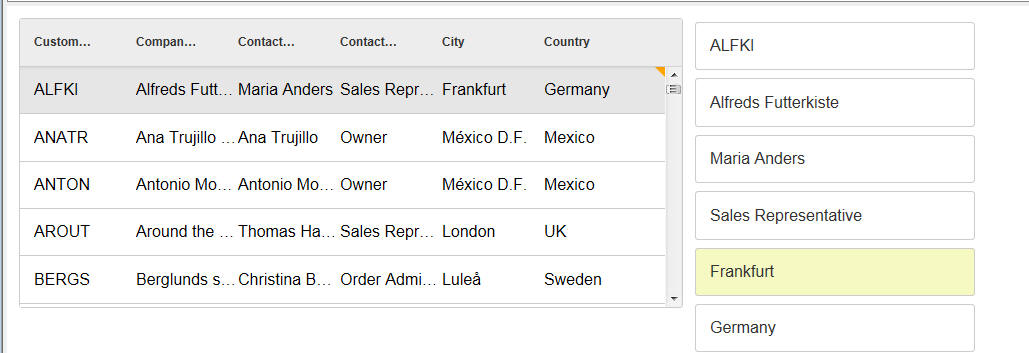
When you have a List with an associated Detail View and you edit the data in one of the rows of the List, an icon (whose appearance you can customize) is shown in the List row to indicate that the List row has data that has been edited, but not yet synchronized.
Displaying 'Dirty' Controls
You can indicate if the dirty fields in a List row that has been edited by specifying a custom CSS class to apply to the Detail View control if the field value has been edited.
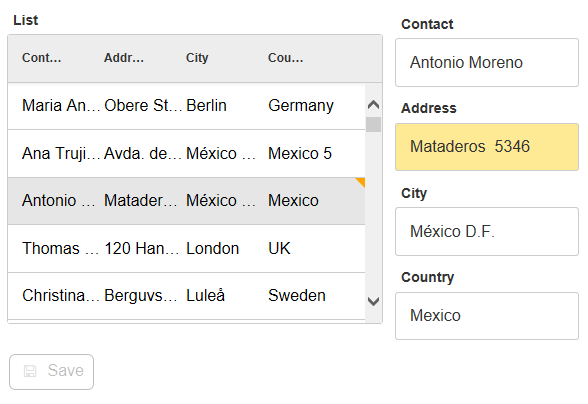
For example in the image shown below, you can see that the first row in the List has been edited, and you can now also see that the field in that row that was edited was the city field that was changed to 'Frankfurt'.
To indicate the CSS class that you want to apply to dirty fields, open the List builder and set the 'Dirty control class name' property.
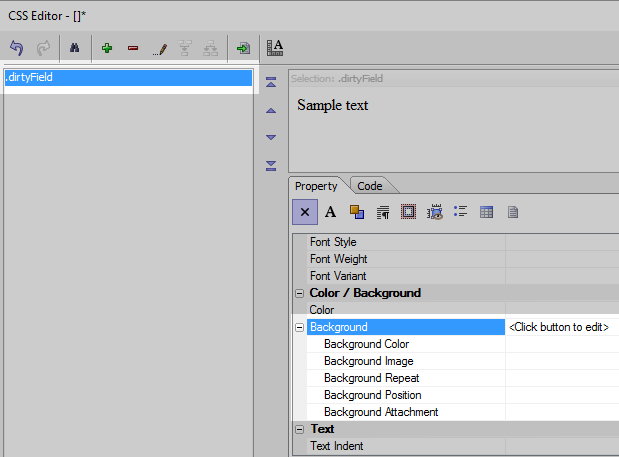
In the above example, the dirtyField CSS class was defined as follows:
.dirtyField {
    background: #f6f9c2;
}
For a video on dirty control class names you can watch this video, download the component, or follow the guide below.
Creating a Detail View with a Dirty Control Class
In the UX Builder open the Data Controls menu. Click on the [List] option to add a list control to the component.

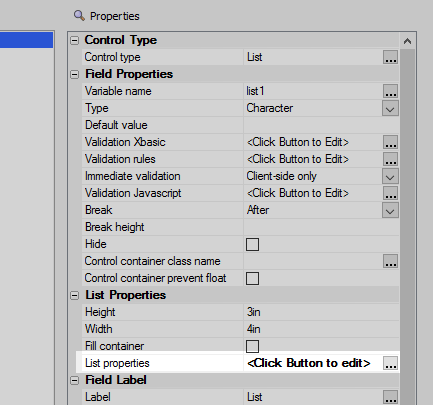
In the properties section click the
 button next to the "List properties" property to open the List Builder.
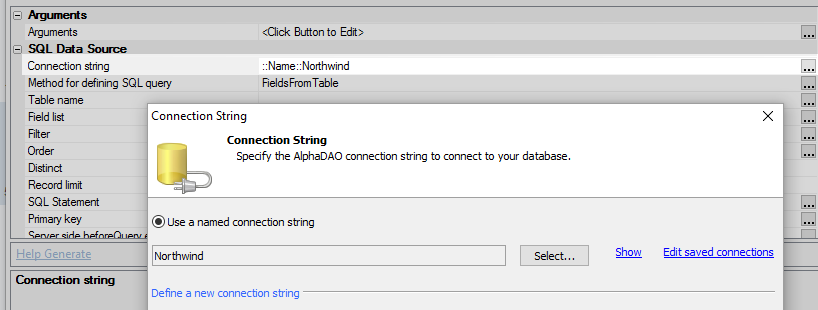
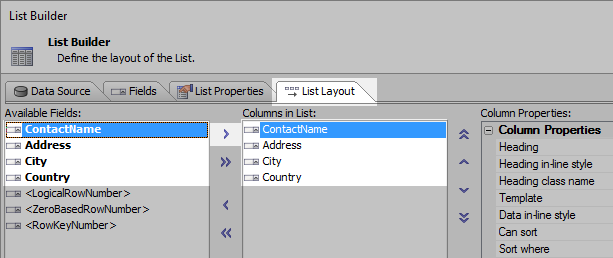
On the Data Source page select SQL as the Data Source Type.
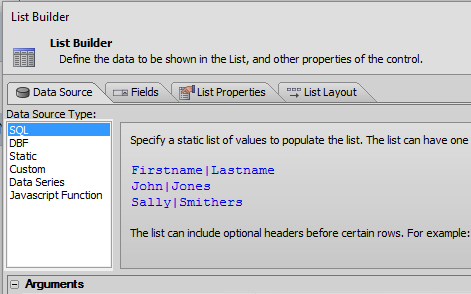
In the SQL Data Source section, set the Connection string property to the 'Northwind' database
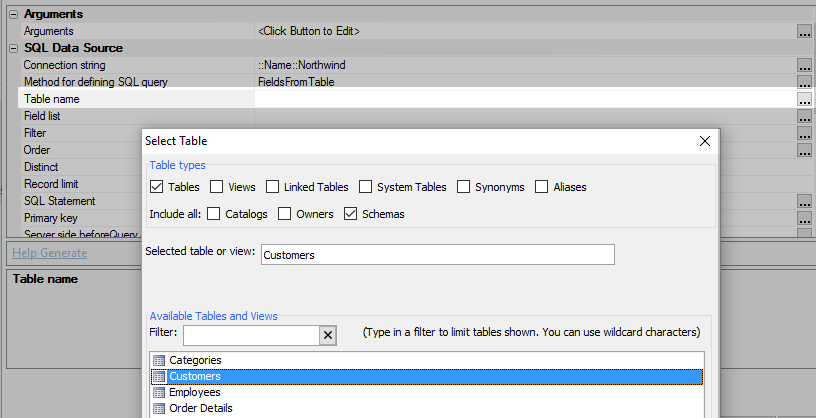
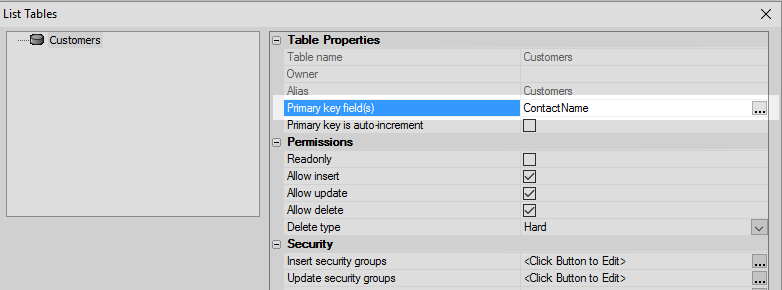
For the 'Table name' property select the 'Customers' table.
Click the
button next to the 'Field list' property and select the ContactName, Address, City, and Country fields.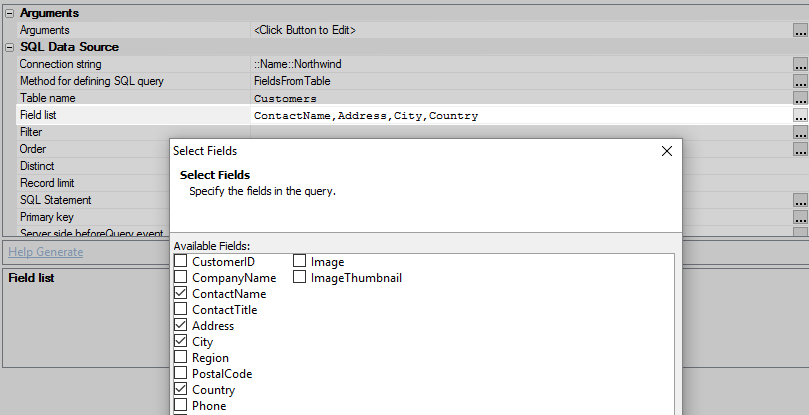
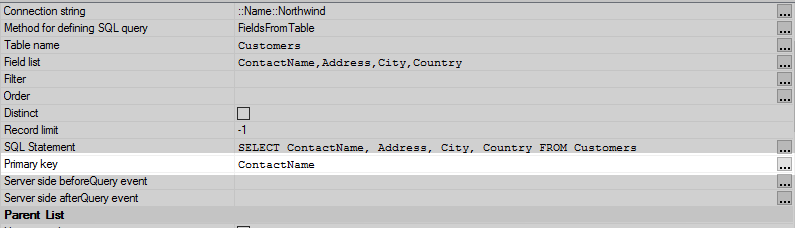
Set the Primary Key to ContactName
Open the List Layout pane. Move the four data fields from the Available Fields list to the Columns in List using the blue > arrow. Click OK to close the List Builder.
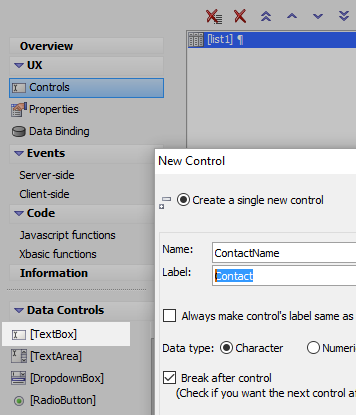
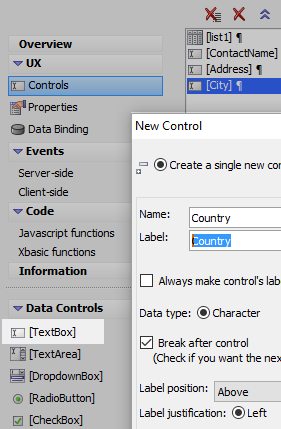
Open the Data Controls menu and click on the [TextBox] option to add a text box to the component. Give it the name ContactName to match the corresponding field name.
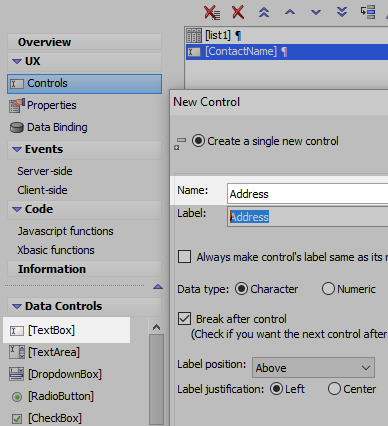
Add a second [TextBox] control named 'Address' to the component
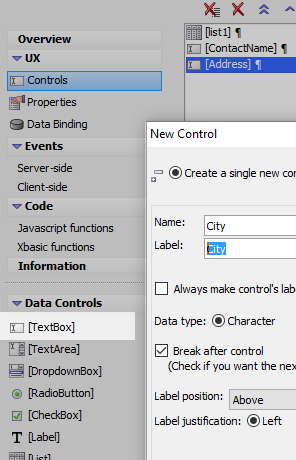
Add a third [TextBox] control to the component named 'City'
Add a final [TextBox] control to the component and name it 'Country'
Highlight all four [TextBox] controls. On the UX Controls page open the Containers menu.
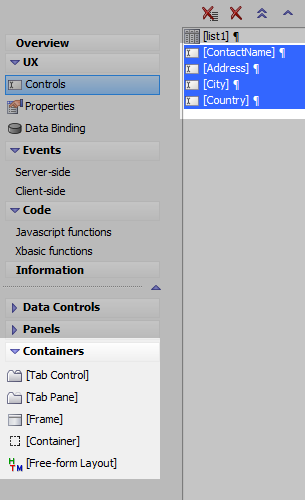
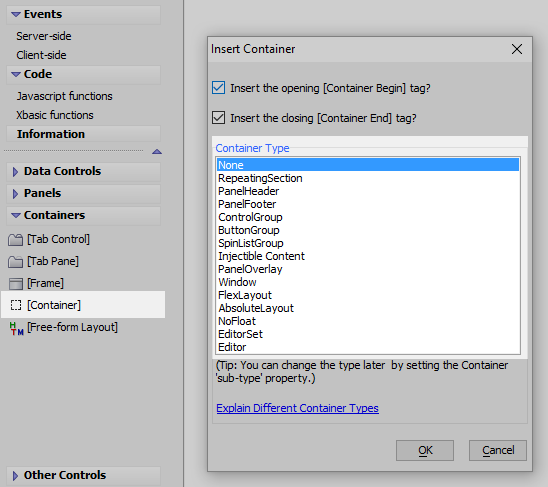
Click on [Container] and from the 'Container Type' list select 'None'. Add the container around the four textbox controls.
Open the UX Properties page. Scroll down the properties list to the CSS/SVG section.
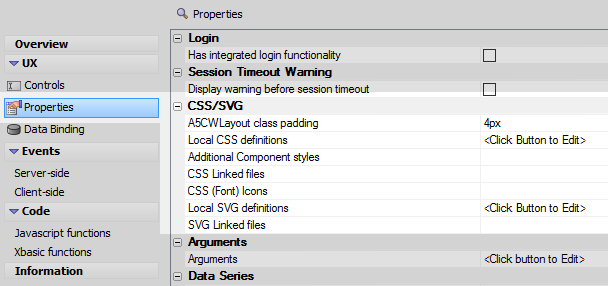
Click the
button next to the 'Local CSS definitions' property.
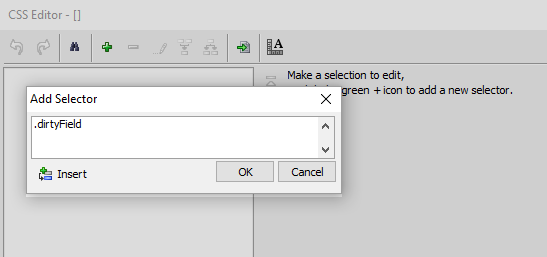
Open the 'Design' tab on the bottom of the CSS editor and click the green + button in the toolbar at the top of the editor.
Add a class named '.dirtyField' to the 'Add Selector' box and click OK.
.dirtyField
 The . denotes a CSS class.
In the CSS Editor's Design 'Property' tab scroll down to the Color/Background properties and expand the 'Background' properties list.
Click the
button next to the Background Color property and select a color from the color picker. Click OK and OK again to close the CSS editor.
Go back to the UX Controls page. Open the List Builder by highlighting the List Control and clicking on List properties again.
Open the 'List Properties' pane and check the 'Has Detail View' property.

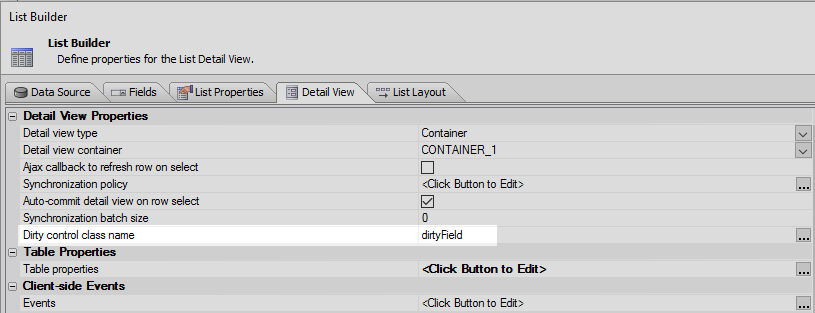
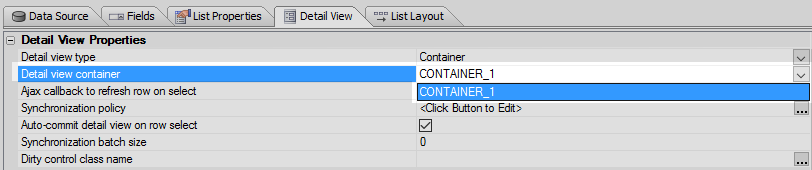
Open the 'Detail View' pane that appears. In the Detail View Properties section set the Detail view type to 'Container'

For the 'Detail view container' property select the name of the container that holds the four textbox controls, in this case CONTAINER_1.
Click the
button next to the 'Dirty control class name' property.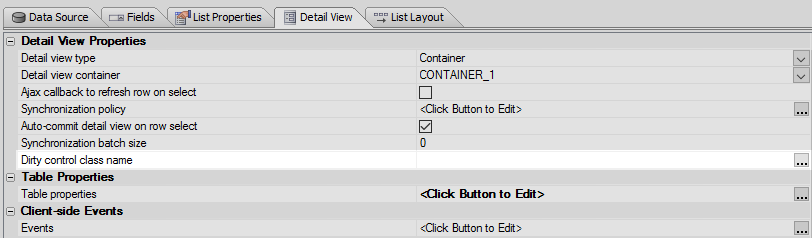
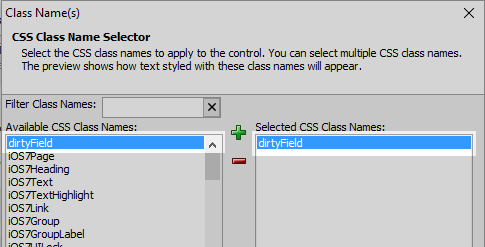
In the CSS Class Name Selector double click on the 'dirtyField' class you defined. highlight it in the Selected CSS Class Names list and click OK.
Click the
button next to the Table properties property.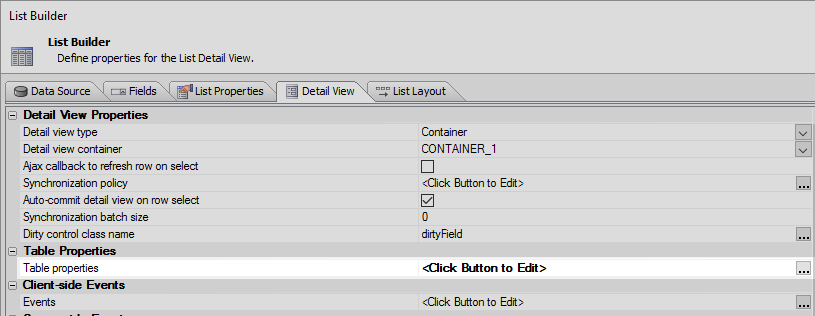
Change the Primary key field(s) property to ContactName. Click OK and OK again to close the List Builder.
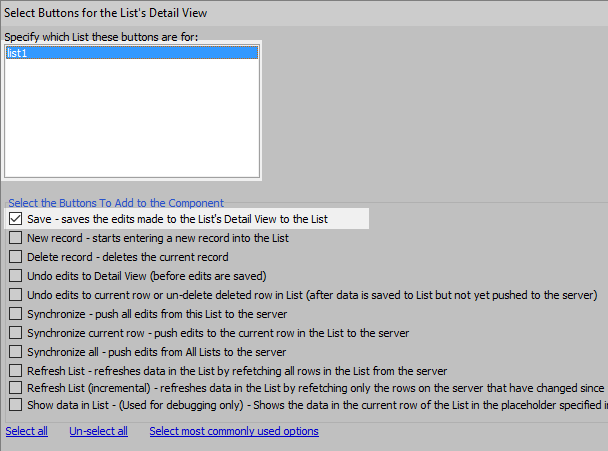
Open the Defined Controls menu. Click the "List-Detail View-Buttons" option. Add this control underneath the container.

Highlight the list control, 'list1', and check the 'Save' option and click OK.
Click OK to close the List Builder and run the component in Live Preview. Click on a row in the List to view it in the Detail View.
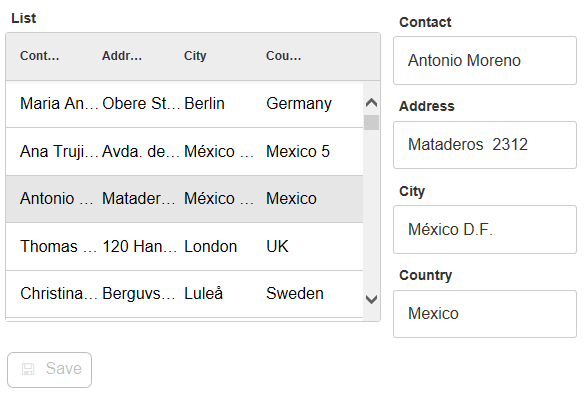
Make a change to one of the fields in the detail view and click the 'Save' button. You should see the field, now dirty, change its background color.