Send an e-mail message
- Send E-mail Message Action Properties
- Sending an Email Message Using a Server-side Event
- Create an A5W Page to Load when Data is Saved
- Create the Controls to Enter Data into a Server
- Create a New Table and Bind it to the Component
- Save Data Entered on the Client to the Server
- Send Email Action Background
- Send an E-mail Stating that the Data was Saved
- Using the Project Properties to Define Email
- Using a Work Queue
- Creating a Separate Process that can Send an Email
Description
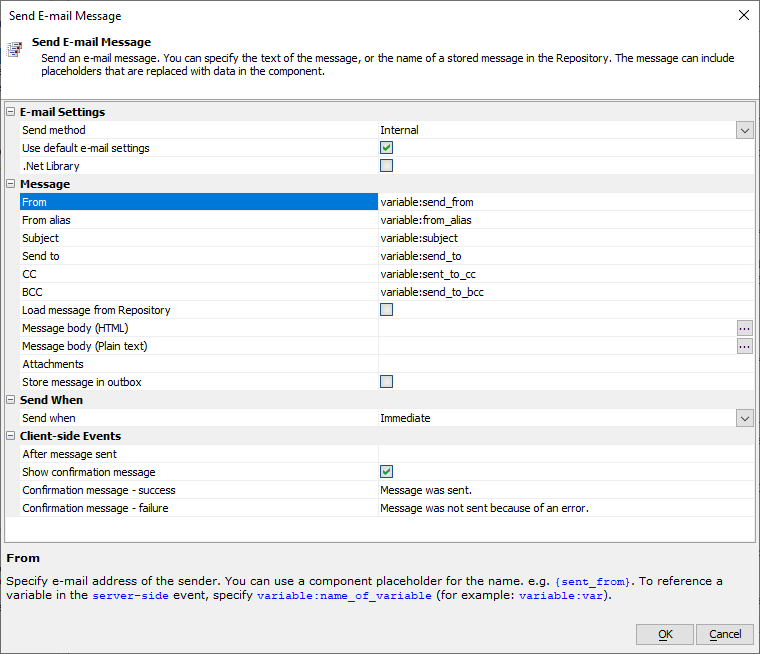
Send an e-mail message. The message can use fields from the component.
A common pattern in web applications is to have a client-side form where customers fill out information. This data can then be saved on a server after which an email message can be sent to the user's address. This message might be an order confirmation or some other type of data that the user can save. The 'Send an e-mail message' action offers several methods by which this can be accomplished. The steps involved in adding this feature to a component are described in this four part video: Part 1, Part 2, Part 3, Part 4. You can reference the guides on this page underneath the action properties section.
Send E-mail Message Action Properties
E-mail Settings
- Send method
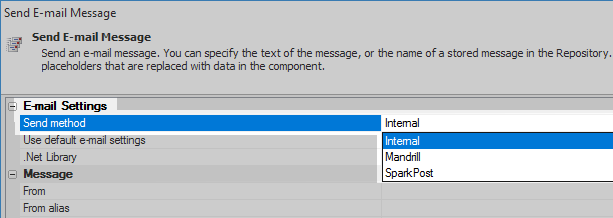
Specify if the e-mail should be sent using the built-in e-mail methods, or using a 3rd party e-mail service. Select SparkPost to send email using SparkPost or SendGrid.
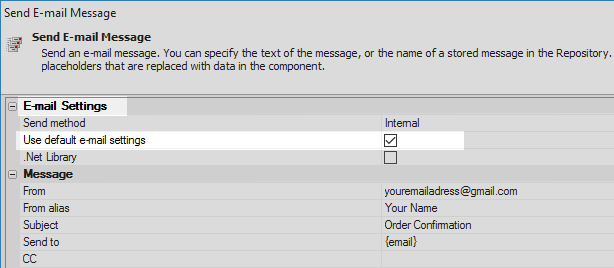
- Use default e-mail settings
If you check this box, then the action will use the e-mail settings stored in the Web Project Properties.
- SMTP server
You can read this value from the Repository at runtime by entering this value for the property: =a5w_GetFromWebAppRepository("keyvalue"), where 'keyvalue' is the key value for the property. This property appears when the send method is 'Internal' and the 'Use default e-mail settings' checkbox is not checked.
- User name
The username. You can read this value from the Repository at runtime by entering this value for the property: =a5w_GetFromWebAppRepository("keyvalue"), where 'keyvalue' is the key value for the property. This property appears when the send method is 'Internal' and the 'Use default e-mail settings' checkbox is not checked.
- Password
The password. You can read this value from the Repository at runtime by entering this value for the property: =a5w_GetFromWebAppRepository("keyvalue"), where 'keyvalue' is the key value for the property. This property appears when the send method is 'Internal' and the 'Use default e-mail settings' checkbox is not checked.
- Port
With SSL or TLS enabled, if you are using Gmail the port for the internal email methods is 465. For the .NET methods, use port 587. You can read this value from the Repository at runtime by entering this value for the property: =a5w_GetFromWebAppRepository("keyvalue"), where 'keyvalue' is the key value for the property. This property appears when the send method is 'Internal' and the 'Use default e-mail settings' checkbox is not checked.
- SSL option
If you select the .Net Library, SSL and TLS operate identically. You can read this value from the Repository at runtime by entering this value for the property: =a5w_GetFromWebAppRepository("keyvalue"), where 'keyvalue' is the key value for the property. This property appears when the send method is 'Internal' and the 'Use default e-mail settings' checkbox is not checked.
- .Net Library
Specify if the email should be sent using Alpha Anywhere's internal 'sockets' object, or using methods in the Microsoft .Net Framework? In most cases either option should be fine.
- SparkPost key
Your SparkPost or SendGrid API Key. If using SendGrid, prefix the SendGrid API key with sendgrid:.
You can enter <Project>, or leave this setting blank, to use the setting for the SparkPost key stored in Web Project Properties. This property appears when the 'Send method' is set to 'SparkPost'.
For more information about SparkPost API keys, see SparkPost API Keys.
For more information about SendGrid API keys, see SendGrid API Keys.
Message
- From
Specify e-mail address of the sender. You can use a component placeholder for the name. e.g. {sent_from_email}. You can also reference an Xbasic variable in the server-side event where this action is called using the variable: prefix. For example: variable:from_email
- From alias
Specify a friendly name for the from name. You can use a component for the name. e.g. {sent_from}. You can also reference an Xbasic variable in the server-side event where this action is called using the variable: prefix. For example: variable:from
- Subject
Specify the message subject. You can use component placeholders in the text. e.g. {subject}. You can also reference an Xbasic variable in the server-side event where this action is called using the variable: prefix. For example: variable:subject
- Send to
A comma or cr-lf delimited list of e-mail addresses. You can use a component placeholder for the e-mail address. e.g. {send_to}. You can also reference an Xbasic variable in the server-side event where this action is called using the variable: prefix. For example: variable:send_to
- CC
A comma or cr-lf delimited list of e-mail addresses. You can use a component placeholder for the e-mail address. e.g. {cc_recipients}. You can also reference an Xbasic variable in the server-side event where this action is called using the variable: prefix. For example: variable:cc_recipients
- BCC
A comma or cr-lf delimited list of e-mail addresses. You can use a component placeholder for the e-mail address. e.g. {bcc_recipients}. You can also reference an Xbasic variable in the server-side event where this action is called using the variable: prefix. For example: variable:bcc_recipients
- Load message from Repository
Specify if the message should use a saved template stored in the Repository.
- Saved message name
Specify the saved message template name. You can use component placeholders. e.g. {message_template_name}. This setting appears when the 'Load message from Repository' checkbox is checked.
- Message body (HTML)
The HTML version of the message. You can use component placeholders in the text. e.g. (send_to}. You can call an Xbasic function to compute the message body by specifying this as the message text: {ExecuteFunction:myfunc}(where 'myfunc' is an Xbasic function defined in the Xbasic Functions section). The function that is called takes 'e' as an input parameter and must return the text of the message.
- Message body (Plain text)
The plain text version of the message. You can use component placeholders in the text. e.g. {send_to}. You can call an Xbasic function to compute the message body by specifying this as the message text: {ExecuteFunction:myfunc} (where 'myfunc' is an Xbasic function defined in the Xbasic Functions section). The function that is called takes 'e' as an input parameter and must return the text of the message.
- Attachments
A comma delimited list of filename attachments. You can use component placeholders for the filenames. e.g. {file1}.
- Store message in outbox
Specify if the message should be stored in the outbox. Outbox name and connection string are defined in the Web Project Properties.
Send When
- Send when
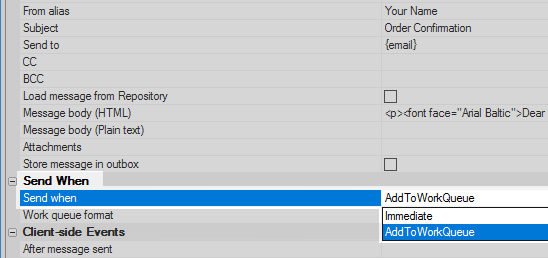
Specify when the email should be sent. The 'Immediate' option sends the e-mail immediately. However, since connecting to a SMTP server can be slow, this option may not be suitable in a high traffic site. The 'AddToWorkQueue' option adds the task to the Work Queue so that another process can perform the work.
- Work queue format
Specify the format to use when adding the task to the Work Queue table. 'XbasicScript' stores a complete Xbasic script that the process that handles the work queue can just execute. 'XbasicProperties' stores the properties of the task using the Xbasic 'property_to_string()' function. 'JSON' stores the properties of the task in JSON format. The process that handles the work queue will be responsible for converting the properties into Xbasic code.
Client-side Events
- After message sent
Specify the name of a Javascript function to call after the message has been sent. The Javascript function gets passed 'e' which contains 'e.hasError - true/false' and 'e.errorText'.
- Show confirmation message
Show an alert in the browser indicating whether the message was successfully sent or not. If you want more control over the text and display style of the message, you should set this option to 'false' and instead define an 'AfterMessageSent event'.
- Confirmation message - success
Confirmation message - email sent or queued successfully. The default reads 'Message was sent'.
- Confirmation message - failure
Confirms that an error occurred and that the email was not sent or queued. The default text for this message is 'Message was not sent because of an error'.
Sending an Email Message Using a Server-side Event
A common experience for the end-user of a application frequently involves the following process. First the user enters some type data into the application such as personal data, shipping information, or payment data. When the user is finished they then click a 'Submit' button and wait to see if their data is validated. This validation can happen on either the client-side or the server. After the data is validated the user then usually receives some sort of confirmation message that appears in the application itself, such as "Thank you for your order" or "Your application has been submitted". This is then frequently followed by an email confirmation that is sent to the email address that the user specified when entering data.
This section will cover the steps involved in creating a component that uses the send e-mail action after entered data is validated and saved on to a server. The first step will be to define the thank you message that the user receives once they are done entering data. This can be done by creating and publishing a simple A5W page in Alpha Anywhere. The second step will then be to create a UX component containing the controls that the user will enter their data into. In order to save this data it will be necessary to create a new DBF or SQL table, the third step. The controls in the component will be automatically bound to the fields in the table through Data Binding. From here it will be possible to tie a 'Save Submitted Data to Table(s)' action to the afterDialogValidate server-side event and then finally add the action that sends the email after the data has been saved.
Create an A5W Page to Load when Data is Saved
In the Web Projects Control Panel click the 'New' button to create a 'New component or page'
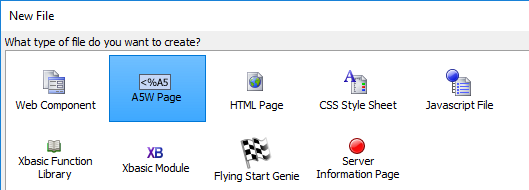
Select the 'A5W' option and click 'Next'.
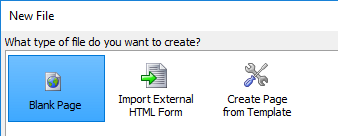
Select the 'Blank Page' option and click 'Next'.
Open the 'WYSIWYG' (what you see is what you get) tab at the bottom of the A5W page.
Type a message into the workspace. Use the tools in the toolbar to set the font, color, and alignment of the message.
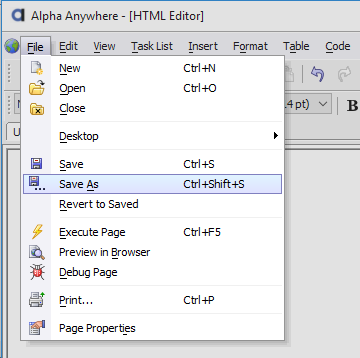
Click on the 'File' dropdown in the top left corner of Alpha Anywhere and select 'Save As'. Save the A5W page as 'Thankyou'
Click the 'Execute' button and run the A5W page in Live Preview. This step is necessary in order to properly load the page later in the tutorial.
Create the Controls to Enter Data into a Server
Return to the Web Projects Control Panel and create a new UX page.
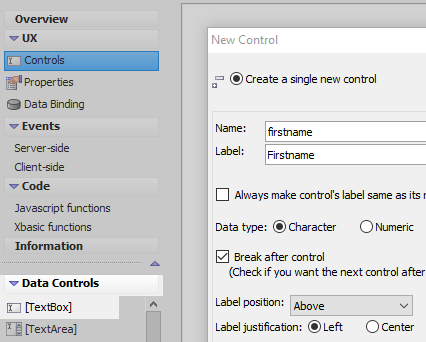
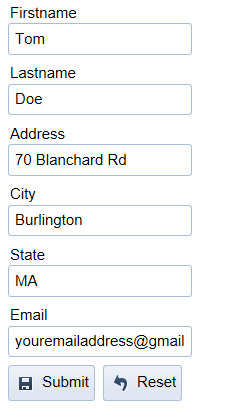
In the UX Builder on the UX controls page open the 'Data Controls' menu. Click on the [TextBox] option to add a textbox control to the component. Give the control the name and label of 'firstname'
Add a second textbox control to the component with the name and label of 'lastname'.
Add a third textbox control. Give this control the name and label 'address'.
Add a forth textbox control named and labeled 'city'.
Add a fifth textbox with the name and label of 'state'.
Finally add a sixth textbox with the name and label 'email'.
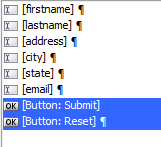
Open the 'Defined Controls' menu and click on the 'Submit-Reset' option to add submit and reset buttons to the component. 'Submit' will send any entered data to the server.
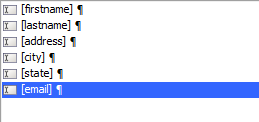
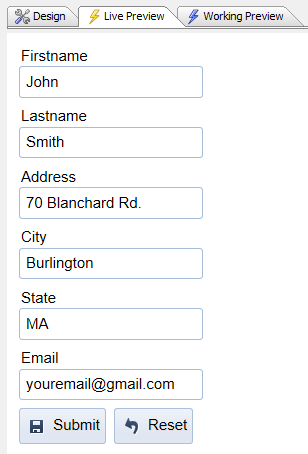
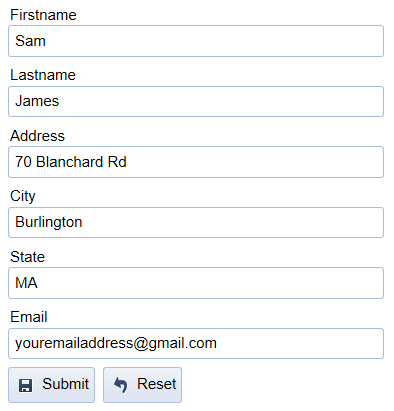
The component should look something like this:
Create a New Table and Bind it to the Component
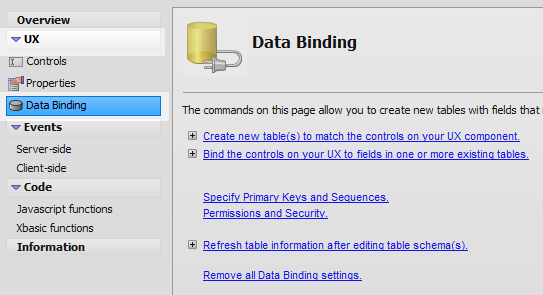
Continuing from the section above, in the UX Builder open the 'UX Data Binding' page.
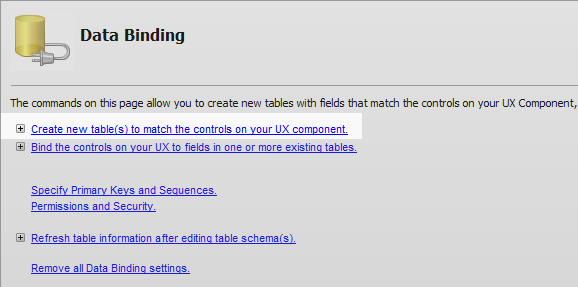
Click the 'Create new table(s) to match the controls on your UX component' hyperlink.
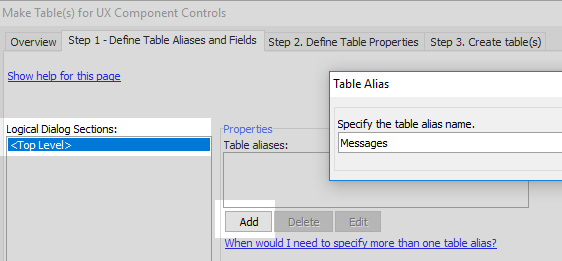
Click on the 'Step 1 - Define Table Aliases and Fields' tab. Highlight the <Top Level> section and click the 'Add' button in the 'Properties' section and add a new table alias.
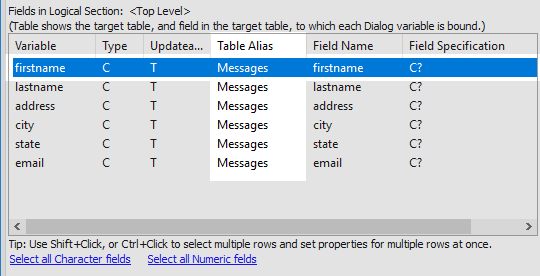
In the 'Fields in Logical Section' the 'Table Alias' should now be defined but not the Field Specification. This specification defines the length and type of each field in the table. Highlight the 'firstname' variable in the 'Fields in Logical Section:' list.
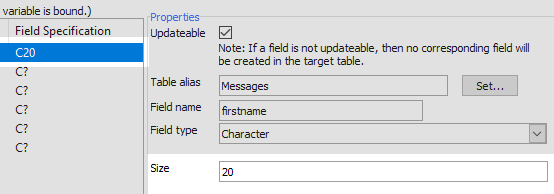
In the Properties section on the right set the Field 'Size' to '20'. Leave the 'Field type' set to 'Character'. If the 'Table alias' was not set automatically you can use the 'Set...' button to define an alias for this variable.
Define the 'Size' for each of the remaining variables. Set the 'email' variable to '30'.
Click on the 'Step 2. Define Table Properties' tab. In the Table Properties fill in a name for the table, like 'Messages'
In the 'Global Table Properties' section at the bottom of the tab click the dropdown next to the 'Table type' property and select 'SQL'.
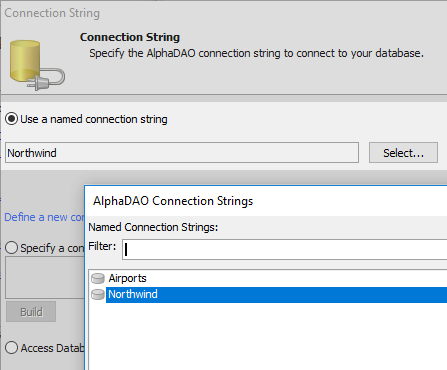
The Connection String dialog should open. If you already a connection string to the Northwind database defined click the 'Select' button and build a connection to the 'Northwind' database. Otherwise choose the 'Specify a connection string' radio button and click the 'Build' button to build a connection.
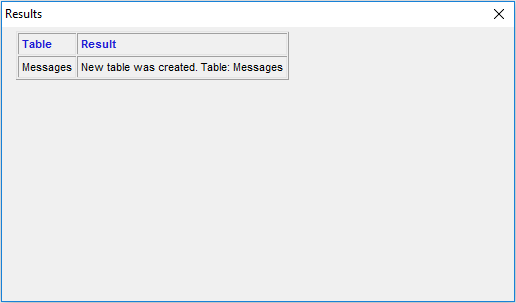
Open 'Step 3. Create table(s)' and click the 'Create table(s)' button and then close the make table(s) dialog.
Save Data Entered on the Client to the Server
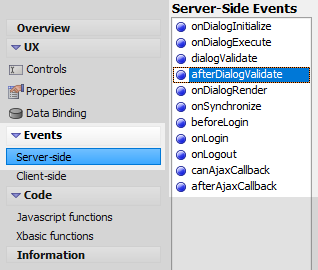
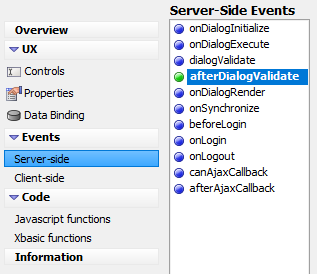
In the UX Builder open the 'Events' menu and then open 'Server-side' events page. In the 'Server-Side Events' list highlight the 'afterDialogValidate' event.
Place the mouse cursor inside the 'afterDialogValidate function definition on the right.
Click on the 'Action Scripting' button in the page's toolbar.
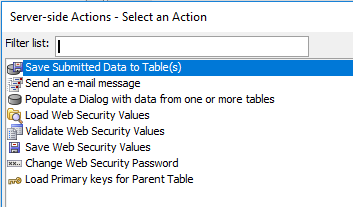
Click on the 'Save Submitted Data to Table(s) action. Click OK.
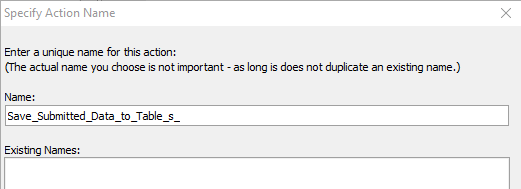
Give then action a name, or use the default name, and click OK.
In the 'Save Submitted Data to Tables dialog click the 'After submit action' dropdown in the 'Save Data' section. Select 'Redirect to another page' option.
Next to the 'Target page' property type the name of the A5w page that you defined in the beginning section, "Thankyou.A5w". Click OK.
Thankyou.A5w
Send Email Action Background
SMTP, or Simple Mail Transfer Protocol, is a way of identifying the server that will send your email. The SMTP server takes emails that have been written on the client-side and then sends them out over the internet to the specified address. The email is then acquired by a 'Pop' or 'Imap' server and delivered to the recipient. Different service providers have different names for their smtp servers. Google uses "Smtp.gmail.com" while Yahoo uses "Smtp.mail.yahoo.com". Other providers, like AT&T or Verizon, don't use the 'smtp' prefix at all and use instead names like "Outbound.att.net" or "Outgoing.verizon.net".
A client-side device can be connected to a SMTP server via a 'port'. The ports most commonly used to send email data to the SMTP server are 587 and 465. Port 587 can be used if the data being sent is not encrypted or uses a TLS (Transport Layer Security) protocol; TLS is a form of encryption. This port can be used with nearly all smtp servers. Port 465 is used to send data that uses SSL or a Secure Sockets Layer. There is also a 'Port 25' that is sometimes used to send unencrypted data. However, this port is often blocked as it is frequently used to send massive quantities of malware and spam.
TLS and SSL are both ways to encrypt and then authenticate data that is sent between the developer's client-side application and the SMTP server used by their service provider. From the client-side perspective there is not major difference between using TLS vs SSL as long as you are able to connect to the SMTP server which supports one and/or the other protocol. There are different versions of both TLS and SSL protocols, with some older versions having major security flaws.
If you are using Gmail for your SMTP server, and you have two-step verification on your account, then you will need to get an application password through your gmail account and use this in place of your regular
Send an E-mail Stating that the Data was Saved
On the 'Server-side' events page place the mouse cursor over the 'Save Submitted Data to Tables(s)' action that you defined and click.
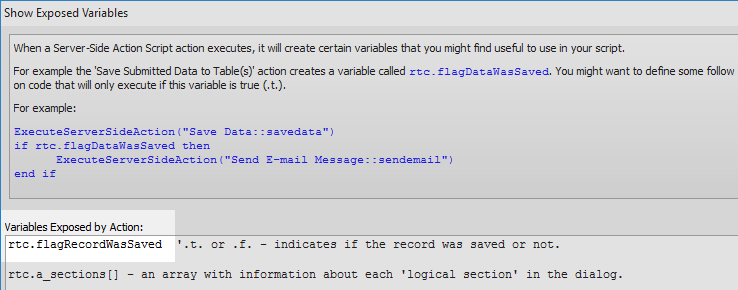
Click the 'Action Scripting' button. Select the 'Show variables exposed by this action' button.
Highlight the 'rtc.flagRecordWasSaved' variable, right click, and select 'Copy'. Click OK.
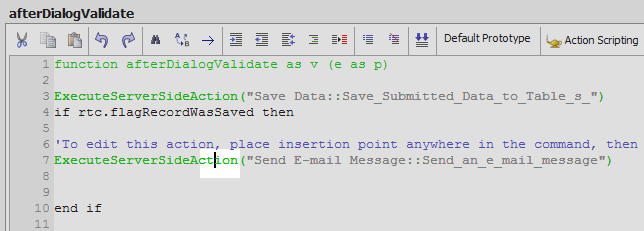
Place the variable inside an Xbasic if statement:
if rtc.flagRecordWasSaved then

end if
Place the cursor inside the 'if' statement. Click on the 'Action Scripting' button.
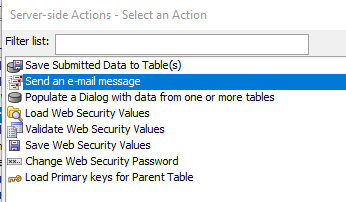
Click on the 'Send an e-mail message' action. Click OK.
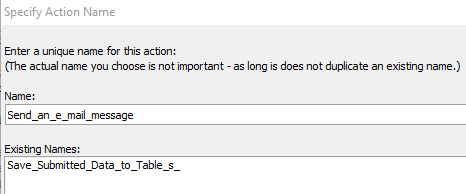
Create a name for the action and click OK.
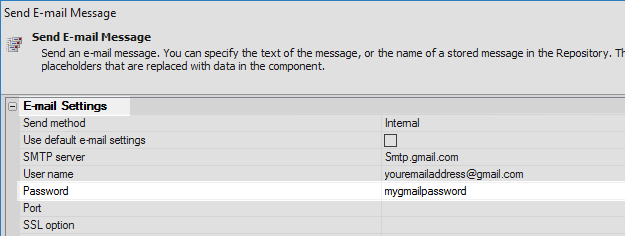
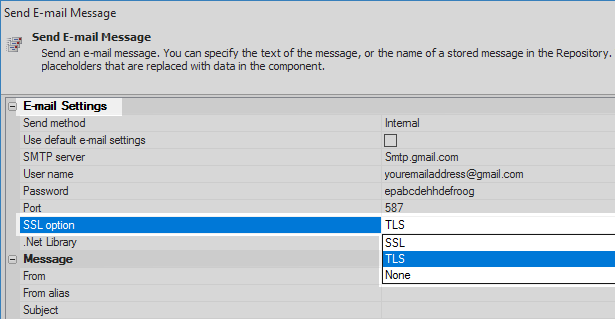
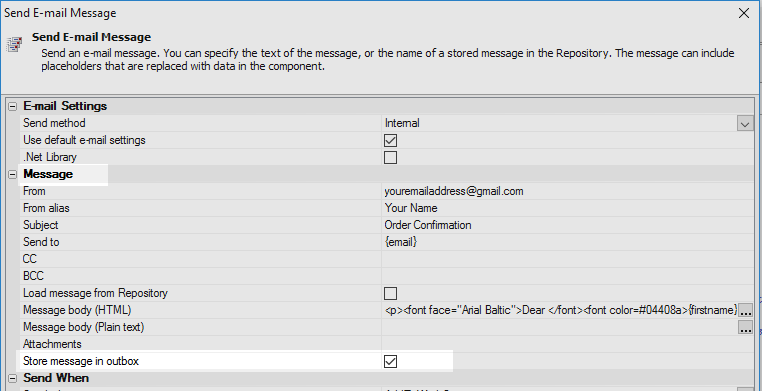
In the 'Send E-mail Message' dialog's 'E-mail Settings' section set the 'Send method' property to 'Internal'.
Make sure the 'Use default e-mail settings' property is NOT checked, more on this later.
If you have a gmail account, set the 'SMTP server' property to be 'Smtp.gmail.com'
Smtp.gmail.com
In the 'User name' property fill in your email address.
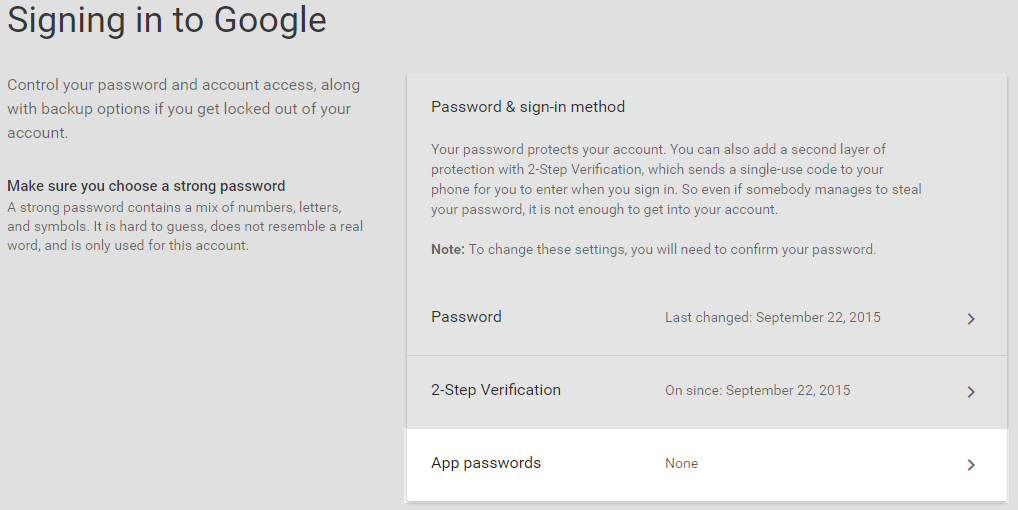
If you do not have two-step verification just type your normal password in the 'Password' property. If you do have two-step verification get a generated 'app password' through your gmail account using these steps
Open your 'My Account' page inside you gmail account and click on 'Sign-in & security.
Click the 'App passwords' link.
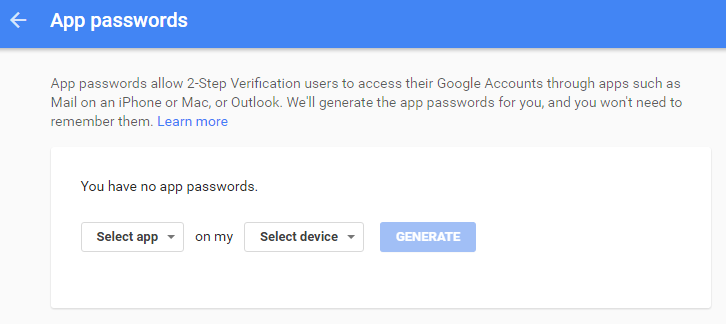
From the 'Select app' dropdown choose 'Other'.
Type in the name of your application and click the Generate button.
A code will be generated copy this code to the clipboard and paste it into the 'Password' property in the 'Send E-mail Message' dialog Alpha Anywhere.
Set the 'Port' property to be 587.
Set the SSL option to be TLS.
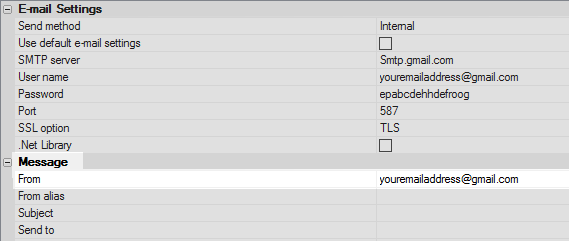
In the 'Message' section type your email address next to the 'From' property.
Next to the 'From alias' property type your name or the name that you want to appear in place of your email address.
In the 'Subject' property type the subject of the email.
In the 'Send to' property you can type the email address that you want to send the email to. Here, however, we will use the placeholder {email}. This way the email will be sent to the email address entered by the user of your application after they enter their address.
{email}Click on the
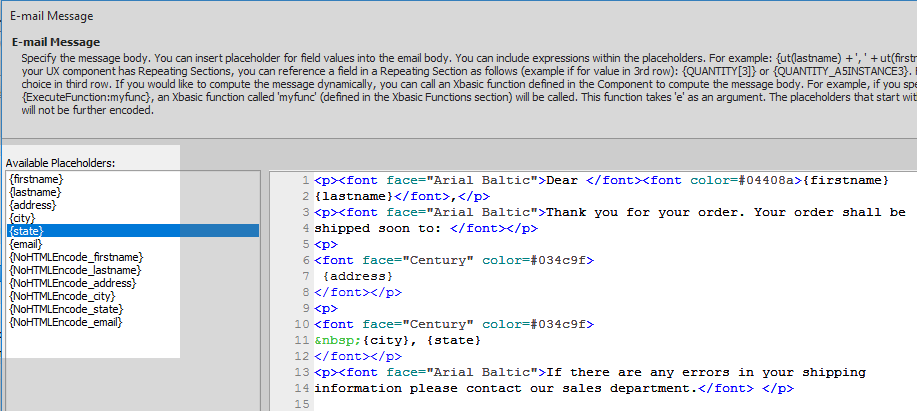
 button next to the 'Message body (HTML) property.
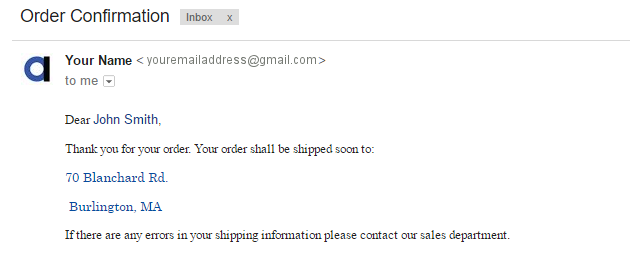
Type the message that you want to be sent via email. Be sure to make use of the available placeholders on the left of the 'E-mail Message' dialog. Simply double click on a placeholder to add it to the text. Click OK when you are finished.
In the Send When section set the 'Send when' dropdown to be 'Immediate'. Click OK to close the 'Send E-mail Message' dialog.
Run the Component in Live Preview. Fill in all the fields. In the last field add your email address. Click Submit.
You should see the generated A5w page.
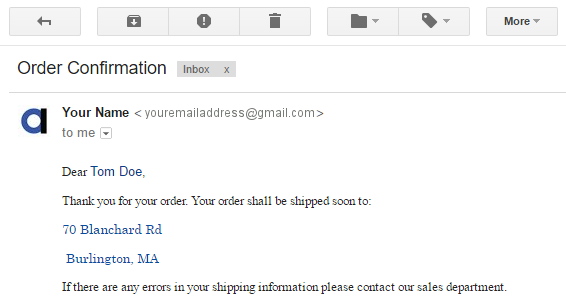
Open your email account. You should see the email that you defined inside.
Using the Project Properties to Define Email
Continuing from the sections above, go back to the Design tab and open the 'Server-side' events page. Highlight the previously edited 'afterDialogValidate' event.
Place your cursor over the 'Send E-mail Message' action and click the mouse.
Click on the 'Action Scripting' button and select 'Edit action'
Check the 'Use default e-mail settings' property. Leave all other settings the same and click OK.
Open the Web Projects Control Panel. In the toolbar click on the 'Project Properties' button.
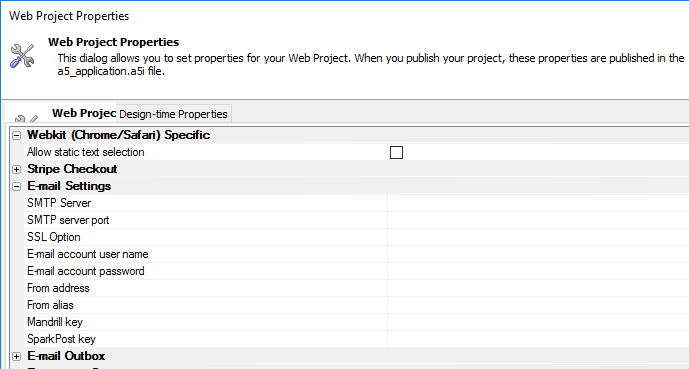
Scroll down to the Web Project Properties to the 'E-mail Settings' property. Expand the section.
If using gmail set the SMTP Server property to 'Smtp.gmail.com'.
Set the 'SMTP server port' property to 587.
Set the 'SSL Option' to TLS
Next to the 'E-mail account user name' property type your email address.
Next to the 'E-mail account password' enter you account password. If you are using two-step verification use a 'app password' here, as described in the previous section.
In the 'From address' property again enter your email address again.
Next to the 'From alias' property type the alias that you want to appear in place of your email address. Click OK to close the 'Web Project Properties'.
Run the component in Live Preview. Fill in the fields as you did in the previous section. Enter your email address in the email field and click Submit.
You should see the A5W page appear after the email sends.
Check your email, the message that you defined in the previous section should appear.
Using a Work Queue
In addition to sending out an email immediately, once some data has been validated, it is also possible to to let another process on the server handle the sending of the email. If the server is very busy dealing with other processes, then having a queue will mean that the actual sending of the email can happen after the other processes happening on the server are resolved. When the server is not overloaded these processes will also finish faster. In this example, this means that the A5W page you defined will load as soon as the user clicks the 'Submit' button; rather than waiting for the email to be sent before loading the A5W page.
Continuing from the sections above, in the UX Builder open the 'Server-side' events page and highlight the 'afterDialogValidate' event that was previously defined.
Place the cursor over the 'Send E-mail Message' action and click the mouse.
Click the 'Action Scripting' button and select the 'Edit Action' option.
In the 'Send E-mail Message' dialog's 'Message' section check the 'Store message in outbox' property.
Scroll down to the 'Send When' section. Click the 'Send when' property dropdown and select 'AddToWorkQueue'.
Here you can use the 'Xbasic script' option if the process that will handle the work queue is another Alpha Anywhere process. If you have an asp.net application that can send email very efficiently, then in this case you can use the JSON option. This will store a JSON object in the work queue that the application will understand.Click the 'Work queue format' dropdown and select the 'XbasicScript' option. Click OK
Go to the 'Web Projects Control Panel' and click on the 'Project Properties' button.
Scroll down the Web Project Properties list to the 'Email Outbox' section and expand it.
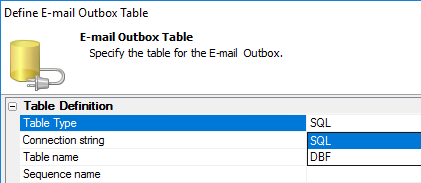
These email outbox keeps track of every single email that your application sent.In the 'Define E-mail Outbox Table' dialog set the 'Table Type' property to 'SQL'
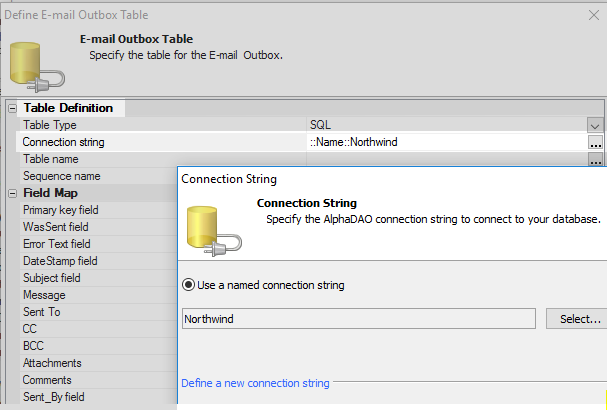
Click the
 button next to the 'Connection string' property and create a connection
to the 'Northwind' database.
Type 'outbox' next to the 'Table name' property.
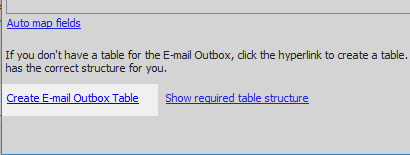
Click the 'Create E-mail Outbox Table' hyperlink at the bottom of the dialog. Click OK, OK, and OK again.
Now back in the Web Project Properties, scroll down to and expand the 'Work Queue Table Settings' properties.
Again click the
 button next to the 'Connection string' property.
Set the 'Table type' property to SQL. This is the default.
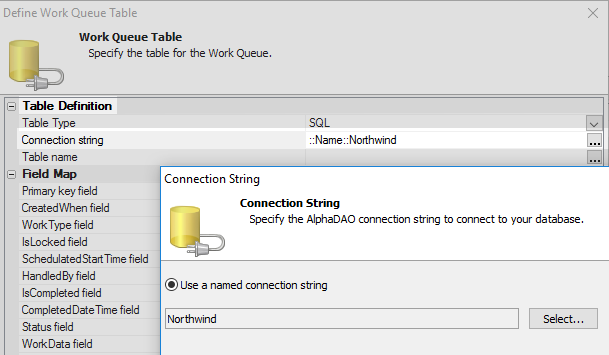
In the 'Define Work Queue Table' dialog click the
 button next to the 'Connection string' property
and create a connection to the 'Northwind' database. Click OK
Type 'workQueue' next to the 'Table name' property.
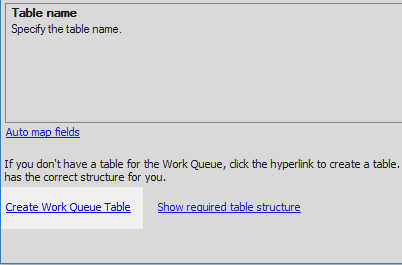
Click the 'Create Work Queue Table' hyperlink at the bottom of the dialog and click OK, OK, and OK again.
Run the component in Live Preview, fill in all of the fields, and then hit the submit button.
You should see the A5W page load very quickly. This is because the application is no longer handling the process of sending out the defined email. Instead the email is being saved in the workQueue table that you defined. In order to actually send the email it will be necessary to define a separate process.
Creating a Separate Process that can Send an Email
Read the 'WorkData' from the work queue and then execute the resulting Xbasic script. This can be done using Alpha Anywhere, but it can also be accomplished using other software.
