Filtering, Printing, and Emailing a Report
Description
This topic describes how to create a UX Component that accepts an email address, start date, and end date, uses the dates to create a filter, prints the filtered report to a PDF file, and then emails the PDF file.
Emailing a Report Using Action Javascript
The first step is to create a UX Component with a TextBox control named email_address and two Calendar controls named from_date and to_date.
Insert a Placeholder control from the Other Controls toolbox. The placeholder will be used to display a working message while the report is being created and emailed.
Insert the Submit-Reset buttons from the Defined Controls section of the UX control toolbox.
Change the Button text for the Submit button to "Send".
Double-click the Submit button to edit the click event. Alternatively, click the
 smart field button for the Javascript - (Touch, Mouse, Pointer Events) > click property to edit the event.
Select the Action Javascript radio button. A warning message will be shown asking if you are sure you want to convert to Action Javascript mode. Click Yes.
Click Add New Action and select Open a Report, Label or Letter layout. Then, click OK.
Select the report. In this example, the "Invoice" report from the Alpha Sports example is used.
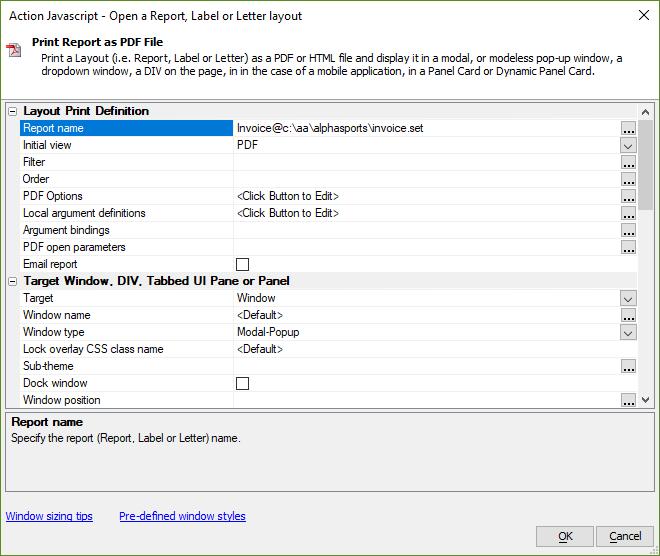
Configure the filter. Click the
smart field button to open the filter builder for the report Filter. Select the "Date" field. Specify that the date should be between the from_date and to_date control as shown below. The filter builder will generate the following filter:between(date,ctod("{from_date}"),ctod("{to_date}"))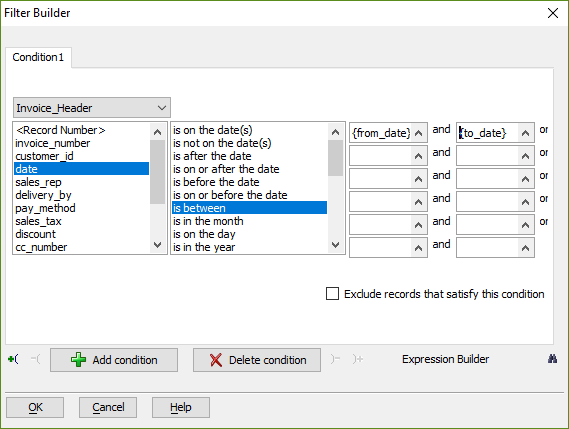
Check the Email property. Then, click the
smart field button to open the Email Settings dialog.Set the Send method. You can choose to use Spark Post or "Internal" which will use the SMTP_SEND functions to send the email. Configure the settings for the method chosen.
Configure the Message properties. Set the From and From alias to the desired address. For example, "[email protected]" and "Alpha Software".
Configure the Subject, Send to, and Message body settings. The settings can reference fields in the UX Component. For example:
- Property
- Value
- Subject
Invoice Report for {from_date} to {to_date}
- Send to
{email_address}
- Message body (HTML)
Invoice report for {from_date} to {to_date} is attached.
Optionally configure the Filename then click OK to save the Email configuration.
Set the DIV Id for progress messages property to the ID for the placeholder control in the component. The placeholder's ID must be specified using the format {dialog.componentName}.V.R1.<placeholderID> where <placeholderID> is the id for the placeholder. For example, if the placeholder's ID is 'PLACEHOLDER_1', the DIV Id for progress messages would be the following:
{dialog.componentName}.V.R1.PLACEHOLDER_1Click OK to save the Action Javascript and return to the UX Builder.
Publish the component to localhost and to test creating and emailing the report. The placeholder control will be updated with the progress of the action. If an error occurs, examine the error message and verify that your email settings are correct.
See Also