Configure Login With Google
Description
Instructions on how to setup a Google Developers Console project to add Login with Google functionality to your application.
Discussion
Summary of Step
In summary, the steps you must follow are:
Either create a new Google Developers Console project or select an existing project.
Configure the Google OAuth consent screen.
Select the required scopes.
Create OAuth client Id credentials.
Set the Authorized Redirect URIs.
Save the settings.
You will then get your Client ID and Secret which you will need to configure the UX component that you are using for Login.
Detailed Description of Steps
Here is a detailed, step by step description (the actual screens in the Google Developer console may be different if Google had made changes since this document was written).
1. Go to the Google Developer console. (https://console.cloud.google.com/)
Create a new project. Click the dropdown arrow. (You can select an existing project if you prefer).
 Google Cloud Platform Project
A list of all of your existing projects will be shown. Click the NEW PROJECT button to create a new project.
 New Project Button
Give your project a name and then Click the CREATE button.
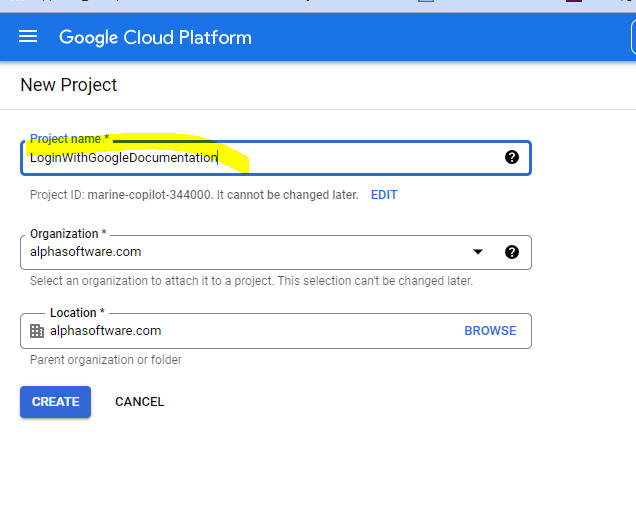 Name your project
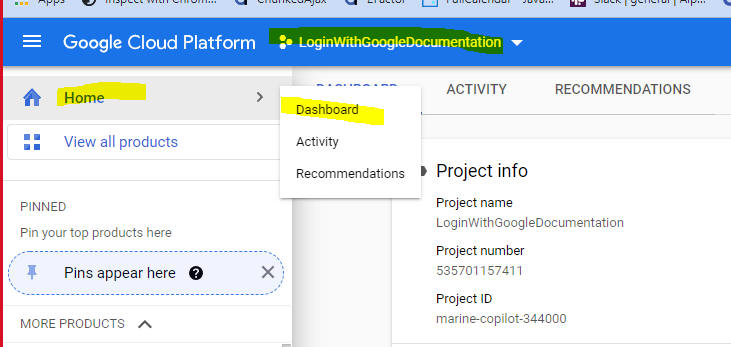
Make sure your new project is selected (if not, click the down arrow and select your new project), then select Home, Dashboard.
Next, click APIs & Services.
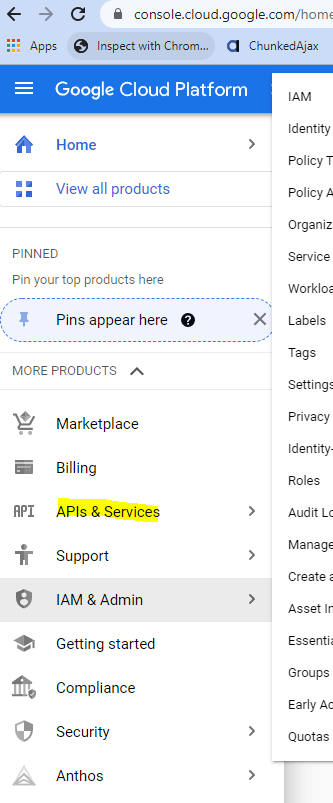
Click the Key icon to display the menu and then select the OAuth consent screen menu.

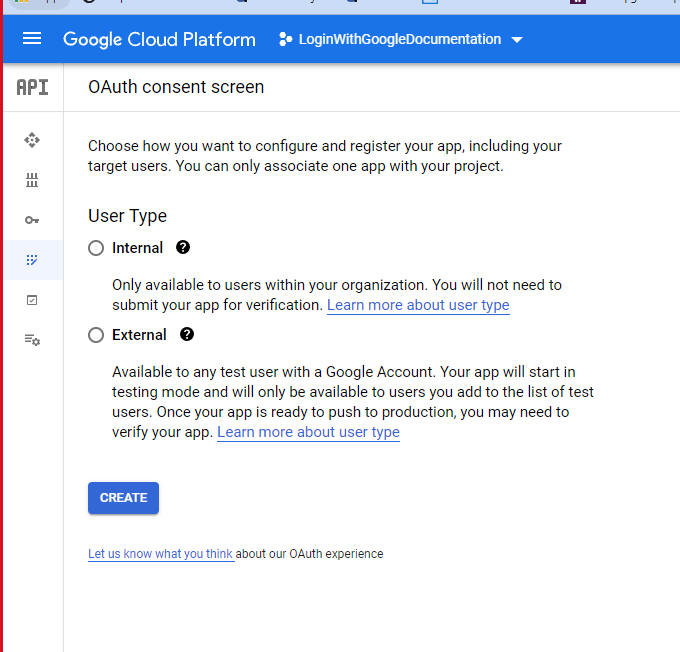
Select the type you want and then press the CREATE button.
Fill in the required fields. The App name is the name that will appear on the OAuth consent screen. You should pick a name that will be meaningful to your users.
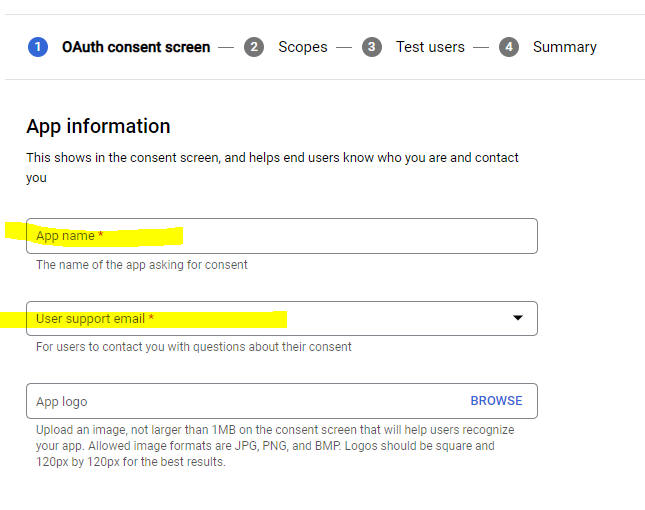
You will also need to specify your email address:

Click the SAVE AND CONTINUE button to move onto the next step - defining Scopes. The breadcrumbs at the top of the screen will show you what step you are on.
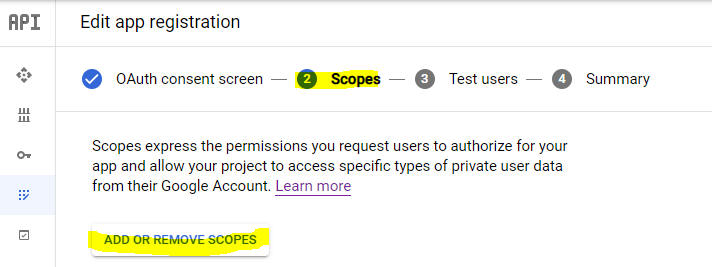
Click the ADD OR REMOVE SCOPES button to set the scopes for the OAuth flow. The only scope need for login is email.
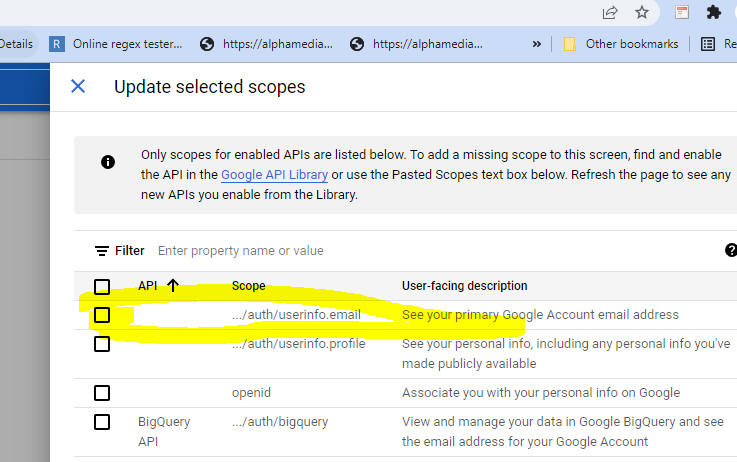
Check the ../auth/userinfo.email scope, then scroll the page if necessary until you see the UPDATE button.
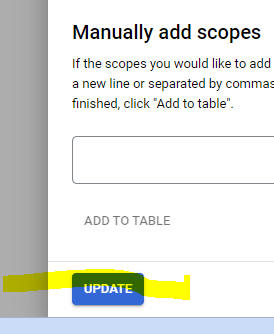
Click the UPDATE button to to close the Scopes panel and then scroll the page if necessary until you see the SAVE AND CONTINUE button.
Click the SAVE AND CONTINUE button as many times as needed until you see the BACK TO DASHBOARD button and then click the BACK TO DASHBOARD button to return to the Dashboard.
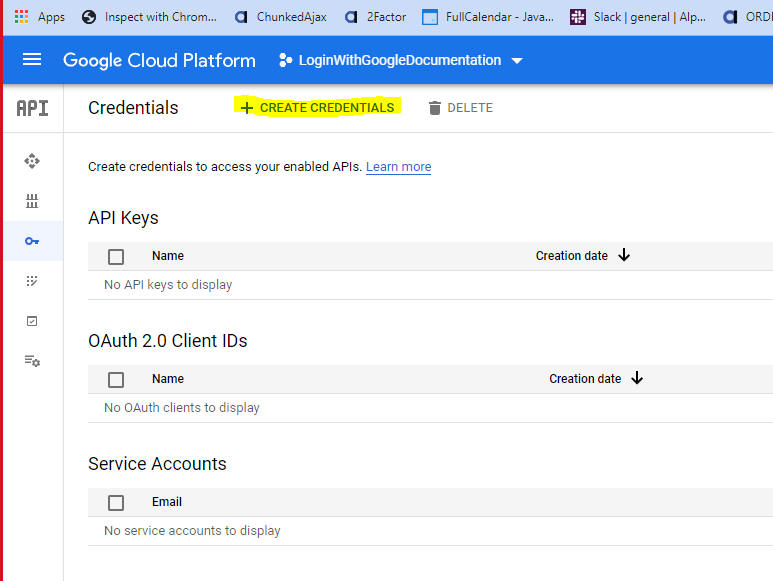
Next, select the Credential menu item from the fly out menu on the left.
On the Credential screen, click the CREATE CREDENTIALS button.
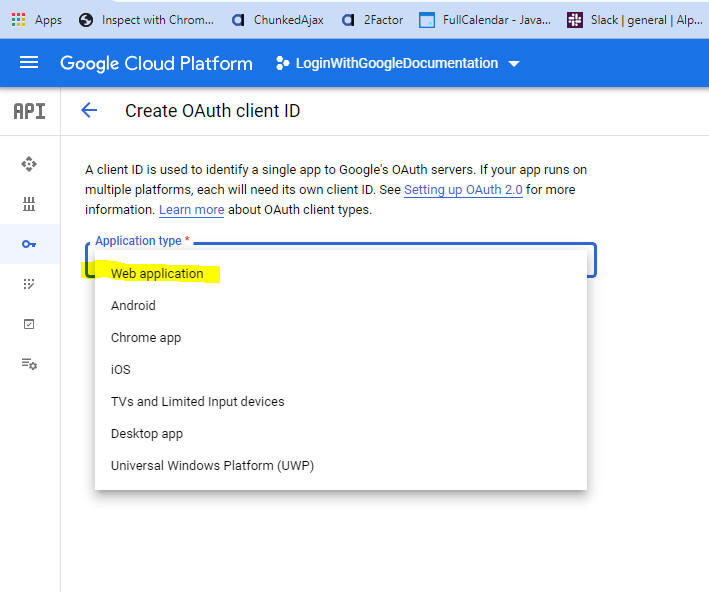
Select OAuth Client ID as the type of credential you want.
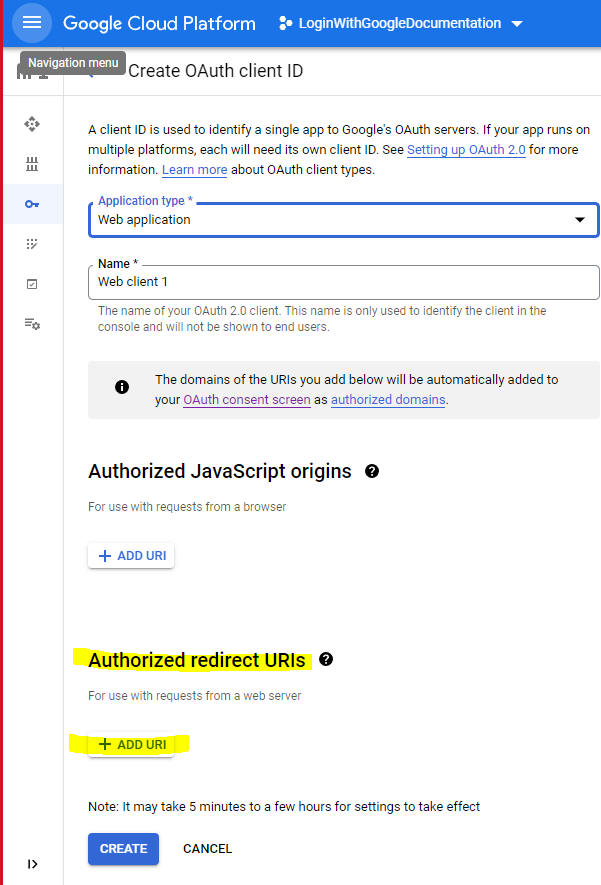
Next select the Application type. Select Web application.
You will be prompted for the Name. You can use the default name.
Next, specify Authorized redirect URIs. Authorized redirect URIs are case sensitive.
For testing your application using the LiveTest feature in Alpha Anywhere you can enter this value:
http://localhost:<your port number>/__liveTest/__a5LoginWithGoogle.a5w
If your server is configured to use port 80, you can enter this value:
http://localhost/__liveTest/__a5LoginWithGoogle.a5w
You will also need to enter a redirect URI for your published application. So for example, assume that your host name for your published application is:
https://myApplication
you would need to specify
https://myApplication/__a5LoginWithGoogle.a5w
as another redirect URI.
The Authorized redirect URIs are case-sensitive.
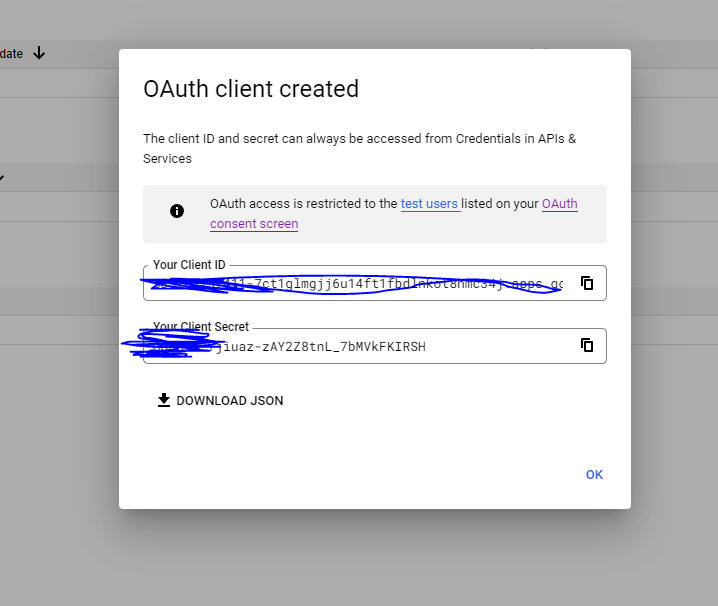
Once you have entered the Authorized redirect URIs, click the CREATE button. You will then get a screen showing the Client ID and Secret.
Copy the Client ID and Secret. You will need them to configure your Login UX component.
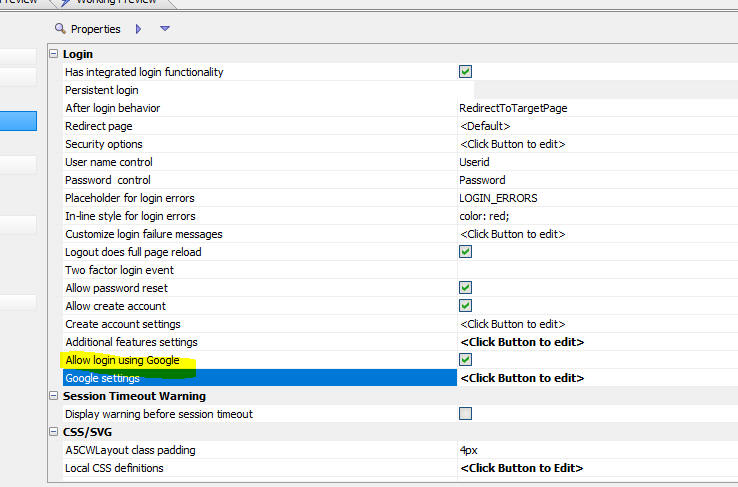
Next, open your Login UX component. Turn on the Allow login using Google property. Then click the smart field for Google settings and enter the Client ID and Secret.
Videos
Login using Google
When you configure a UX component as a Login Component you can enable Login with Google to allow users to login using the Google credentials.
See Also