Defining Security Settings
Description
An overview on how to define security settings and a list of properties.
How to Define Security Settings
The first step when configuring the web publishing security framework is to define the security features you want to use.
Display the Web Projects Control Panel.
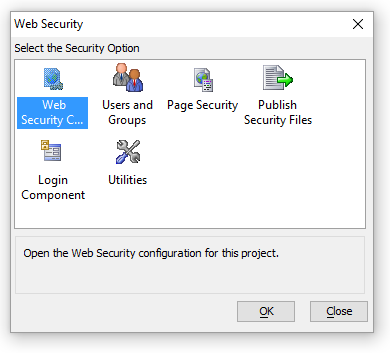
Click Web Security to display the Web Security dialog. Picture
Assuming that you have not previously defined any security settings, the first step is to create the initial security settings files. Select Web Security Configuration and click OK. The Security Settings dialog will appear. Picture
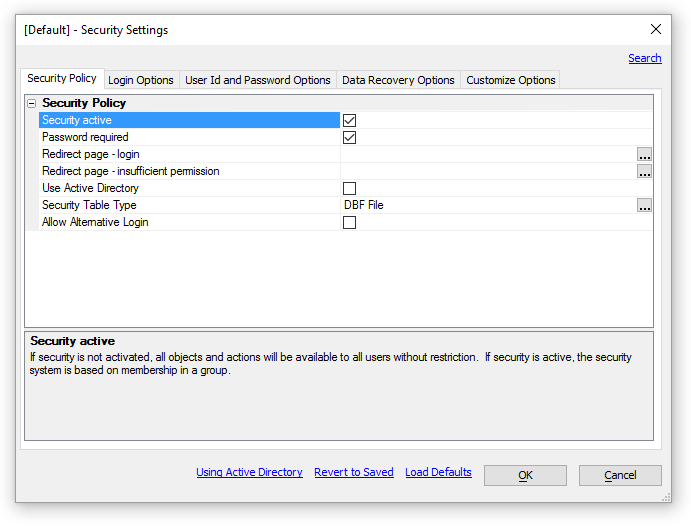
Enable (check) the Security Policy > Security Active property.
Enable (check) the Security Policy > Password Required property. A large number of additional properties will appear.
Click
 in the Security Policy > Redirect Page - login property and select "Login.a5w".
Click
in the Security Policy > Redirect Page - insufficient permission property and select "Login.a5w".Click
in the Login Options > Redirect Page after Login property and select "Menu.a5w".Select "User ID Field Value" in the User ID Options > User ID Configuration property.
Click
in the User ID Options > User ID Validation Rules property to display the User ID Validation dialog.1. Enter "4" into the Data Length > Minimum Length property.
2. Enter "12" into the Data Length > Maximum Length property.
3. Click OK.
Enter alphafive into the Password Options > Password encryption key property.
Click
in the Password Options > Password Validation Rules property to display the Password Validation dialog.1. Enable (check) the Text Format > Allow digits property.
2. Enter "4" into the Data Length > Minimum Length property.
3. Enter "12" into the Data Length > Maximum Length property.
4. Click OK.
Open the customize options by expanding the option. Picture

1. Enable (check) the Customize Options > Show external user identifier field property. This is also called the 'ulink' field.
2. Enter "__protected__user_identifier" into the Customize Options > Session variable for identifier field property.
3. Click OK.
Click Save.
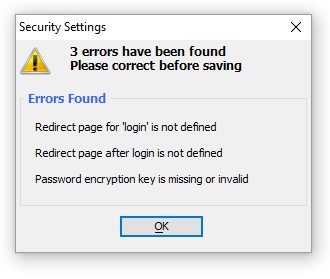
If you have neglected to set any required properties, a dialog similar to the following will appear. Click OK and correct these errors. Picture
Set Security Properties
The Security Settings dialog provides access to the following properties.
Optionally, enable the Security Policy > Security Active property. This causes the Security Policy > Login Required property to appear.
Optionally, enable the Security Policy > Password Required property. This causes the Password Options properties to appear.
Refer to the following tables for explanations of different properties.
Security Settings
Security Policy
Security Active
If security is not activated, all objects and actions will be available to all users without restrictions. If security is active, the security system is base on membership in a group. The options are:
- Activated (checked)
- Not Activated
Password Required
Login with a User ID and password is required to access some or all pages. The options are:
- Password required (checked)
- No password required
Redirect Page - Login
Display this page if login is required to access a selected page and no one is legged in. Click
to display the Select Page dialog.Redirect Page - Insufficient Permission
Optional. Display this page if a user id logged in but does not have sufficient permission to prevent access a selected page. Click
to display the Select Page dialog.
Login Options
Login Expiration Policy
Define when the user's login policy will expire. The options are:
- Policy
- Related Properties
- Defined time after last page access
Set the Login Expiration Time, Remember Me Option, and Remember Me Policy
- Defined time after initial login
Set the Login Expiration Time, Remember Me Option, and Remember Me Policy
- Expires when the user closes their browser
Set the Locked Out Action
- Expires when the current session expires
Login Expiration Time
This property contains the time interval required by the Login Expiration Policy. Click to display the Expiration Time dialog.
Remember Me Option
The Remember Me option enables the capability to provide an automatic login. If the option is enabled, the user can select to save their login information in a tracking cookie. This information will be automatically retrieved whenever login is required. The option is only available if the login expiration policy is for a specified time. The options are:
- Enabled (checked)
- Not enabled
Lockout After Failed Attempts
This property defines the number of times a user can try to login unsuccessfully before they are locked out of the application. Set to 0 to allow unlimited attempts.
Locked Out Action
Defines the action that is taken when a user is locked out. The options are:
- Action
- Related Properties
- Wait for a period of time
Set the Locked Out Message and Locked Out Wait Time
- Redirect to another page
Set the Locked Out Redirect Page
- Lock out User Until reset by administrator
Set the Locked Out Wait Time to indefinite.
Locked Out Message
This property defines the message that they user will see when locked out.
Locked Out Wait Time
This property defines the interval that the user will have to wait before another login attempt. Click
to display the Expiration Time dialog.Locked Out Redirect Page
Select the page to display if the user is locked out. Click
to display the Select Page dialog.Login activity file
Define whether to save login activity to a text file. The options are:
- Save login activity (checked) - Set the Login Activity Log Folder
- Do not save login activity
Login Activity log save to
If you enabled the Login Activity File, specify where the activity log file will be saved. The options are:
- Location
- Description
- Data Folder
Login activity is saved in the data folder.
- Project target folder
Login activity is saved to the project target folder.
- User defined function
Login activity is sent to a user defined Xbasic function that handles the data.
Login Redirect Option
Specify the action to take after a successful login. The options are:
- Option
- Description
- Same page for all logins
send all users the same page after login
- Current page
keep the user on the page containing the login
- Page assigned by user
Set the Redirect Page After Login
Redirect Page After Login
If the a redirect page is not defined in the current user's profile, this property specifies the page to display after a successful login. Click
to display the Select Page dialog.
User ID Options
User ID Configuration
This property defines the type of user ID to use. The options are:
- Option
- Related Properties
- Email Address
Set the User ID Error Message
- User ID Field Value
Set the User ID Validations Rule
User ID Error Message
Appears only if the User ID Configuration was set to "Email Address". This property defines the message to display if the user ID is not a valid email address.
User ID Validations Rule
Appears only if the User ID Configuration was set to "User ID Field Value". This property defines the way to validate a user ID. Click
to display the UserID Validation dialog.
Password Options
Password Encryption
Specify whether a new password should be encrypted before saving it in the user table. The options are:
- Checked = encrypt password before save
- Not Checked - save in clear text
Password Encryption Key
Enter the encryption key to use if encryption is desired. Key must be a minimum of 8 characters
Allow Password Change at Login
Specify whether to allow the user to change his or her password at login. The options are:
- Yes (checked) - Set Password Validation Rules
- No
Password Validation Rules
Define the way to validate a user ID. Click
to display the Password Validation dialog.Password Expires?
Specify whether passwords will expire. When the current password expires, the user must enter a new password. The options are:
- Yes (checked) - Set Password Expiration Time
- No
Password Expiration Time
This property defines the length of time that a password will last before it expires. Click to display the Expiration Time dialog.
Password Restricted Re-use
This property defines the number of old passwords that are saved in a restricted list and cannot be re-used. When you add a new password to the list, the system removes the oldest password. A value of 0 will allow any password to be re-used without restriction. A value of 1 requires only that a new password not match the current password.
Password Restricted Re-use Message
Message to show if user entered a restricted password.
Lost Data Recovery Options
Allow User ID Recovery
Specify whether to allow a user to recover his or her user ID when it has been lost. The options are:
- Yes (checked) - Set Data Required for Recovery
- No
Data Required for Recovery
Specify the information required to recover a user ID. You will also need to have an email field in the user security table. See User Table Field Map. The options are:
- Option
- Description
- Valid Email Address
User must provide a valid email address to recover a user ID.
- Valid Email Address & security question
User must provide both a valid email address and answer a security question.
Lost Password Action
Specify whether to allow a user to recover his or her password when it has been lost. The options are:
- Action
- Description
- Not Allowed
Password recovery is not permitted.
- Recover Password
Original password can be recovered.
- Reset Password
Will create system generated single use password.
Data Required for Password Reset / Recovery
Specify the information that must be entered to identify the user in order to recover or reset his or her password. The options are:
- Valid Email Address
""
- Valid User ID
""
- Valid User ID & Email
- Valid User ID & Security Question
- Valid Email Address & Security Question
Lost Data Recovery Method
This property defines the method used to recover a lost user ID or password. The options are:
- Show on Screen
Displays the recovery information in the browser.
- Create Email link on page
Displays an email link that will allow the user to send a pre-configured email request to a predefined address.
- Send Email to User
Configure Email to Send to User with User ID, Configure Email to Send to User with Password, and Configure Email Request from User. The Send User ID with Password? property must be configured.
Lost Data Recovery Alternative Method
This is the method to use if you selected "Send Email to User" for the Lost Data Recovery Method property, but the server does not support email. The options are:
- Show on Screen
Display the recovery information in the browser.
- Create Email link on page
Display an email link that will allow the user to send a pre-configured email request to a predefined address.
Send User ID with Password?
Send both User ID and Password in the same message? The options are:
- Yes (checked)
- No - The user will receive 2 emails if the recovery process was used to find his or her user ID.
Configure Email to Send to User with User ID
Click
to display the Create Email to Send to User with User ID dialog.Configure Email to Send to User with Password
Click
to display the Create Email to Send to User with Password dialog.Configure Email Request from User
Click
to display the Create Login Request Email FROM User dialog.Security Questions
Click
to display the Login Recovery Security Questions dialog.
Customize Options
Default security group
Defines the default security group(s) assigned to a new user record. The default group is only used if the new user is not assigned any security groups when the account is created. The default group is added to new users by a process running on the Application Server.
Enable External User Identifier Field
Enables a special user table field named "ulink". User records may exist in tables outside of the security system. The field 'ulink' can be used to enter a user identifier value from a user record in an external table to 'link' that user to a web user security record.
Session Variable for Identifier Field
(Optional) Enter the name of a session variable to contain the value from the 'ulink' field. If the security framework is on, the session variable will always exist for every page. The variable value will be blank if no one is logged on, or contain a 'ulink' value from the logged in user record, if a value exists for that user.
Prompt to Display for Identifier Field
Enter the prompt to display on the Users and Groups dialog for the 'ulink' field. The name can describe the source of the value.
User Verification Field Values Required
This option is available if a feature that allows a user to recover lost login information is enabled. A user will be able to recover their login information if they can identify themselves by answering the security questions. The security questions are called the 'User Verification Fields'. When a new user is added to the Users table, or when an existing user's information is edited, you can specify if the User Verification Fields, MUST be entered, or if they are OPTIONAL. The options are:
- Required (Checked) when adding/editing records in the Users table via a Web form or function.
- Required (Checked) when adding/editing records in the Users table via a Desktop dialog.
User ID not Unique Error Message
Used ID values must be unique. This message will display if the User ID entered already exists in the user table. This message is only used in a web component.
User File - Required Data Missing
This message is displayed if required data is missing when saving a new or changed user record. This message is only used in a web component.
Password - Confirm Password Doesn't Match
This message is only displayed if an optional 'confirm_password' value doesn't match the entered password. This message is only used in a web component.
Enable component security for 'virtual pages'
Components embedded in an A5W page use the pages' security setting when security is enabled. When a component is displayed without using an A5W page, however, using other methods such as Action Javascript, a 'virtual page' is created to display the component. In this scenario, no security is applied to component -- the security is set to 'Always Allowed' -- because the page that the component is rendered on was dynamically created at run-time.
The default security for virtual pages is 'Always Allowed'. The Enable component security for 'virtual pages' can be used turn on component-level security. When enabled, component level security is turned on. Component security allows you to define the security settings for each component and report in your project.
As with A5W pages, the default security for components and Reports on virtual pages when Enable security for 'virtual pages' has been turned on is 'Always Denied'.
Enable security at component level for AJAX components
If checked, security settings for components and Reports will be applied on all pages, both virtual pages and A5W pages. If the user accesses a component for which they do not have permissions to view, even if they are allowed to access the A5W page on which the component is embedded, the component will not be rendered and a 403 error will be shown instead.
All components opened using Action Javascript or on virtual pages always use the component security permissions if component security is enabled.
This option is only available if Enable component security for 'virtual pages' has been enabled.
Ask browser to not cache requests requiring login
If enabled, the browser will turn off caching for any page, component, or report that requires login. This only applies to request for items that require login to view. In most circumstances, this forces the browser to make a new request for a page when the back or forward button is used in the web browser.
Caching will still be permitted when security is turned off or if the page or component security is set to 'Always Allowed'.
Cache lifetime (in seconds)
Security settings are cached on the server for improved speed and are not automatically updated when new security settings are published. The Cache lifetime (in seconds0 determines how often the server checks for updates to the security system. A value of 300 will allow the server to check for new settings every 5 minutes. Set the value to 0 to never check for updates.
Cache lifetime does not apply to the Application Server for IIS.
Configuring Page and Component Security Settings
The third step when implementing the Web Security framework is to define the security for components, reports, and pages. Security for a component, report, or page can be one of three types:
- Security Setting
- Description
- Always Denied
Access is denied to everyone. By default, access is set to "Always Denied" for all components, reports, and pages when security is first enabled or when a new component, report, or page is created.
- Always Allowed
Anyone can access the component, report, or page without logging in.
- Login Required
The user must be logged in and belong to the specified security groups that have been given access to the component, report, or page.
For more information about configuring pages, folders, components, and reports, see the following:
Limitations
Web publishing applications only
See Also