Creating a Grid Based on a Microsoft Access Table or View
Description
Step by step instructions for creating and formatting a Microsoft Access table or view.
Create a new grid component.
Display the Component Type page.
Leave the Grid Layout selection as "Tabular". This produces a multi-record view, similar to a conventional Alpha Anywhere browse, with field labels at the tops or bottoms of columns.
Leave the Read only radio button selected.
Check the Grid contains a 'Search' part check box. This is an optional form that allows you to query your table and return matching records.
Check the Grid contains a 'Detail View' part check box. The Detail View is the form used to add, delete, and edit records.
Select the DetailView is Updateable radio button.
Selecting the Data Source
Display the Grid > Data Source page.
Select the SQL Database accessed via AlphaDAO (Alpha Data Access Objects) radio button.
Selecting the Records to Display
Display the Grid > Query (AlphaDAO) page.
Leave the Connection type selection as "Use Named Connection String".
Click the Add/Edit Saved Connections button.
Click New in the AlphaDAO Connections dialog.
Give the connection string a name and click Build.
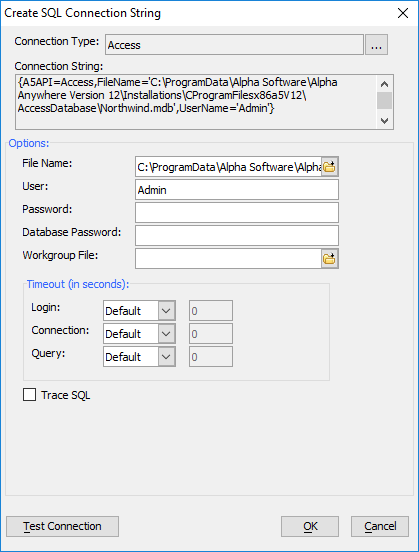
Make sure the Connection Type is set to "Access".
Click on the browse button for File Name and select an access database. In this example, we are using the Northwind database.
 You can quickly create a connection string to the Northwind database using the "Create 'AADemo-Northwind' demo connection string" link on the AlphaDAO Connections dialog.
Test the connection string using the Test Connection button. If it succeeds, click OK to save the connection string.
Click OK in the "Edit AlphaDAO Connection" dialog to save the connection string.
Click Close in the "AlphaDAO Connections" dialog to close the dialog.
Click Select... on the Query (AlphaDAO) to open the list of connection strings. Select the connection string you just created and click OK.
Click Connect. With the Table or View radio button selected, click the Select... button next to "Table/View name" to choose a table or view the Grid will be based on. Optionally specify a "Filter" or "Order by" statement that will filter and sort the records retrieved from the Access database.
Selecting the Fields to Display
Display the Grid > Fields page.
Leave the Grid is editable check box unchanged.
In the Available Fields list select several fields and click the
 icon to add them to the list of selected fields.
Modifying Field Properties
The display and behavior of individual fields in the Grid component can be modified using the field's properties. Properties can be used to choose the control type used to edit the data, format the displayed value, style the control, configure the field's column heading, add Action Javascript or scripts to events, etc. To demonstrate this, let's change some of the field properties for the first two fields in the Selected Fields list.
Select the first field in the Selected Fields list.
Change the Column Properties > Column heading field to:
First
Change the Column Properties > Heading in-line style field to:
color:blue;text-align:left;font-size:larger;width:150px;
Select the second field in the Selected Fields list.
Change the Label Properties > In-line style field to:
text-align:right;
Change the Column Properties > Column heading field to:
Second Column
Change the Column Properties > Heading in-line style field to:
color:red;
Customize additional fields as you see fit. See Grid Field Properties for additional information about the available settings for configuring a column.
Adding a Search Part
The Grid can also contain a Search Part for searching the data in the Grid component. All fields in the Grid query can be added to the Search Part on the Fields pane for the Search Part settings. The Search Part's properties can be used to configure the type of Search (individual fields, keyword, etc) and optional features, such as a Sort By box, saved searches, and more.
Display the Search > Fields page.
Select several fields to add to the search part. Use the
icon to add them to the select search fields list.Optionally configure the search fields to change the control type displayed for the search field, the field's layout, the label for the field, etc.
Adding Fields to the Detail View
If the Grid Component has been configured to have a Detail View, the Detail View section will be shown in the Grid Builder. The Detail View is often used in Grids as a way to edit a record. The fields in the Detail View are configured the same way as they are in the Grid Layout and Search Part on the Fields pane for the Detail View. The Detail View also has a set of properties for configuring Update settings, layout, event handlers, and more.
Display the Detail View > Fields page.
Select all of the fields except the <RowNumber> and <LogicalRowNo> fields in the Available Fields box. Use the
icon to add them to the Selected fields list.Display the Detail View > Properties page.
Change the Detail View Display > Method to display Detail View to "Click on a Grid row".
Change the Display Options > Detail View window position to "PopupWindowModal".
Change the Display Options > Only show Detail View on request property. Check the checkbox to only show the Detail View on request.
Formatting the Grid
Display the Grid > Properties page.
Click the
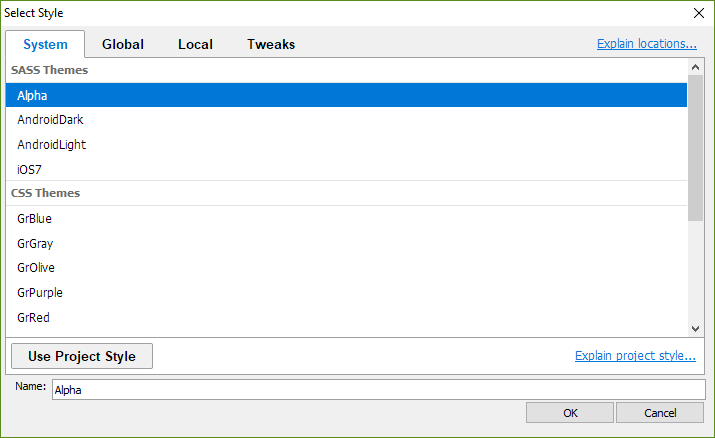
 Smart Field for the Style name property to open the Select Style dialog.
Choose one of the listed styles. You can use one of the pre-built styles shipped with Alpha Anywhere or create your own.
Change the Layout Options > Font Size to "Smaller".
Click the
Smart Field button in the Record Navigator > Record navigator layout field to display the Record Navigator Designer dialog box. You can modify the default navigator styles or create new navigator styles.
Select the |< << 10 of 20 >> >| layout and click OK.
Save your Grid Component.
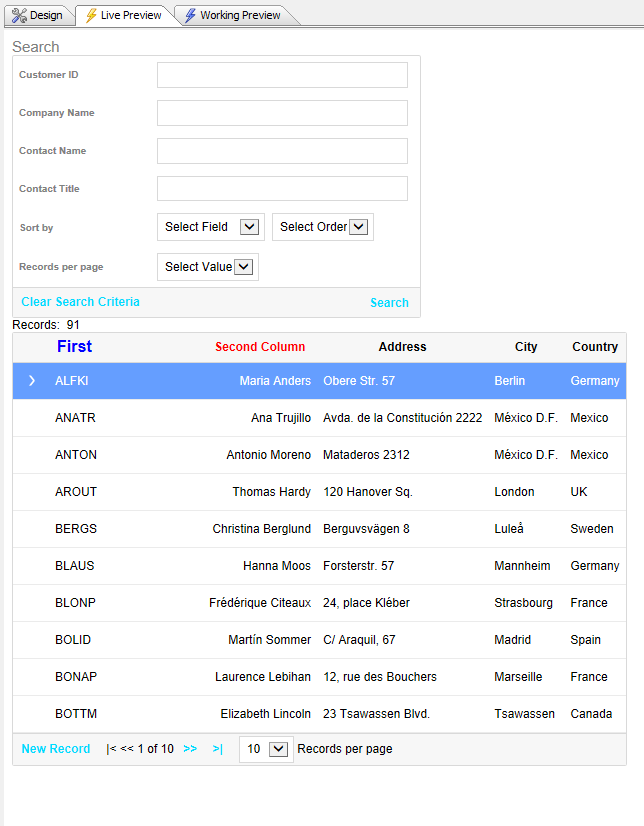
Preview Your Component
Click the Live Preview or Working Preview tab to preview the Grid Component. If prompted, start the Development Server. Your Grid component preview will be similar to what is shown below.