How to Create a Grid with a Form Layout
Description
Records in a Grid component can be configured to display as "forms", similar to the type of layouts you can create in the UX Component.
Discussion
The record layout for a Grid component can be configured to use a "form" layout. A form layout is typically used when presenting one record at a time, though you can display as many records as you'd like. The record's fields are grouped together using tabs, frames, and containers.
Create a new or open an existing Grid Component. On the Grid Layout pane in the Grid Builder, select Form (Columnar). If the form layout will be used to edit the records, be sure select the Updateable radio button for the Grid is. The Grid component cannot have a Detail View if the Grid is updatable.
If you are converting an existing grid to a form layout, you will need to check the editable? checkbox for the Selected fields list on the Grid Fields pane to make the Gridi editable.If this a new Grid, define a data source for the Grid and define the query to select the fields shown in the Grid Component.
Display the Grid > Fields page.
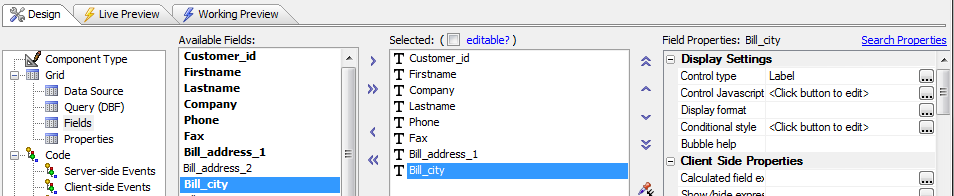
Select and format the fields you wish to display. Use the arrows between the 'Available Fields' list and the 'Selected' list to select fields. You can choose the formats you would like for each field under Field Properties.
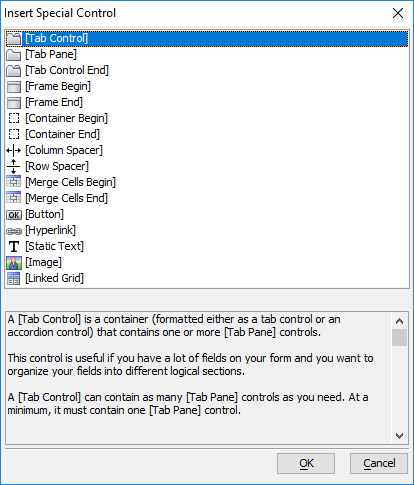
Optionally use containers to organize the Grid fields. Click the Insert... link below the Available Fields list to open the Insert Special Control dialog. The Insert Special Control dialog can be used to insert tabs, tab panes, frames, and containers into the Grid Field layout:
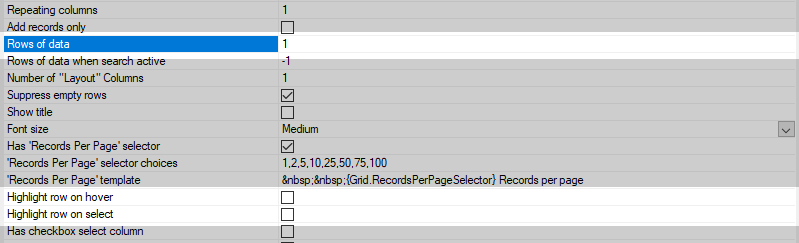
To display one record at a time, the records per page property needs to be modifed. Go to the Grid > Properties page and change the value in the Layout Options > Rows of data property to 1. This will display one record per page in the Grid component.
You may also want to disable the Highlight row on hover and Highlight row on select options. If these options are enabled, the current Grid Row will have a highlight color applied to the background. When displaying the Grid using a form layout, this is often undesirable.
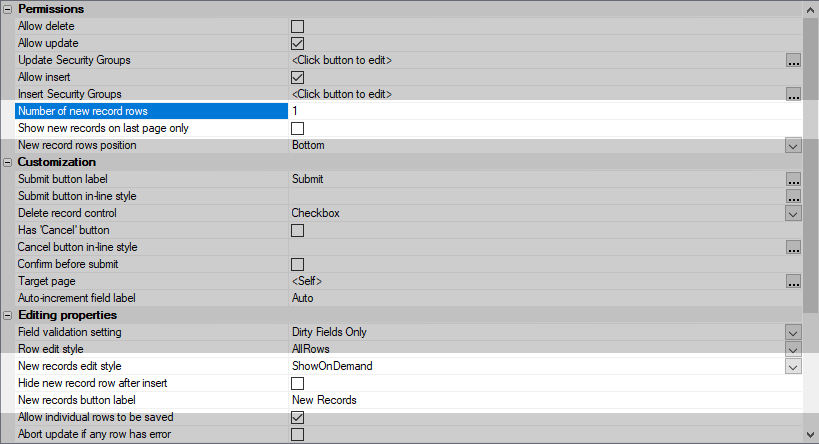
Go to the Grid > Update Settings page under the Grid tree menu. This option will only be visible if you clicked on 'Updatable' under Component Type.
Change the value in Permissions > Number of new record rows property to 1. This will result in only one "form" displayed for the Grid component to enter a new record. You can specify more if desired.
If you do not want the new record form displayed on every page of the Grid, you can either check Show new records on last page only or change the New records edit style property to "ShowOnDemand".
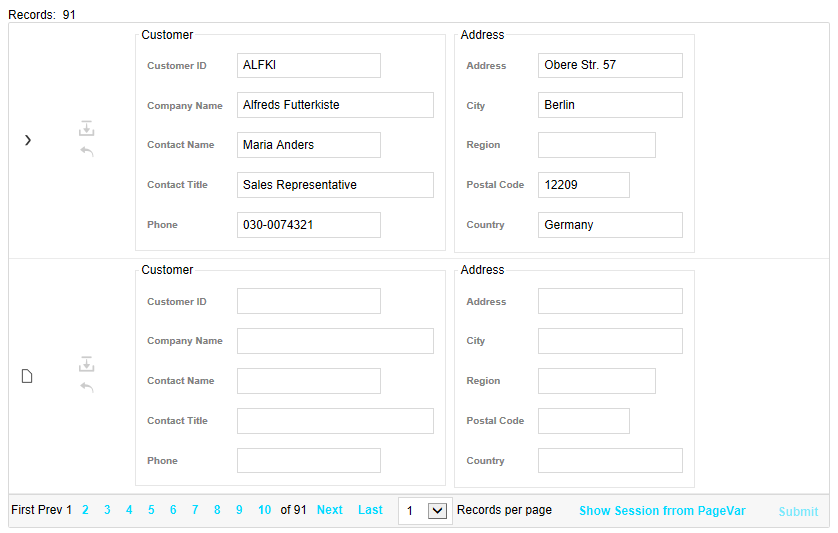
Go to Live Preview tab at the top of the Web Builder Dialog. Select 'Full Preview'. The results should look similar to the image below. The Grid shown below has two frames in the layout - "Customer" and "Address" - and was configured to be updatable with the New Record row shown on every page: