Choices
Description
Specify one or more options to display in the CheckBox control.
Discussion
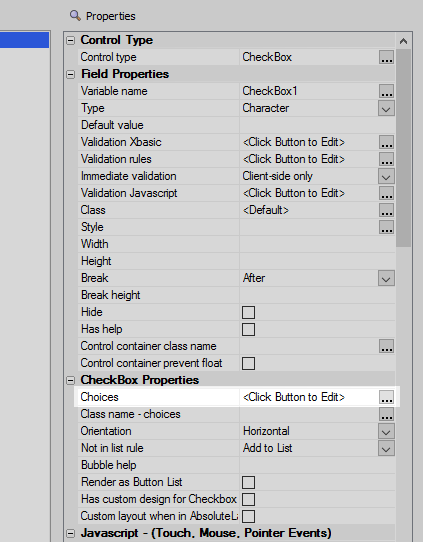
The Choices property lets you define the choices that will appear next to each checkbox.
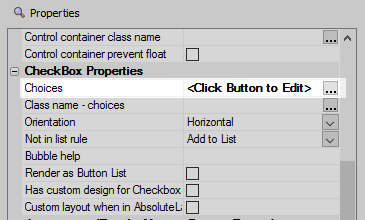
Clicking the  button next to Choices will open the Define Choices dialog. There are three options for how to define
the choices presented, Static, Dynamic, and Variable.
Defining Static Choices
In this scenario you can manually enter the choices to show for the CheckBox control.
Click the
 smart field button for the Choices property to open the Define Choices dialog for a new or existing CheckBox control.
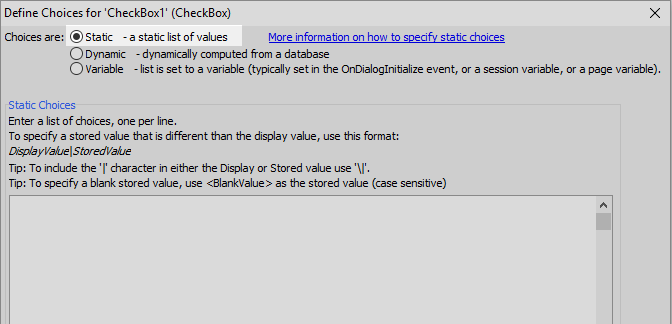
The Define Choices dialog will open. Check the "Static" radio control.
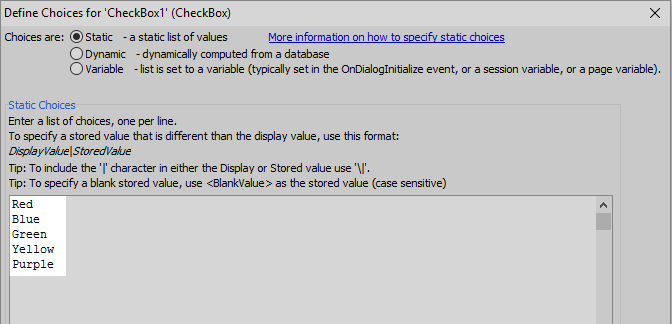
Define a list of choices for the control. Separate each choice by placing it on a new line.
Run the component in Live Preview.
If the control appears to be wrapping reopen the Controls page, highlight the checkbox control, and adjust the Width or Height settings under the Field Properties section of the Control Properties list.
Dynamic Choices
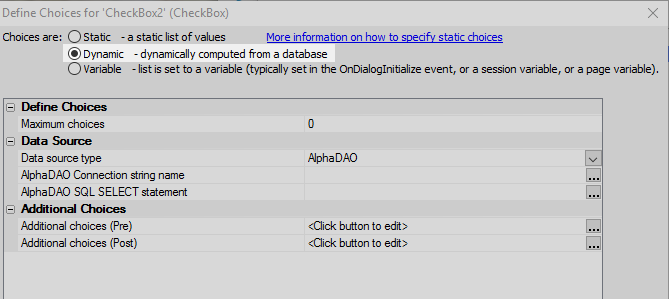
The Dynamic option can be used to populate the control from a data source using an AlphaDAO connection. This is done as follows:
Click the
 smart field button for the Choices property to open the Define Choices dialog for a new or existing CheckBox control.
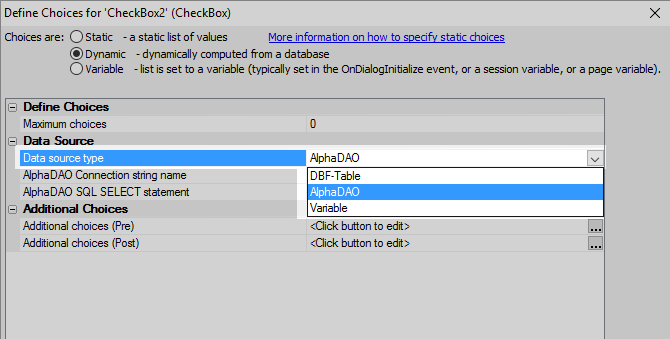
The Define Choices dialog will open. Select the Dynamic option.
Under the Data Source section of the Define choices dialog click the dropdown next to the "Data source type" property. Select AlphaDAO.
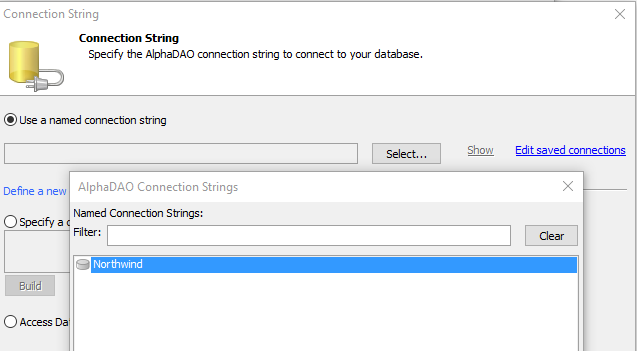
Click the
 button next to the AlphaDAO Connection string name.
 Choose "Use a names connection string" and click the Select button. Connect to the Northwind database and click OK and OK again.
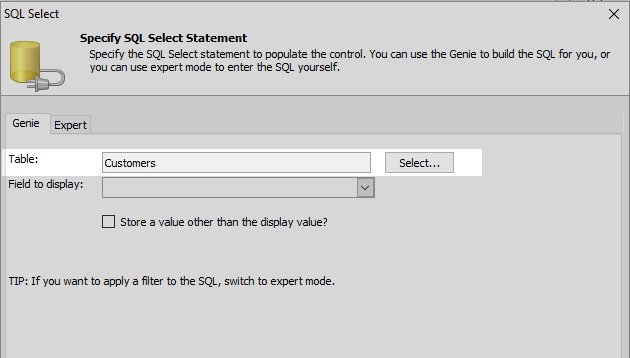
Click the Select button. Choose the Customers table from the list of tables and click OK.
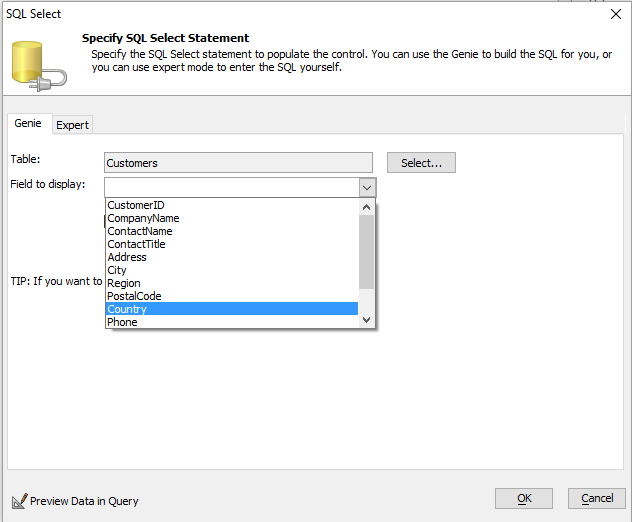
Select the Countries field as the Field to display. Click OK and OK again.
Run the component in Live Preview.
Variable Choices
An Xbasic variable can also be used to populate the CheckBox control. The variable can be statically defined or dynamically computed using data from a web server, Node service, or other means. The Xbasic variable is defined in the server-side events for the component. The steps below describe how to create a variable and use it to populate a CheckBox control:
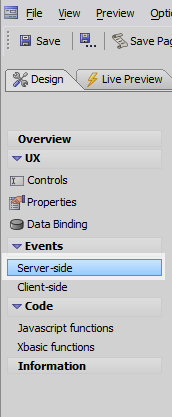
Open the UX Builder and then open the Events Server-side page.
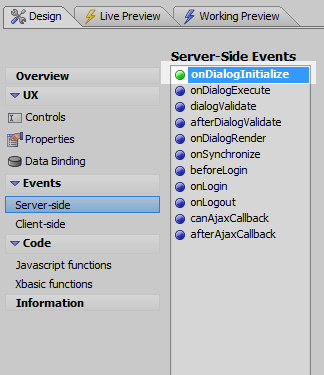
In the Server-Side Events menu highlight the "onDialogInitialize"" event.
Add the following code to the onDialog Initialize event:
e.rtc.variableCheckBox = <<%str%
one
two
three
%str%
Here we are defining a variable named "variableCheckBox" and populating the list of choices as one, two, and three.Click the
 smart field button for the Choices property to open the Define Choices dialog for a new or existing CheckBox control.
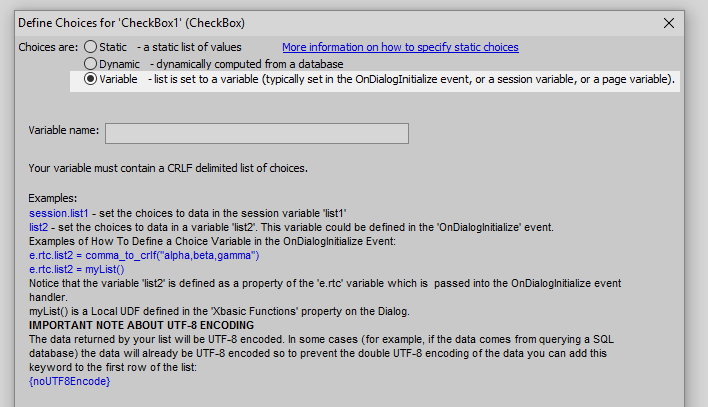
The Define Choices dialog will open. From the "Choices are:" menu select 'Variable'.
Enter 'variableCheckBox' as the variable name and click OK.
Now go to Live Preview and run the component. You should see the list you defined appear as checkbox choices.
